With a soft, buttery texture, the signature anise flavor, and simple decoration, these Italian Anise Cookies are a holiday staple. Made with just 10 ingredients in less than 20 minutes, they’re the perfect addition to any holiday tray.

Anise cookies, aka Italian Anisette Cookies, are an old-school cookie that I can’t get enough of. They remind me a bit of whipped shortbread cookies or butter cookies, but with a different texture and flavor. Anise extract is not something I bake with frequently and it adds such a unique twist to the cookies. The texture is so soft and tender too. These always get a great reaction when I add them to Christmas cookie trays!
Why This Anise Cookies Recipe Is So Good
- Unique flavor. One of the best things about these cookies is the flavor. The anise extract adds a licorice-like flavor, but it’s light and not overpowering. Additionally, they’re not super sweet like some cookies. Most of the sweetness comes from the icing, which is a nice balance.
- Quick and easy to make. Anise cookies require fewer than 10 ingredients to make and almost everything is a pantry staple. Plus, the dough comes together in minutes, with no chilling required, and they bake in just 7-9 minutes. The hardest part is waiting for them to cool to add the icing!
- Great for cookie trays. These cookies are simple but make a wonderful addition to any holiday cookie tray. I like to use red and green nonpareils to give them a little festive appearance. Plus they stay fresh for several days, which makes them great for gifting.
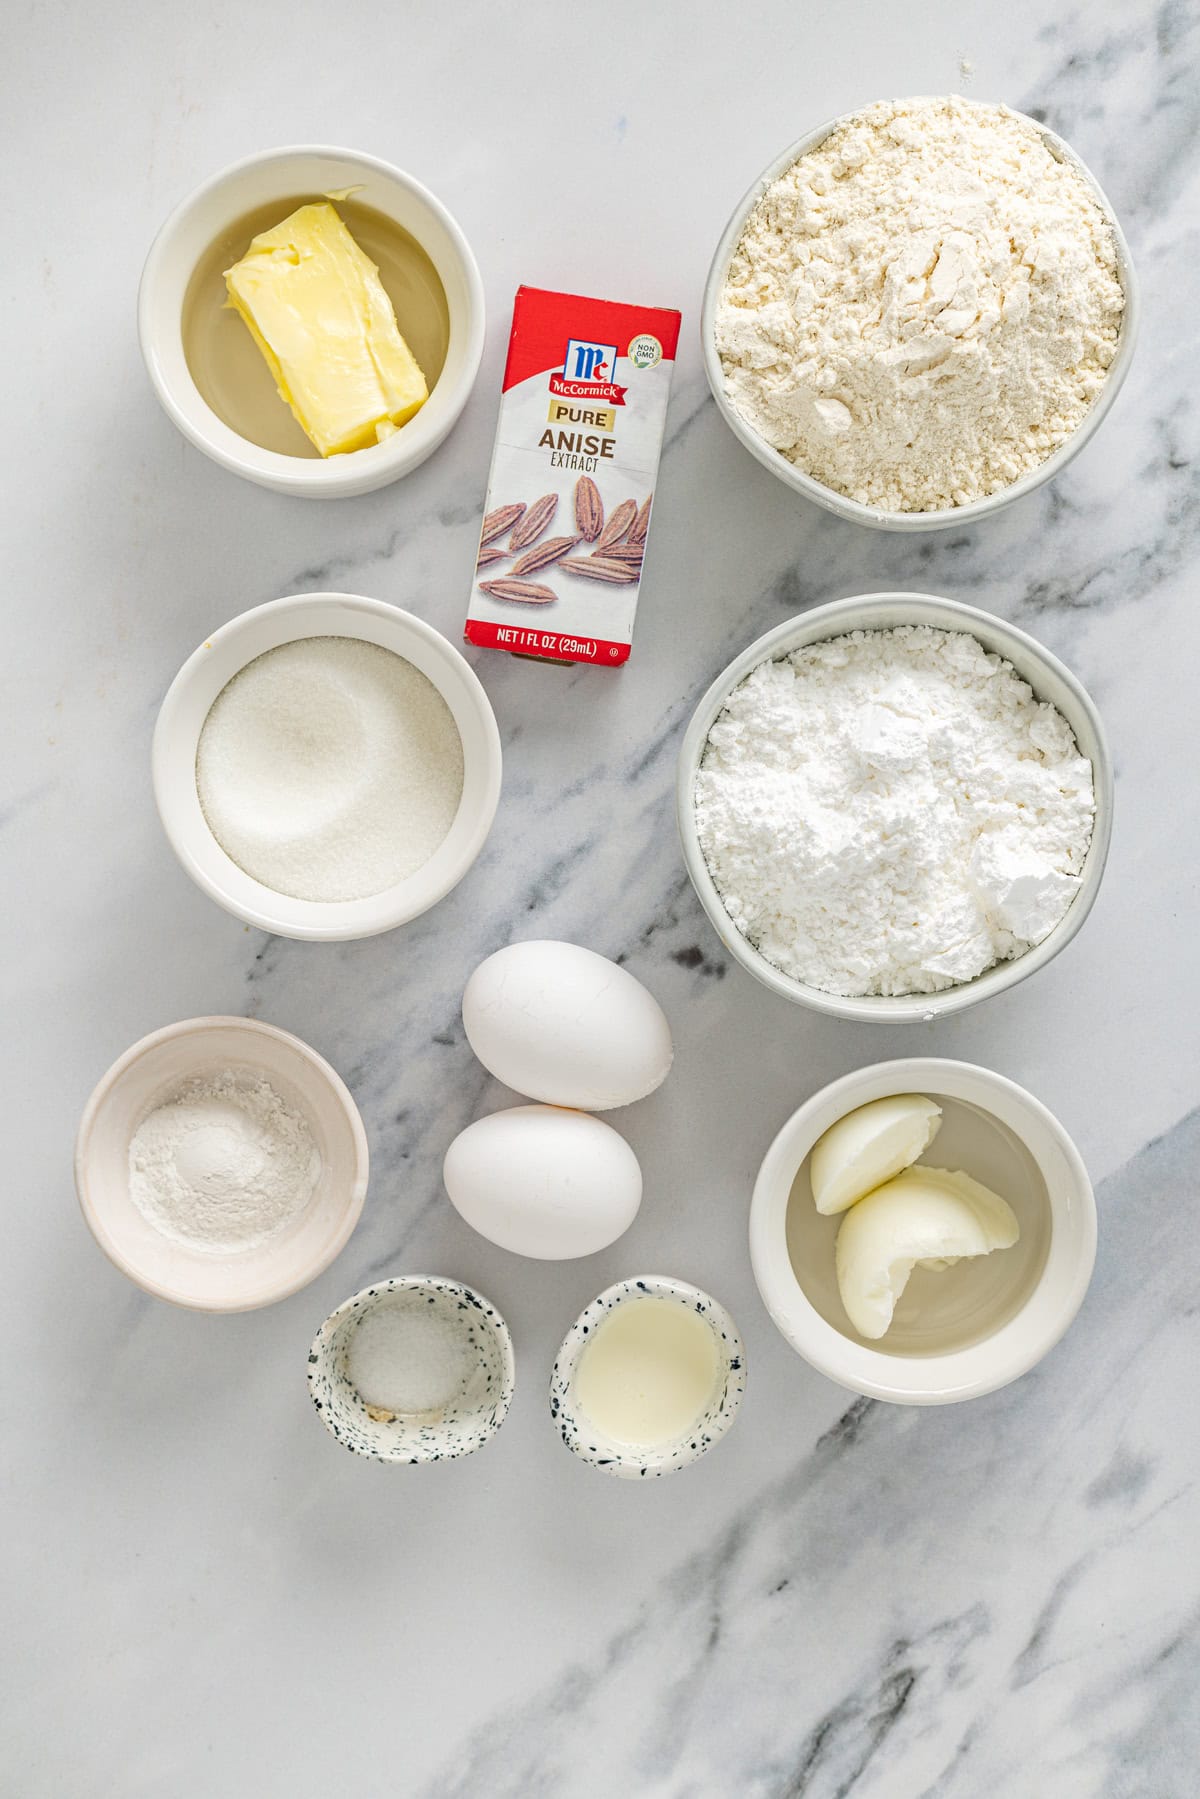
Recipe Ingredients
These simple cookies are made with anise extract and a handful of basic baking ingredients. Scroll down to the recipe card below for the exact measurements.
- Unsalted butter – Be sure to use unsalted butter, as these cookies have a very delicate flavor and too much salt can easily overpower the flavors.
- Shortening – Using shortening in addition to the butter gives the cookies the best of both worlds, keeping them from spreading too much and extra soft.
- White sugar
- Eggs – Be sure to bring them to room temperature first.
- All-purpose flour – Use the spoon and level technique for accurate measuring.
- Baking powder – Helps create the beautiful rise in the oven, keeping the cookies nice and tall.
- Salt – Just a tiny amount of salt is needed here to enhance the flavors.
- Anise extract – The star of the show. The anise extract adds a licorice flavor to the cookies, without being overpowering.
- Powdered sugar
- Milk or cream – Combined with the powdered sugar to make the icing.
How To Make Anise Cookies
These cookies may look and sound fancy but they’re so simple to make. And quick, since the dough doesn’t require chilling! The printable instructions are in the recipe card below.
- Melt the butter. Microwave the butter and shortening in 15-second increments. Be sure to melt in increments to prevent it from making a mess in the microwave.
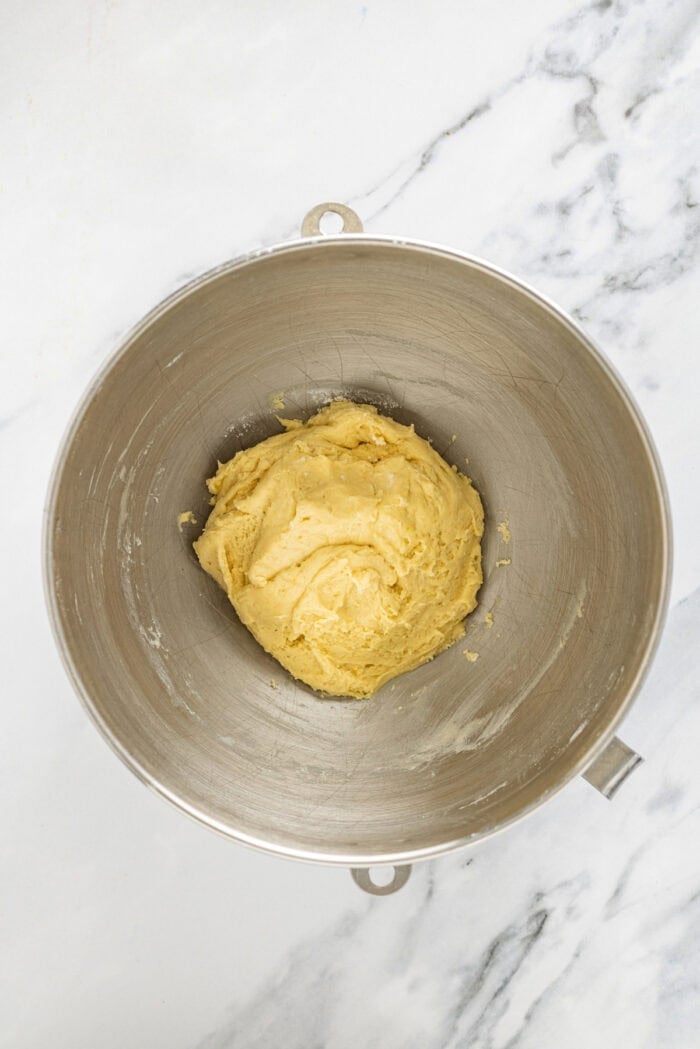
- Make the dough. Add the melted butter and shortening to a bowl. Beat in the eggs one at a time on medium, followed by the anise extract. In a separate bowl, whisk together the dry ingredients. Gradually add the dry mixture to the wet mixture, mixing just until flour is no longer ivsible.
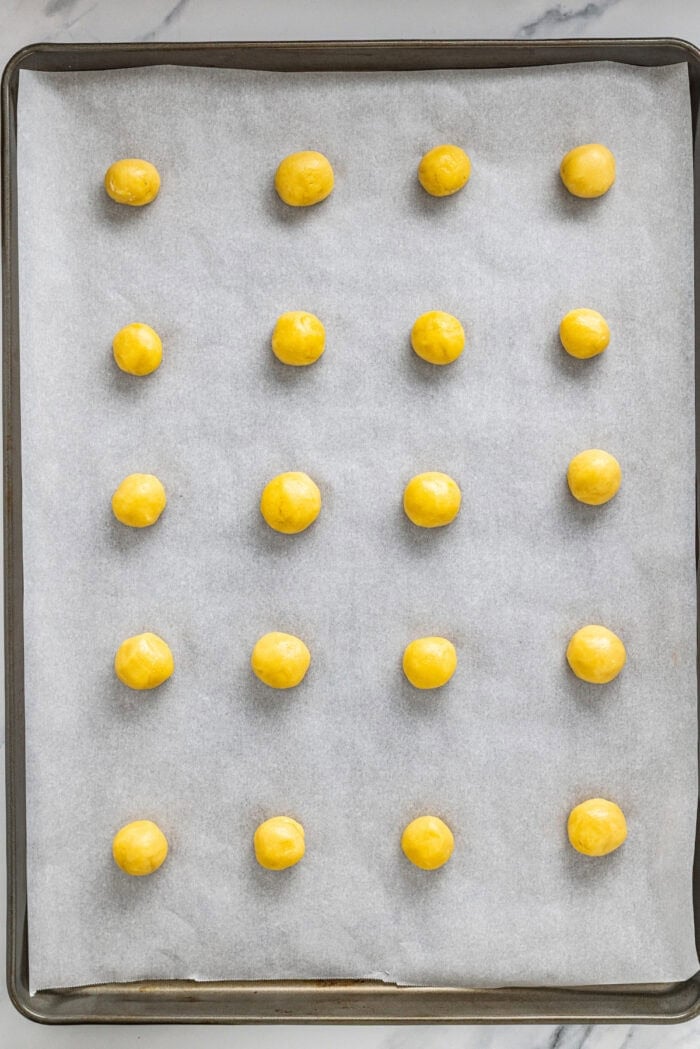
- Bake. Preheat the oven to 375. Line the baking sheet with parchment paper. Scoop 1/2 tablespoon of dough and roll it into a small ball. Place on the baking sheet 2 inches apart. Bake for 7-9 minutes, until the edges are just starting to turn golden brown but the tops are still light.
- Cool. Let the cookies cool on the baking sheet for a few minutes then transfer to a wire rack to cool completely.
- Make the glaze. Add one tablespoon of milk to the powdered sugar at a time. The glaze should be smooth and just runny enough to dip the cookies in.
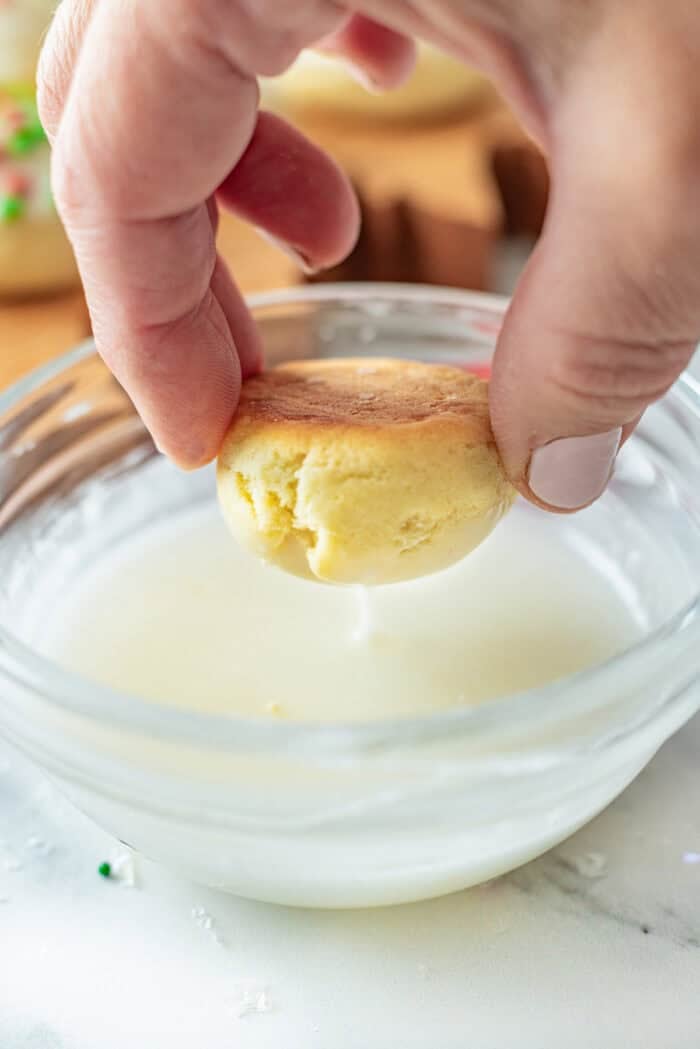
- Decorate the cookies. Dip each cookie halfway in the glaze, allowing excess to drip off. Place on the wire rack. Sprinkle immediately with nonpareils. Repeat with each cookie.

Tips & Tricks
Here are a few tips to help make perfect anise cookies every time.
- Don’t overmix. It’s very important to mix just until no streaks of flour remain. Overmixing can make the cookies too dense.
- Use flour as needed. If you find the dough is too sticky to roll, use a small amount of flour in your hands to aid in the rolling.
- Try other extracts. If you can’t find anise, or don’t love the flavor, these cookies can be made with vanilla, almond, or lemon extract as well. They’ll have a different flavor but still keep the same light, melt-in-your-mouth texture.
- Test your oven. Anise cookies go from “just perfect” to “overbaked” very quickly. Every oven is different, so I recommend sacrificing one cookie first to determine exactly how long you should bake the cookies before baking a large batch at once.
- Keep the glaze thick. Make sure the glaze is pretty thick, otherwise it will leave a thin glaze on the cookie and it will run all over. If it ends up too thin, just mix in a bit more powdered sugar.
- Cool before glazing. Let the cookies cool completely before adding the glaze. Otherwise, they’ll melt the glaze and it’ll run all over.

Proper Storage
- Room temperature. Anise cookies can be stored in an airtight container at room temperature. They’ll last for up to a week, though I find they’re best enjoyed in 4-5 days.
- Freezer. Undecorated anise cookies can be frozen for 1-2 months. Cool completely, then freeze in ziploc bags. Thaw to room temperature, then decorate as directed.

Anise Cookies
Ingredients
- 1/2 cup unsalted butter room temperature
- ½ cup shortening
- ¾ cup granulated sugar
- 4 eggs room temperature
- 3 cups all-purpose flour
- 5 teaspoons baking powder
- ¼ teaspoon salt
- 2 teaspoons anise extract
- 2 cups powdered sugar
- 2 Tablespoons milk or cream
Instructions
- Melt the butter and shortening in the microwave in 15 second increments. (Don’t allow it to cook very long at a time or it will explode.)
- Add the melted butter and shortening to a mixing bowl.
- On medium speed, add the eggs one at a time, mixing thoroughly in between.
- Add the anise extract and combine.
- To a separate medium bowl, add the flour, baking powder and salt. Whisk to combine.
- With the mixer at medium speed, gradually add the dry mixture to the wet mixture a little at time. Mix just until the flour is no longer visible. Do not over mix.
- Preheat the oven to 375 degrees.
- Prepare a baking sheet with parchment paper.
- Scoop ½ Tablespoon of cookie dough into your hand and roll it into a smooth ball. Place the ball on the cookie sheet.
- Repeat the process with the remainder of the dough spacing the cookies approximately 2 inches apart.
- Bake the cookies for 7-9 minutes or until the edges are just starting to turn golden brown, but the tops are still light. Remove the baking sheet from the oven and allow the cookies to finish baking on the hot sheet for a few minutes before transferring the cookies to a wire rack to cool.
- Once the cookies are fully cool. Add the powdered sugar to a small bowl. Add the milk one Tablespoon at a time until to glaze is smooth and just runny enough to dip the cookies and have the glaze stay in place.
- Dip each cookie into the glaze halfway. Allow the excess to drip off then place the cookie on the wire rack. Sprinkle with your desired nonpareils for decoration. Continue this process until all cookies are decorated. Allow to dry and then store.



Leave a Review!
We LOVE hearing from you! Submit your question or comment here.
Your email address will not be published.