

Who loves the delicious and sweet taste of rice krispie treats? How would you like to add a wonderful twist of flavor to your favorite treat? This amazing Apple Rice Krispie Treats recipe may become a family favorite snack. You can share this with your loved ones for any occasion!
Apple Rice Krispie Treats
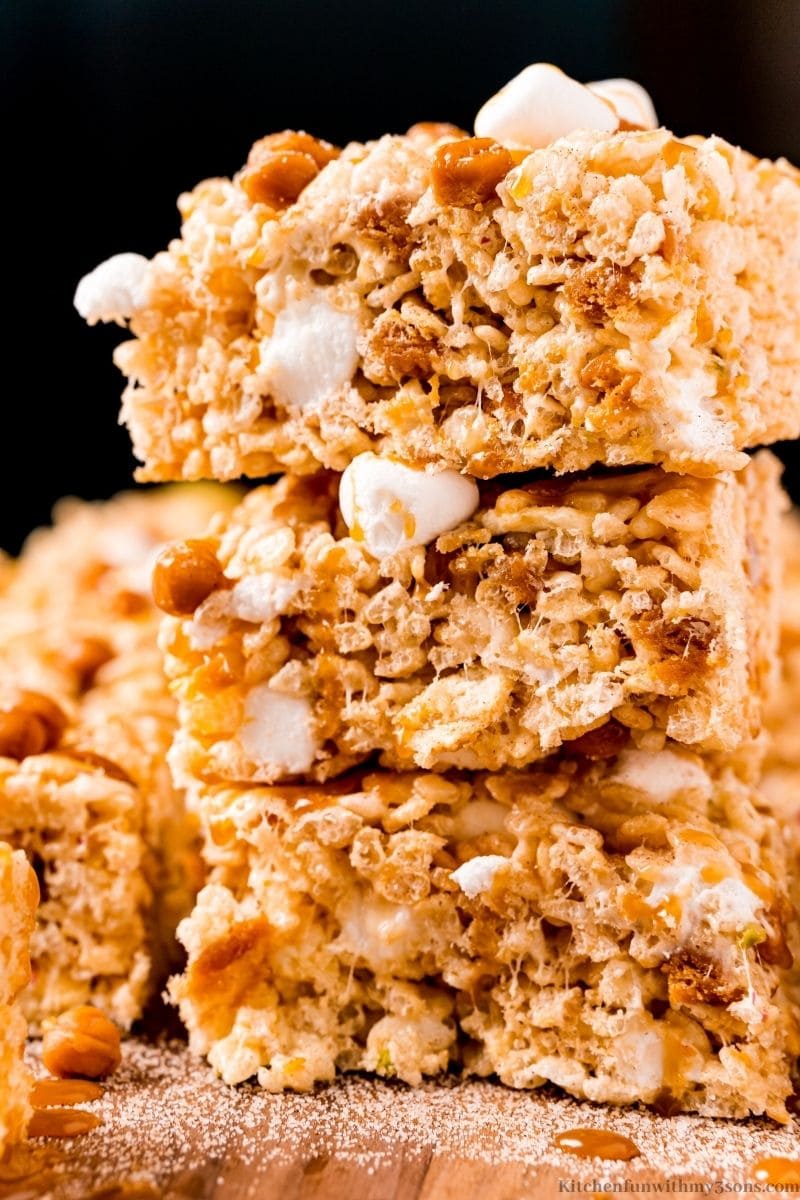
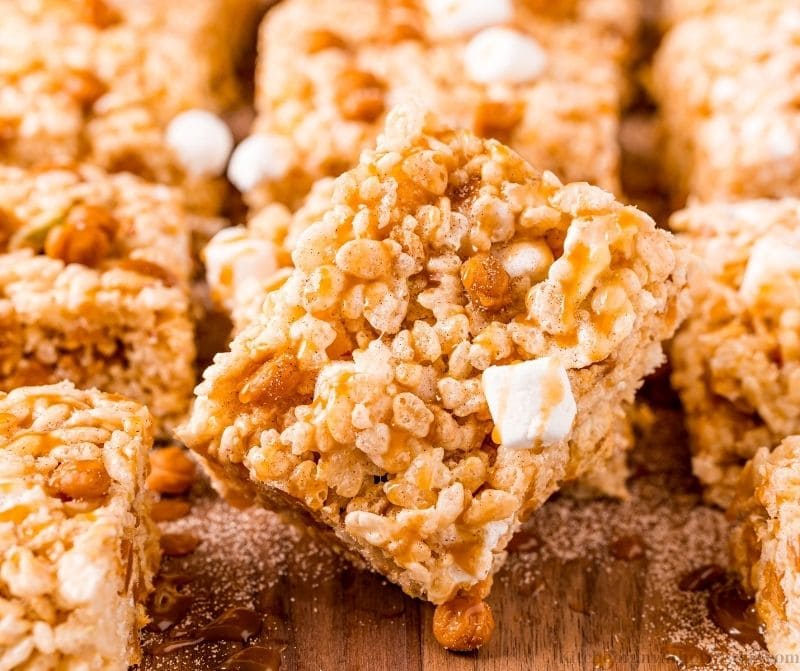
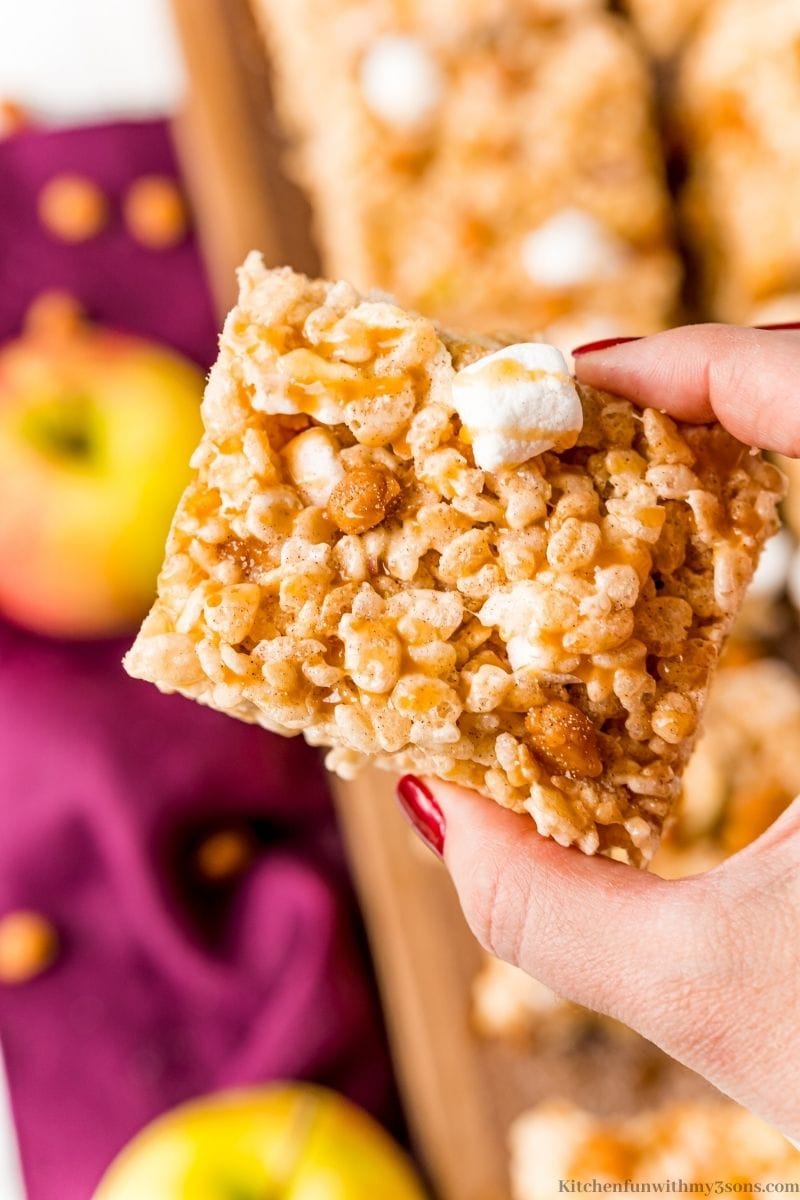
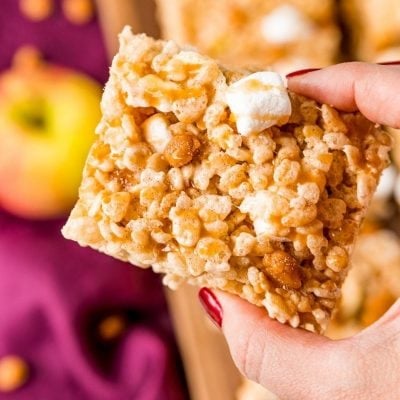
This Rice Krispie treat is a great choice for fall. These Krispies are filled with flavor. They have marshmallows, caramel bits, and freeze-dried apples, and browned butter to add a warm and cozy flavor. You can add cinnamon sugar and caramel sauce on top for a more sweetened treat! This is a no-bake treat that will be made in no time! Be sure to write this one down for the books!
When it comes to caramel apple treats, you might also love Caramel Apple Pizza and No Churn Caramel Apple Ice Cream.
Ingredients
- Butter- You will want to use salted butter for this recipe.
- Marshmallows- You will want to use the mini marshmallows.
- Rice Krispies cereal- This cereal will add the crispy and popping texture.
- Caramel bits- This will add a smooth creamy texture inside your treats.
- Apples- You will want to use freeze-dried apples for this recipe.
- Cinnamon sugar- You can make your own homemade mixture.
- Caramel sauce- The caramel is an optional topping.
How to Make Apple Rice Krispie Treats
You want to line a 9×13 inch pan with parchment paper or if you don’t have paper, you can use aluminum foil to replace it. Before adding your ingredients, you will need to spray the foil with non-stick spray. Then, set your pan aside.
Measure out your ingredients to prepare…
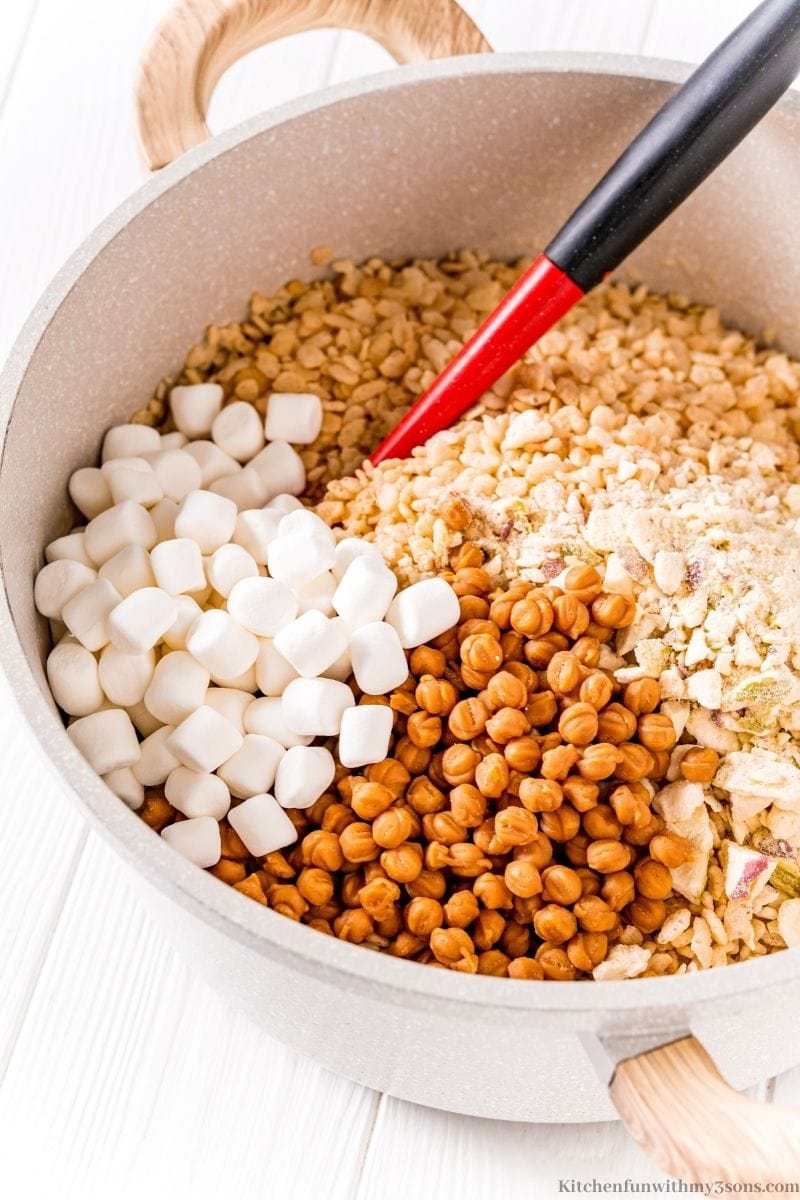
- You will divide your marshmallows (8 cups and 2 cups divided), by dividing your marshmallows and adding cups at the end, they will hold there shape and you will have pockets inside the treats with marshmallow. However, this step is optional to leave out the 2 cups of marshmallows, but DO NOT melt the marshmallows in or they will have a thick consistency and will settle at the bottom of your treats and pan.
- When your marshmallows are divided, add them into a food processor along with the cereal, caramel bits, and freeze-dried apples. I get my apples from Target and if you have a Trader Joe’s near you, they carry them as well. You can also buy them on Amazon HERE. You can choose to leave the apples small or into crumbles. You will need to work fast, so all the ingredients are ready to go in the pan.
- Now, you don’t HAVE to brown your butter, but browning it will allow for a nuttier and cozy taste to the apples and caramel.
- To brown the butter, you will need to melt it in a large pot on medium to high heat. You will heat the butter until it starts to brown or have small flecks of brown in it.
- Lower the heat to low and mix in the mini marshmallows and constantly mix until melted.
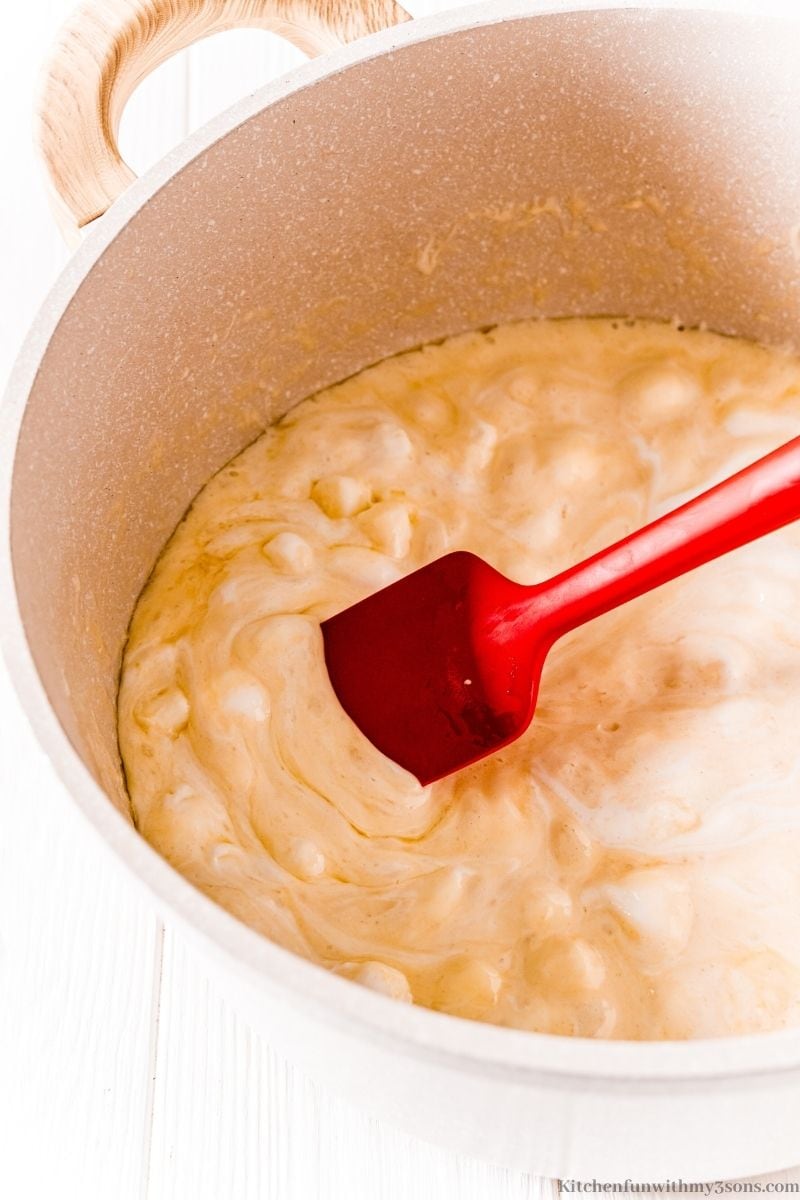
- Take away from the heat and add in the cereal, caramel bits, apples and the rest of the marshmallows and stir until all ingredients are coated with butter and the marshmallow mixture.
- Switch over the finished mixture into the baking pan and take some parchment paper between your hands and carefully press down on the mixture in the pan.
- You can also, add more marshmallows and caramel bits on top of the treats before pressing down for a nicer presentation. And, make sure you don’t want to apply to much pressure or the treats will become too hard.

- Then, when your treats are done, and if desired, you can sprinkle some of the cinnamon sugar and top off with caramel.
- Let your treats rest for 30 minutes before serving. When you a finished, you should store in an airtight container at room temperature. This will let your treats last up to 2 days or you can put in the freezer for up to 6 months.
How Do I Keep These from Sticking to Utensils?
There is only one good way to keep any utensils from sticking to your Rice Krispies. The best thing to do is add a something that will keep anything from sticking to the knife or other utensil you are using. You can use oil to do this or you can use some baking spray as another alternative.
Can You Use Marshmallow Fluff in Rice Krispies?
Yes, it is possible to use Marshmallow fluff for rice Krispies. However, for this Apple Rice Krispie recipe, it calls for mini marshmallows. Not only will the mini marshmallows add more texture to your treats, but they will also make for a prettier presentation.
More Rice Krispie Treats
- Salted Caramel Rice Krispie Treats
- Reindeer Rice Krispie Treats
- Thanksgiving Rice Krispies Turkey Legs
- Fall Owl Rice Krispie Treat Pops
Brown Butter Caramel Apple Rice Krispie Treats
Ingredients
- ½ cup salted butter
- 10 cups mini marshmallows divided
- 9 cups Rice Krispies cereal
- 1 cup caramel bits
- 1.25 ounces freeze dried apples
- Cinnamon sugar optional topping
- Caramel sauce optional topping
Instructions
- Line a 9×13-inch baking pan with parchment paper and set aside.
- Prepare your ingredients by measuring out the marshmallows (8 cups and 2 cups divided), cereal, and caramel bits and running the freeze dried apples through a food processor. You can leave the apples as smaller bits or turn them into crumbs. You will want to mix fast so it’s best that everything is ready to dump in.
- Melt the butter in a large pot over medium-high heat until it begins to brown and there are little flecks of brown in the butter.
- Reduce heat to low and add in 8 cups of mini marshmallows and stir constantly until melted.
- Remove from heat and add in the cereal, caramel bits, freeze dried apples and remaining marshmallows and mix until evenly coated in the butter and marshmallow mixture.
- Transfer the mixture to the prepared baking pan and use a piece of parchment paper between your hands and the mixture to gently press it into the pan. Don’t press too hard or the rice krispies treats will be hard.
- Sprinkle with cinnamon sugar and drizzle with caramel, if desired.
- Allow the treats to cool at room temperature for about 30 minutes before slicing.
Last Step:
Please leave a rating and comment letting us know how you liked this recipe! This helps our business to thrive and continue providing free, high-quality recipes for you.Notes
By dividing the marshmallows and adding a couple of cups of them in at the end it means that they hold their shape and you get little pockets of marshmallows in the treats. However, you can omit the extra 2 cups of marshmallows, if desired. But DO NOT melt them in or you will get a thick marshmallow layer that settles in the bottom of the pan and treats.
You can sprinkle more marshmallows and caramel bits on the top before pressing down for a prettier presentation.
You can use aluminum foil instead of parchment paper but it is very important that you spray the aluminum foil with nonstick spray, otherwise the treats will stick to it.
I get my freeze dried apples at Target and I know Trader Joe’s carries them too. You can also buy them on Amazon, but the Amazon ones are almost double the price. You can use a 1 – 1.5 ounce bag for this recipe.
Store in an airtight container at room temperature for 2 days or freeze for up to 6 months.
Nutrition


Leave a Review!
We LOVE hearing from you! Submit your question or comment here.
Your email address will not be published.