
This post may contain affiliate links. Please read our disclosure policy.
We made these cute little Ding Dong Doggy treats using pre made Hostess Ding Dongs and vanilla wafers. Just something fun we decided to make one day!
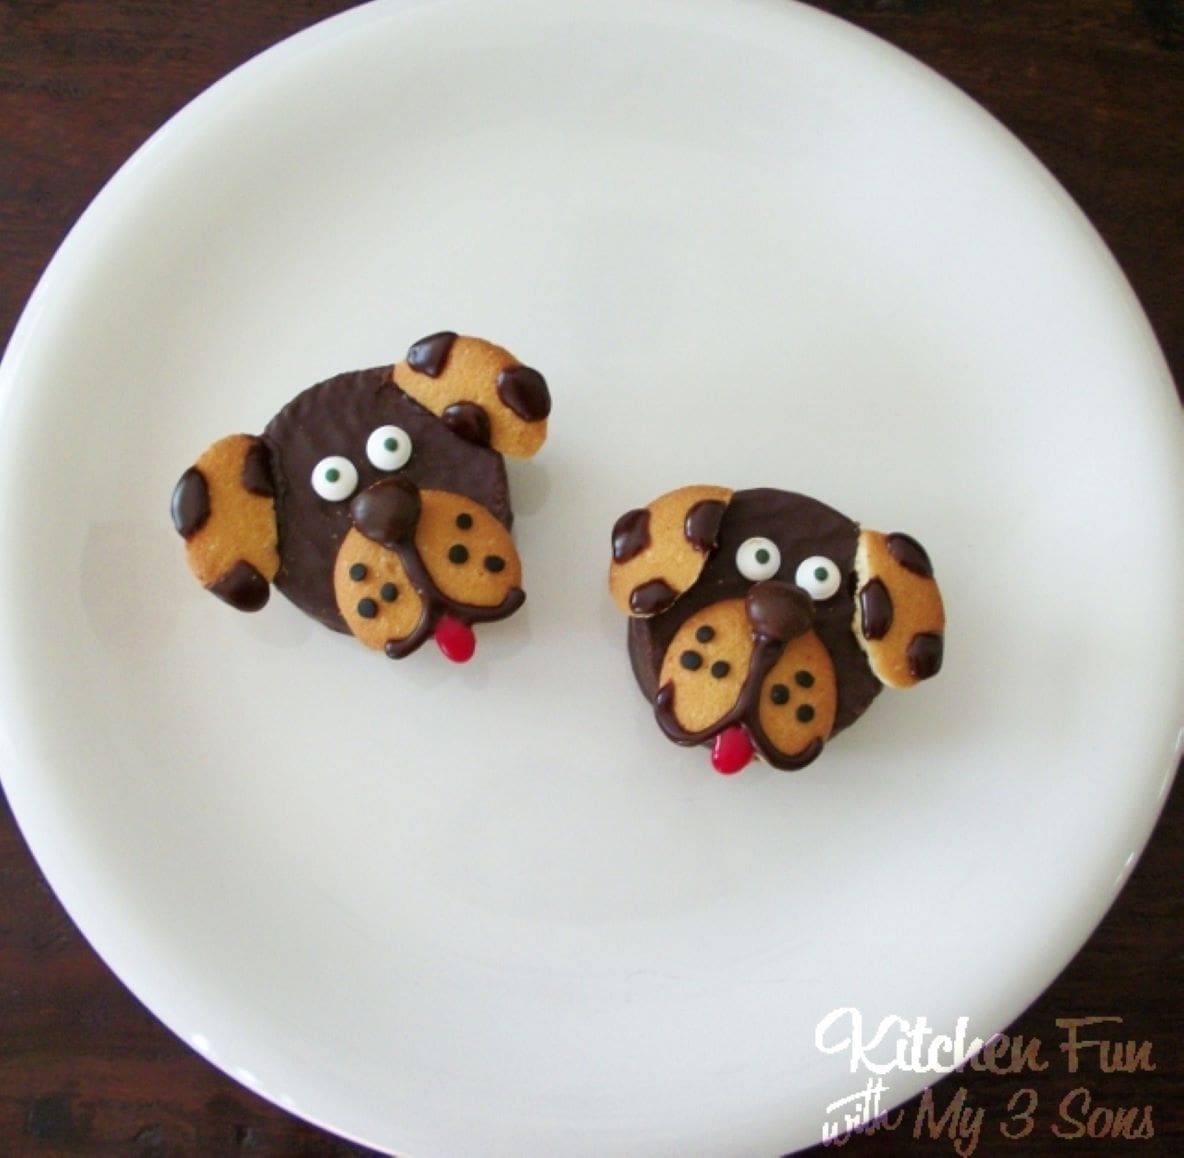
My 8 year old actually thought of this one…we just liked the name.:) They were so easy to make and turned out so cute! My boys and I had lots of fun making these! They would be cute to make for a dog themed party or just for fun for the kids to make themselves!
Hostess Ding Dong Doggy Treat
- Hostess Ding Dongs
- Vanilla Wafers
- Chocolate Cookie Frosting
- Edible Eyes
- Red Candy (you could use an m&m or heart candy for the tongue)
- Brown m&m candies (or any other brown candy)

How To Make Ding Dog Doggies
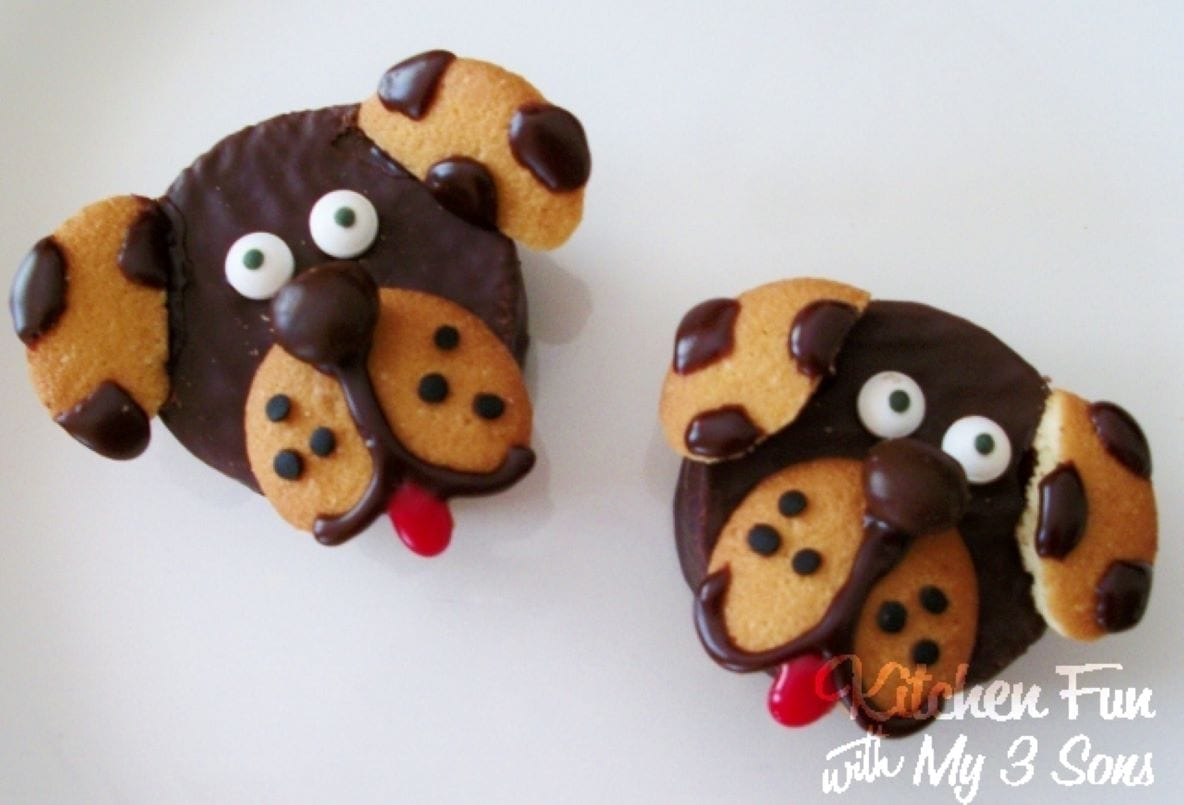
- Cut some vanilla wafers in half to make the ears using a knife. Take the other vanilla wafers and cut 2 triangles out of the bottom leaving the a small piece in the middle using kitchen scissors.
- Take the chocolate cookie frosting and make spots on the ears. Attach the ears on with the cookie frosting and let dry.
- Attach the first ears on the cut side.
- Decorate the face with cookie frosting, candies and edible eyes.
Other Cute Dog Themed Recipes

 Add as Google Trusted Source
Ding Dong Doggy
We made these cute little doggies using pre made Hostess Ding Dong cakes and vanilla wafers. Just something fun we decided to make one day!
Ingredients
- Hostess Ding Dong Cakes
- vanilla wafers
- edible eyes
- chocolate cookie frosting
- red candy, m&m or heart candy
- m&m's, brown
Instructions
- Cut some vanilla wafers in half to make the ears using a knife. Take the other vanilla wafers and cut 2 triangles out of the bottom leaving the a small piece in the middle using kitchen scissors. This will be the tongue. Round off the edges with the scissors.
- Take the chocolate cookie frosting and make spots on the ears…if desired. Attach the ears on with the cookie frosting and let dry. In the picture I show the ears placed on 2 different ways. We attached the first ears on the cut side and the other ears are just laid on top.
- Attach the nose on with cookie frosting as well. Use the red candy for the tongue and the chocolate cookie frosting to dress up the rest of the face.
- Cut off the top of a brown m&m candy and use for the nose. Attach the edible eyes.
Like this? Leave a comment below!
Leave a comment & rating below, or tag @kitchenfunwithmy3sons on social media!








Featured you today! COme see and grab a featured button from my sidebar while you are there!
Thanks for linking up
Stacey of Embracing Change
These are just so fun!
Thanks for linking up to the Creative Inspirations Party at Embracing Change!
So happy you were here!
Stacey
Gorgeous and sooo funny!
I love them!