
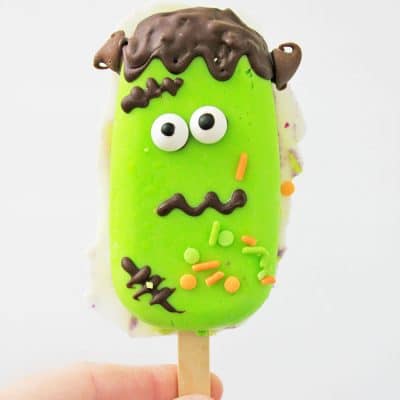
If you feel frightened by how difficult these fun Frankenstein Cakesicles look like they are to make, never fear. You can do it and your kiddos will love you for it.
Halloween is coming! Aaaack! Who doesn’t love sneaking a handful of candy from the kiddos when they’re not looking? “Sorry, honey. Mommy has no idea where that Snickers went.” We love Halloween recipes because they’re so much fun. A few reader favorites on the site are Spider Cookies, Graveyard Pudding, and Mummy Fudge.
Frankenstein Cakesicles
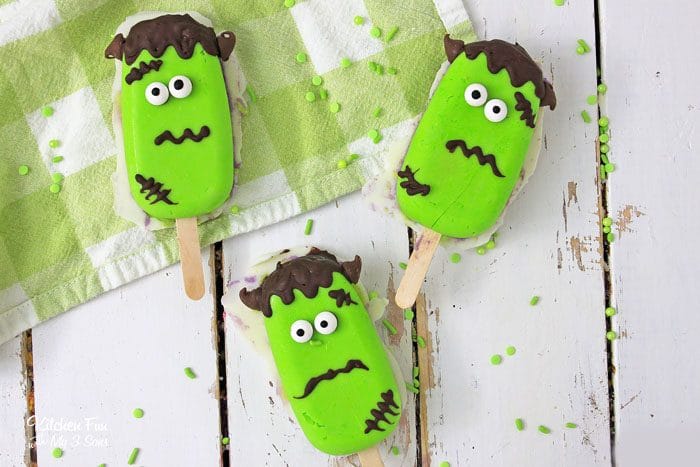
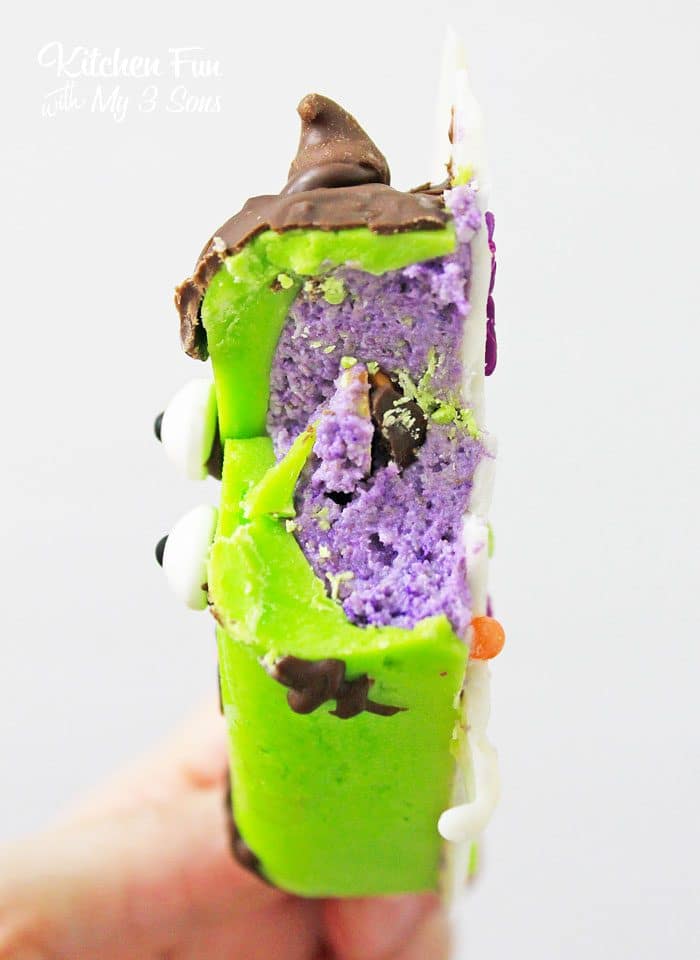
This recipe will make 10-12 treats, so enough to feed a small group of Halloween goblins. What you’re making here is basically cake and frosting dipped in chocolate and served on a popsicle stick.
If you’ve ever made cake balls, you get where we’re going. They’re really pretty easy.
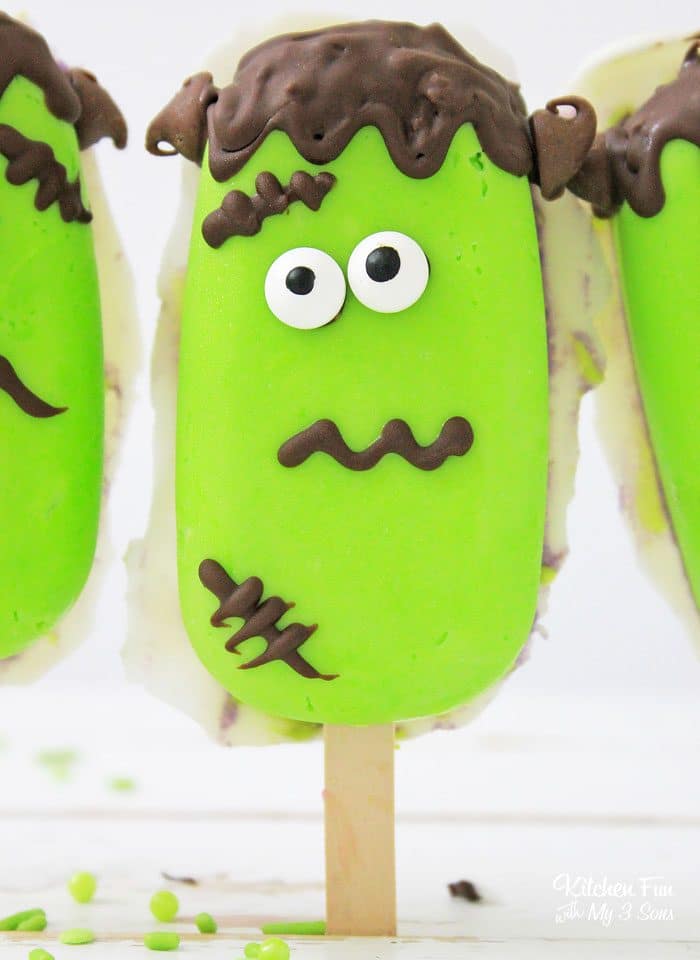
You’ll need some eyeballs for Frankenstein Cakesicles.
Candy eyeballs, that is. Check at a grocery store near you and it’s a safe bet you’ll find them. Secure them by putting a dab of chocolate where you want them to be and pressing the eye into it. Once the chocolate hardens, the eyes won’t slide off.
Gel food coloring!
I mention this fairly frequently in recipes that call for food coloring. If you’re making something where the colors need to be WOWEE, you need to use gel food coloring. The colors are far richer and deeper and purer than liquid food coloring. Gel coloring will stand up to baking and won’t fade. In this recipe, the purple and green need to really pop. It’s the perfect recipe to see what gel food coloring can do.
Even more Halloween recipes!
Kids love Halloween goodies, so we love Halloween. Snoop around these recipes and you’ll have enough good ideas to bake like a champion ghoul!
- Halloween Monster Sandwich Cookies
- Halloween Monster Brookies
- Halloween Snack Mix
- Bat Ice Cream
- Halloween Bark
Frankenstein Cakesicles
Ingredients
HERE’S WHAT YOU NEED:
FOR THE CAKE:
- 3 cups flour
- 1 Tablespoon baking powder
- 1 Tablespoon baking soda
- 1/2 teaspoon salt
- 2 1/4 cups sugar
- 2 sticks butter
- 2 eggs
- 1 1/3 cups milk you can use Soy, or Almond, or whatever you prefer
- 1 teaspoon Vanilla
- Purple food coloring gel
FOR THE FROSTING:
- 2 sticks butter
- 4 cups powdered sugar
- 1/2 cup milk
- 1 teaspoon vanilla
- Purple food coloring gel
FOR THE COATING – OUTSIDE LAYER:
- White chocolate Almond bark – MELTED
- Green food coloring gel
Instructions
HERE’S WHAT YOU DO:
CAKE:
- In the mixing bowl of a stand mixer, with the Whisk attachment, cream the butter and sugar until light and fluffy. Add the vanilla, food coloring, and eggs, and mix until completely blended.
- In a separate bowl, mix the flour, salt, baking soda, and baking powder, until well blended, and add the flour mixture and the Milk, alternatively to the mixing bowl, mixing on low speed between additions until all ingredients have been added. Mix on high for about 1 minute to make sure all ingredients have been well incorporated. Turn off the mixer and scrape down the sides of the bowl with a Spatula, and stir the batter.
- Butter the bottom and sides of a 9 X 13 dish, and pour the cake batter into the dish. Bake at 350 degrees for 30 – 40 minutes, or until a toothpick inserted in the center comes out clean. Remove to a wire rack to cool.
FROSTING:
- Wash and dry the mixing bowl and whisk attachment, and add the 2 sticks of softened butter, milk, and vanilla to the mixing bowl, and mix to blend. Add the food coloring gel, and mix until well blended. Add the powdered sugar a little at a time, mixing on low speed between additions until all the sugar has been added. Scrape the sides off the bowl, and blend again. If frosting is not thick enough, add a little more powdered sugar until a thick consistency is achieved.
- Remove mixing bowl to the refrigerator. When cake is cool, break up the cake into crumbs, right in the pan it was baked in, and when the cake is crumbs add about a cup of the frosting at a time, and stir the cake and frosting together until you have a big ball of cake and frosting that sticks together, so you'll need to add more frosting, but don't over add. You want it to be thick so that it will hold it's form in the cakesicle molds. Set aside.
ASSEMBLE THE FRANKENSTEIN-SICLES:
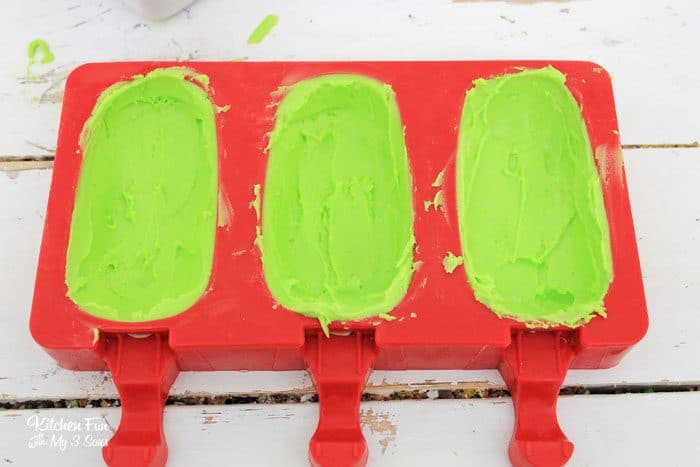
- In the microwave, melt 3 squares of the White Chocolate Almond bark in a microwave safe bowl on 10 second intervals until it's smooth. Add the Green food coloring gel and mix until the chocolate is all the same color, with no streaks of white. Spoon the green/white chocolate into the Cakesicle molds, and turn the molds a little sideways, in both directions to coat the inside of the molds with white chocolate.
- Place the molds in the freezer for 30 minutes to allow the chocolate to set. When chocolate is set, place a heaping Tablespoon of the Cake/frosting mixture into the mold, and form the Cakesicle, adding more of the cake/frosting mixture, until all the molds have been filled, and are full, but level with the mold.
- Insert the sticks in the cake mixture, using the mold as a guide. Pop the green/white chocolate back in the microwave for a few seconds, and stir to make sure it's smooth, and spoon onto the Cakesicles with a spatula to cover the mold in the Green colored white chocolate. Place the mold in the refrigerator for about and hour to completely set the white chocolate.
- When chocolate is set, remove the Cakesicles from the molds, and place them on a parchment paper lined cookie sheet. Melt 3 squares of Chocolate Almond Bark in the microwave on 10 second intervals, and stir the chocolate to make sure it's smooth. You can either place the chocolate in a squeeze bottle with a tip, or in a pastry bag with a fine tip, to decorate the face of the Cakesicles.
- Follow the photo for placement of decoration of the Frankenstein face. Start with the eyes; place a dot of chocolate where you want the eyes, and place the eyes on the chocolate to secure them to the green chocolate coating. When all the faces are decorated, you'll want to place the cookie sheet in the refrigerator for about an hour to allow the chocolate to set. Serve immediately, or place in a single layer in an airtight container, and keep refrigerated until time to serve. Enjoy!
Last Step:
Please leave a rating and comment letting us know how you liked this recipe! This helps our business to thrive and continue providing free, high-quality recipes for you.Equipment
- Electric mixer
- Cakesicles Mold
- Spatula’s
- Microwave
- Pastry bag squeeze bottle, or plastic food bag for icing to decorate face
- Fall colored sprinkles optional
Notes
Nutrition


Leave a Review!
We LOVE hearing from you! Submit your question or comment here.
Your email address will not be published.