

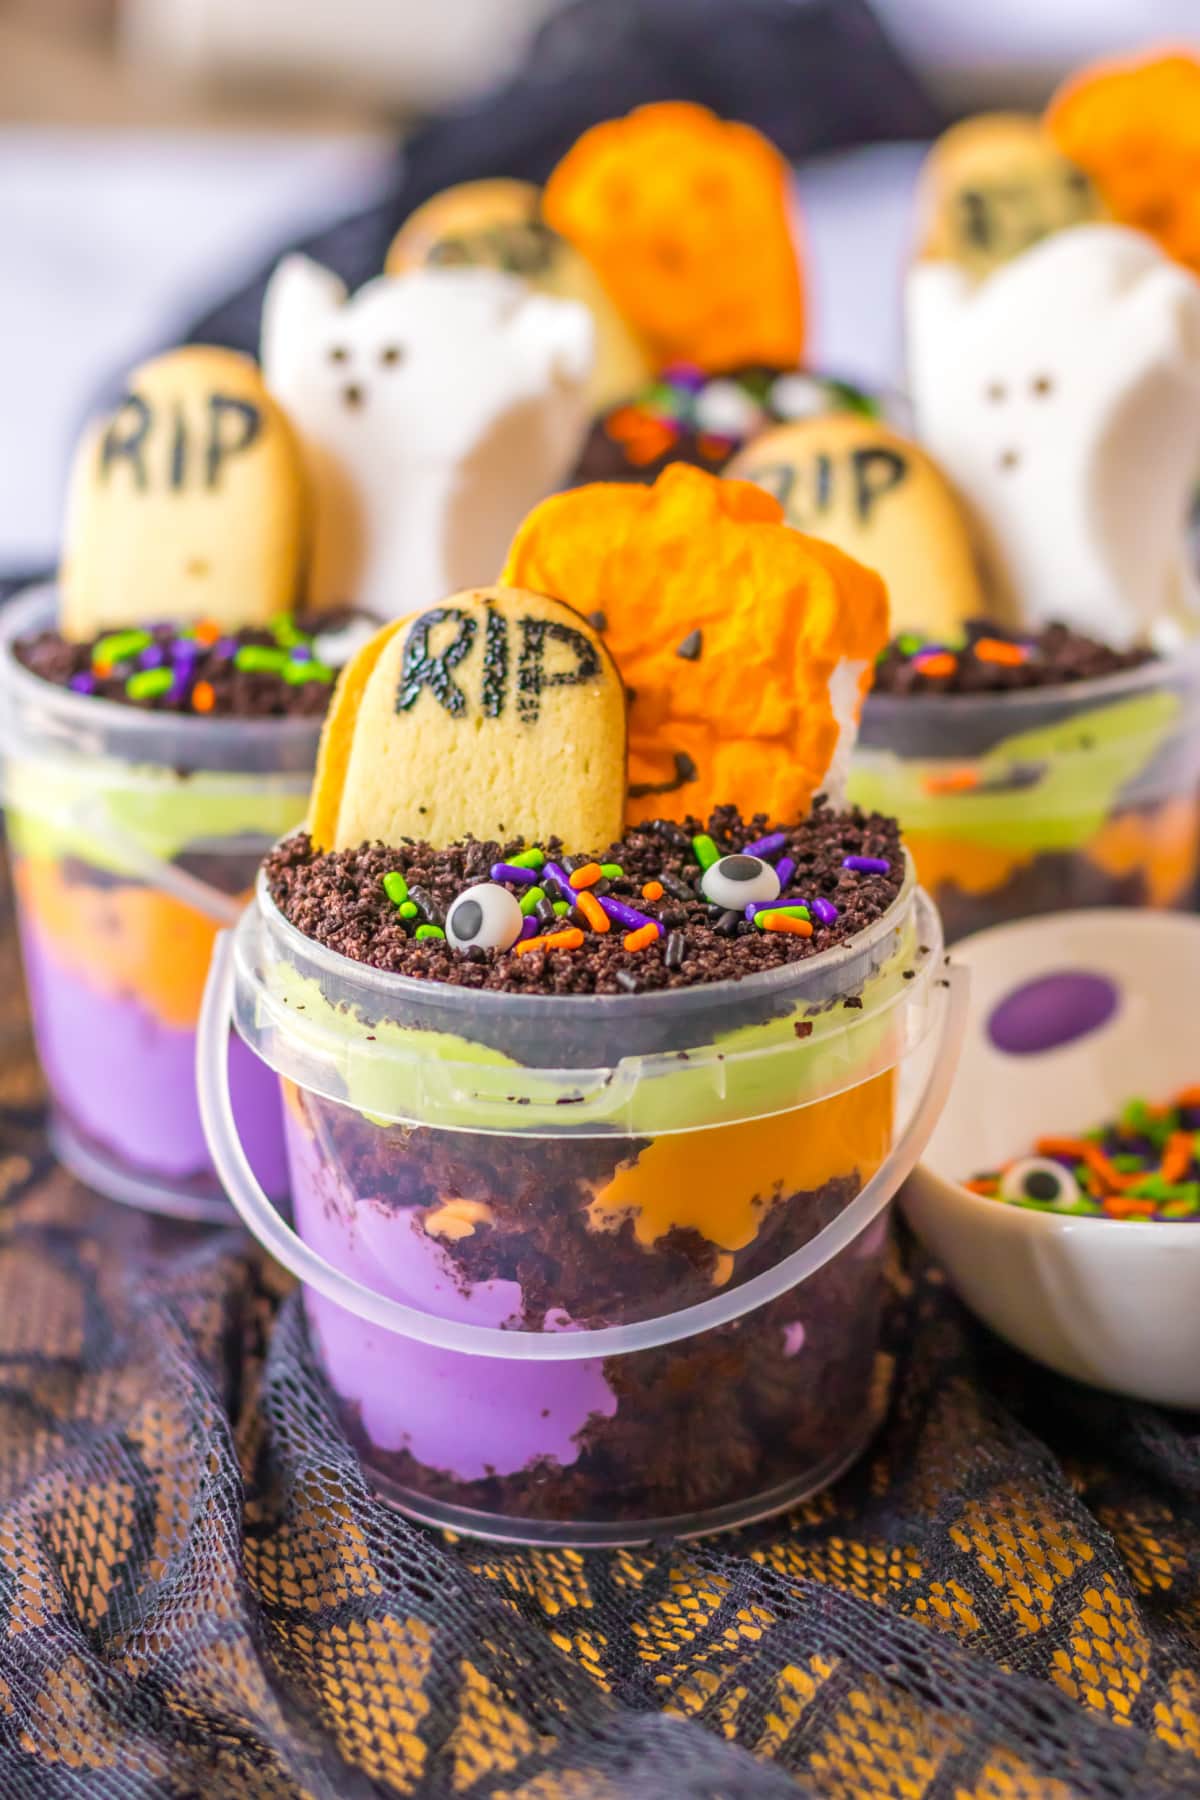
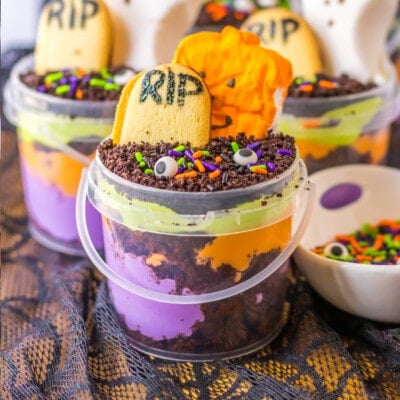
Looking for a cute and spooky sweet treat? These Graveyard Pudding Cups are perfect for Halloween! They are filled with pudding, cake, and cookies. So easy to make and so yummy!
Halloween Graveyard Pudding Cups
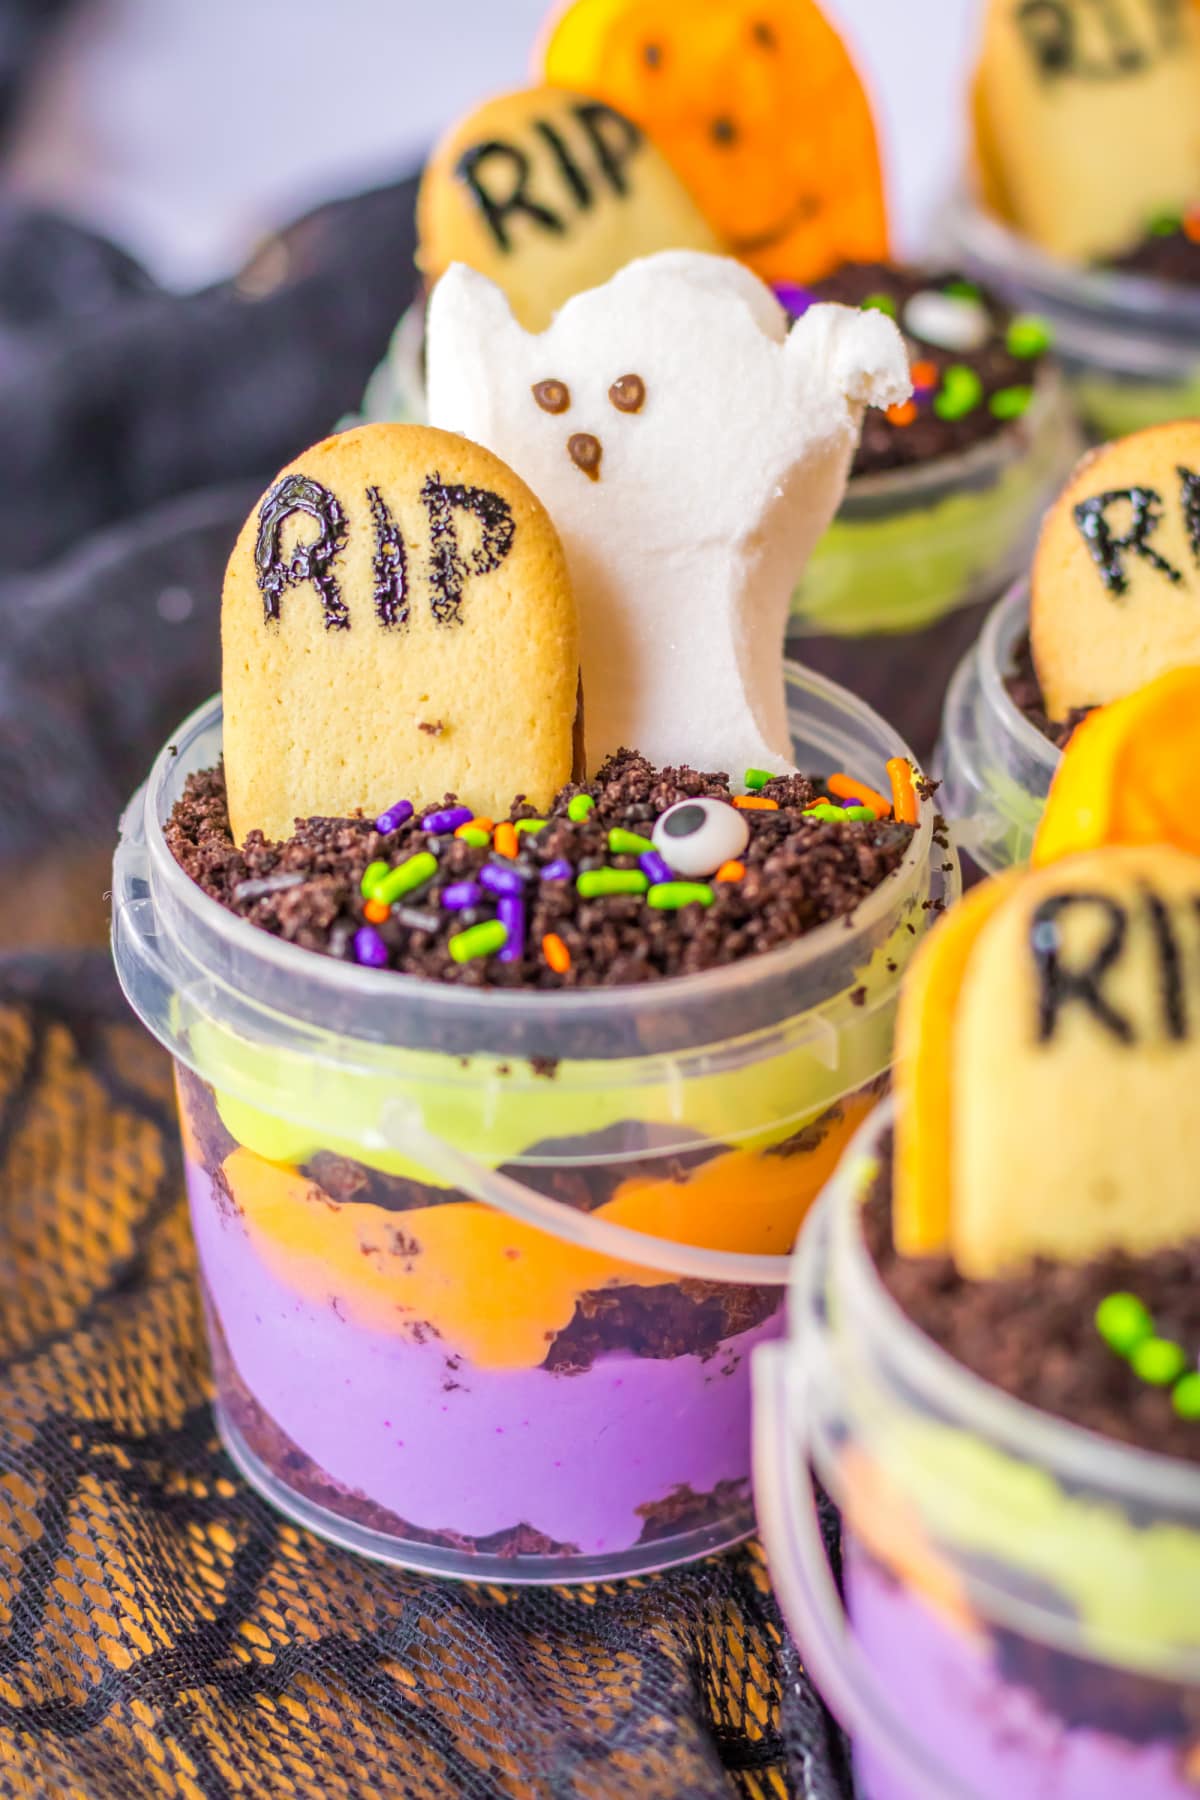
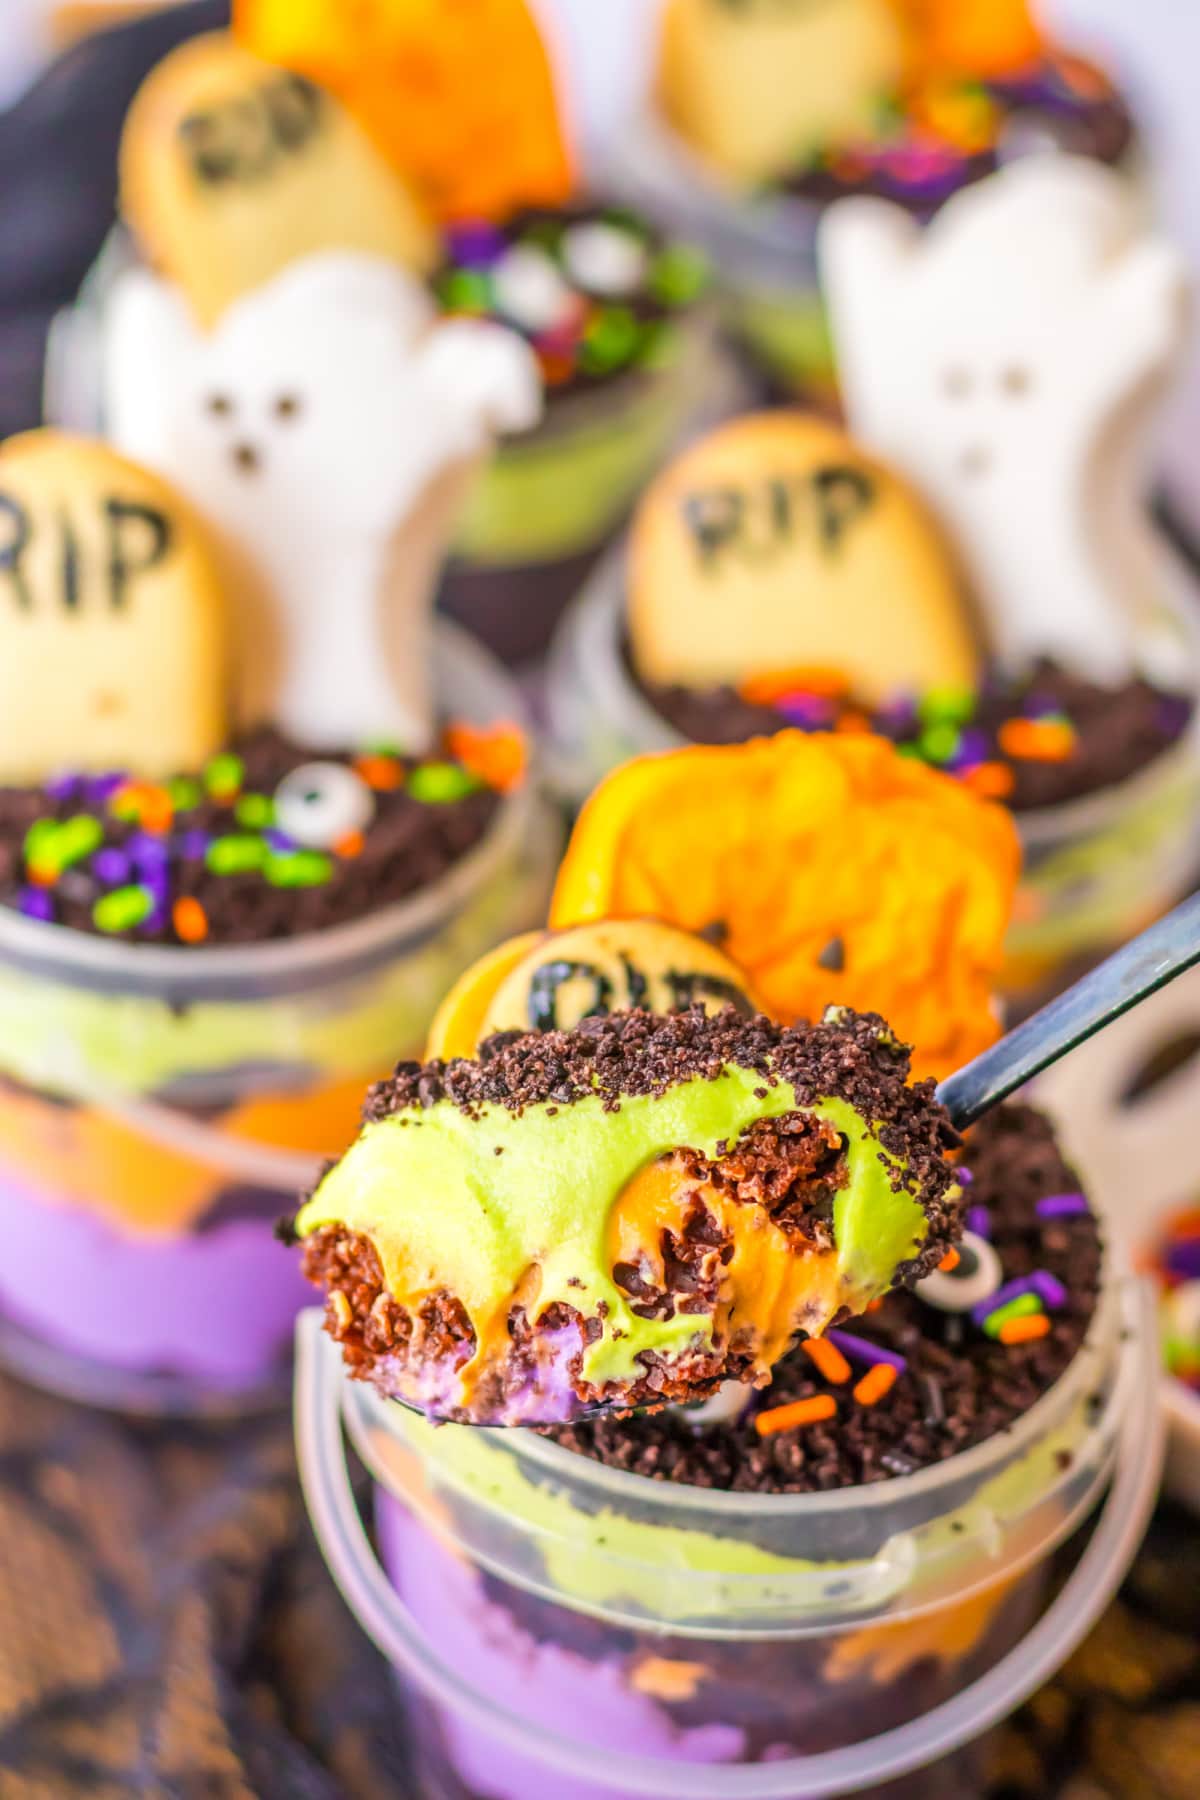
These Halloween dirt pudding cups are tasty and adorable. You can make them for a party or as a treat for your little ones to take to school and share with their class. Your kids can even help you assemble and decorate the graveyard pudding cups. The creamy pudding and crunchy cookie crumbs are a great combination. Plus, the dark color of the devil’s food cake makes them extra spooky! It’s a spooky spin on classic Dirt Pudding.
I love that you can customize this easy dessert. Depending on the toppings that you choose, you can have a different theme every time! I have used candy pumpkins, skulls, gummy worms, candy eyes, Halloween-colored sprinkles, and more. There’s no wrong answer! These are so fun to serve at a Halloween party!
If you love the look of these, try Easter Dirt Cake or Carrot Patch Dirt Cups for spring!
What You’ll Need
These are easy-to-find, cheap ingredients that come together to make an easy and delicious Halloween dessert!
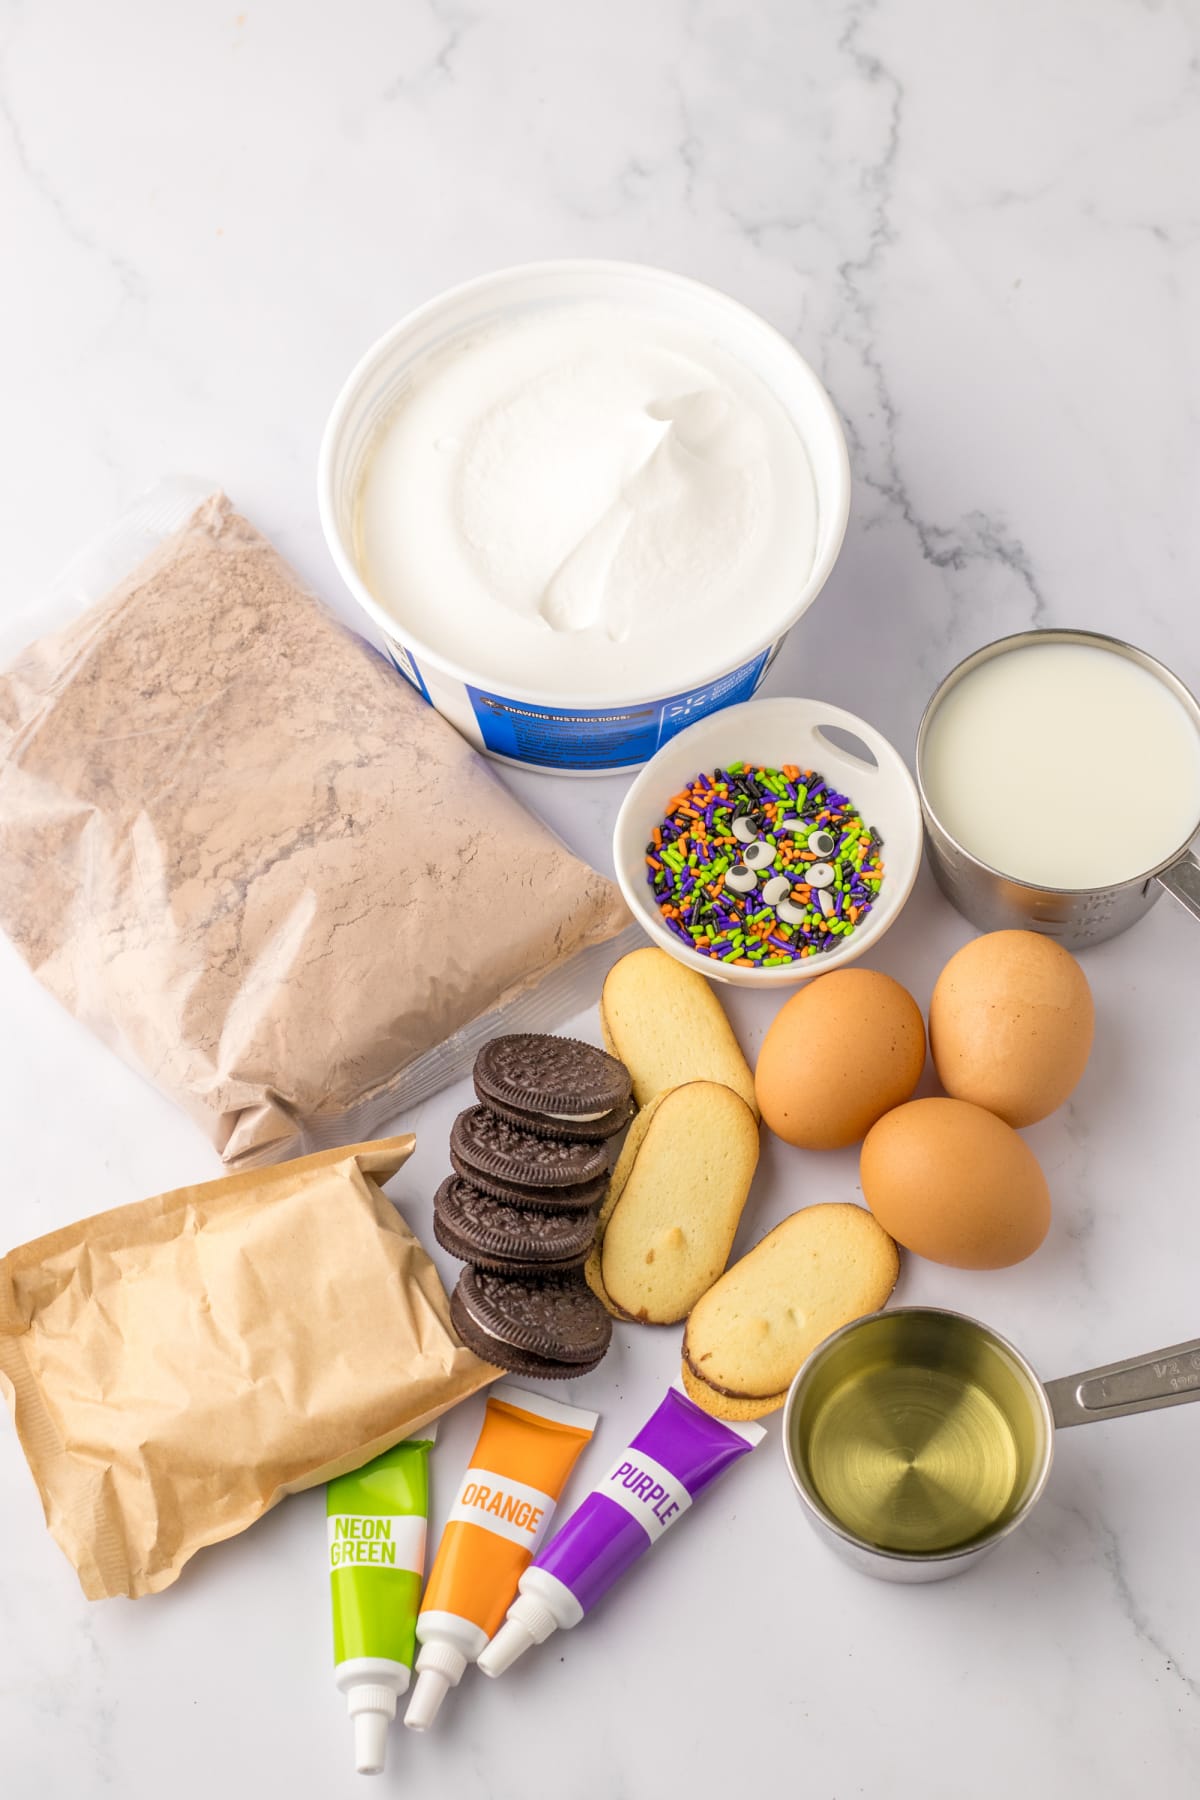
- Devil’s Food Cake Mix
- Ingredients Needed to Make the Cake: Water, oil, and eggs – use the package directions for the correct amounts.
- White Chocolate Instant Pudding – you will add food coloring to the pudding mix.
- Milk: This is the milk needed to prepare the pudding. The exact amount will be on the package.
- Whipped Topping – Use Cool Whip or make our easy homemade whipped cream.
- Food Coloring: I used neon green, orange, and purple gel food coloring.
- Crushed Oreos: Any chocolate sandwich cookie will work perfectly.
- Milano Cookies: These are going to be your cookie tombstone decoration!
- Halloween Candy/Sprinkles: Use whatever kind you find.
- Clear Buckets – we love using little buckets, but plastic cups will also work well.
How to Make Graveyard Pudding
It’s so easy to make these Halloween pudding cups. They are the perfect make-ahead treat!
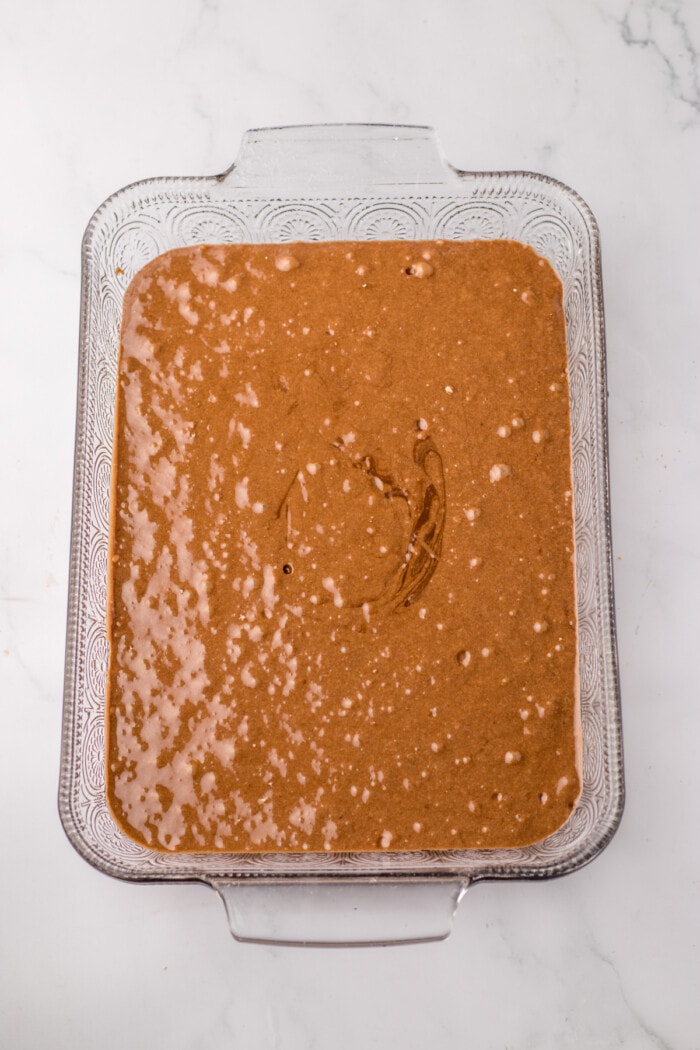
Step 1. Preheat the oven to 350 degrees F. Grease a 9×13 baking dish.
Step 2. Make your devil’s food cake batter according to the package directions – combine the water, egg, and oil. Then, mix in a large bowl until combined.
Step 3. Pour the prepared batter into the baking dish and bake for 30-35 minutes. Insert a toothpick into the center to check for doneness. It should come out clean.
Step 4. Slice the cake into bite-size squares and set them aside to cool completely.
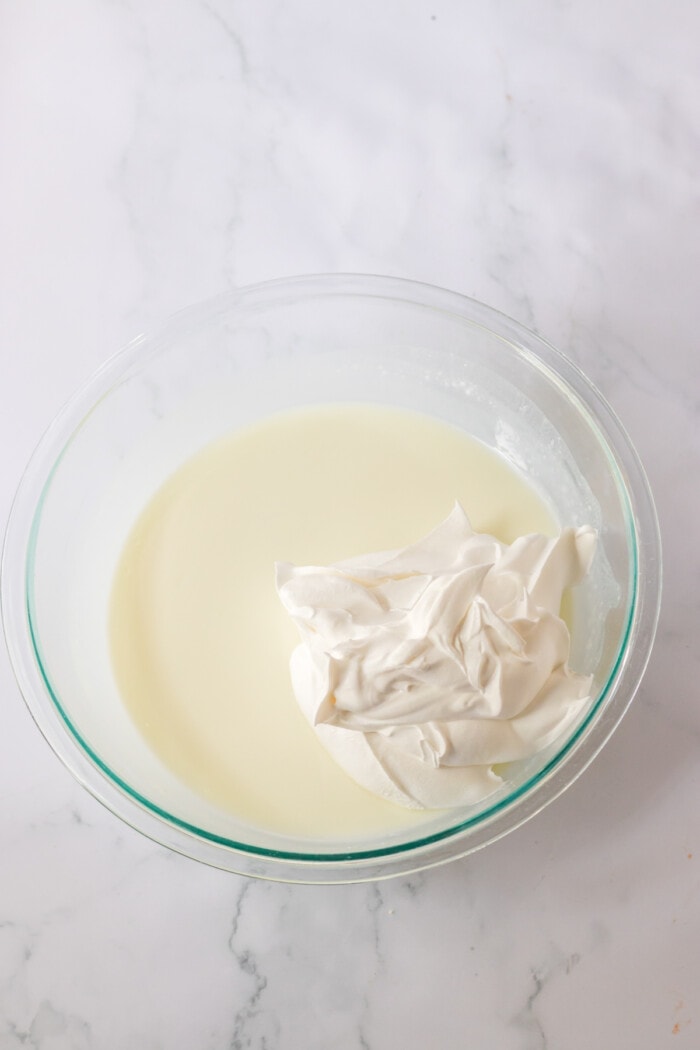
- Step 5. Prepare the pudding by whisking the mix with cold milk. It will be soft after a couple of minutes, Then, fold in the whipped topping.
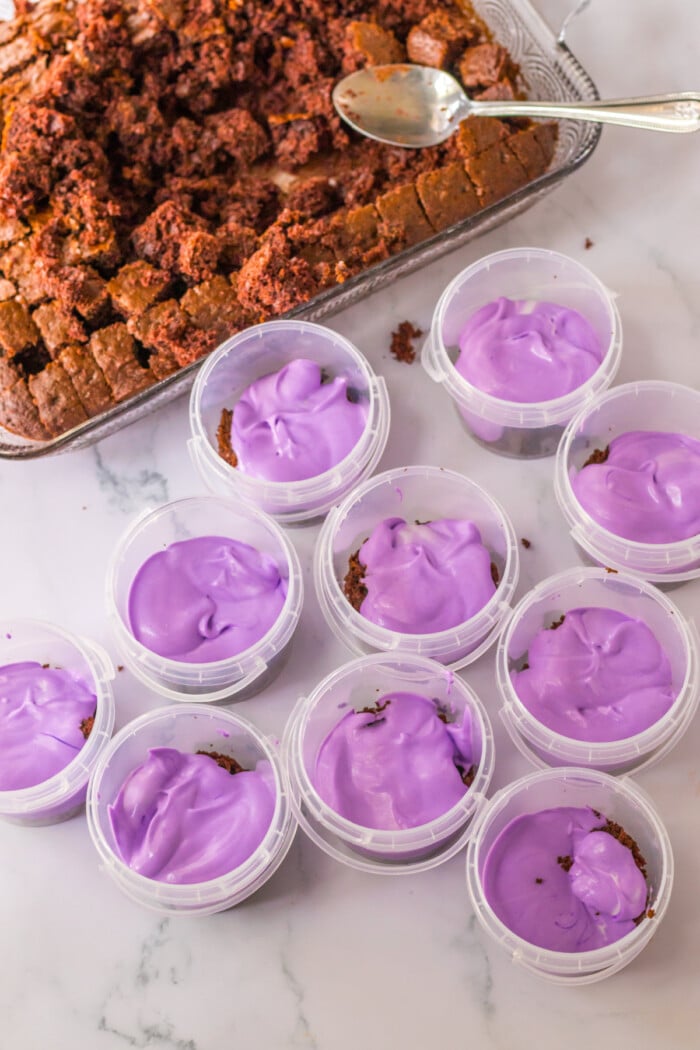
- Step 6. Separate the pudding into 3 bowls. Add one color to each of the bowls and stir until even colored.
- Step 7. Prepare each bucket by adding a spoon of cake, and a layer of pudding, and then repeating until there is one layer of each color.
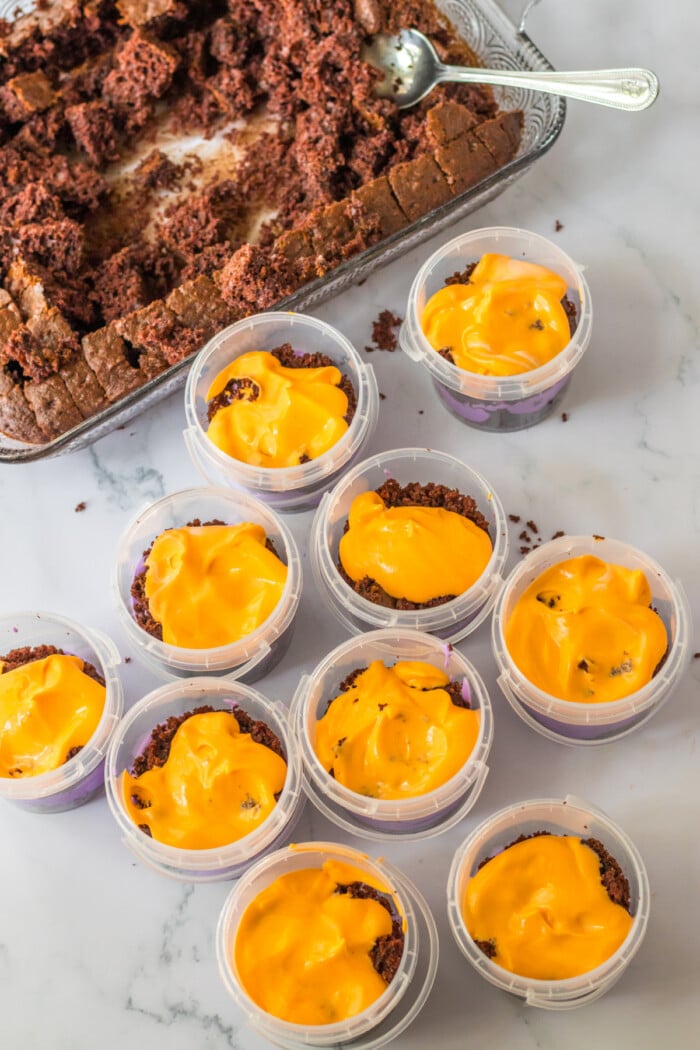
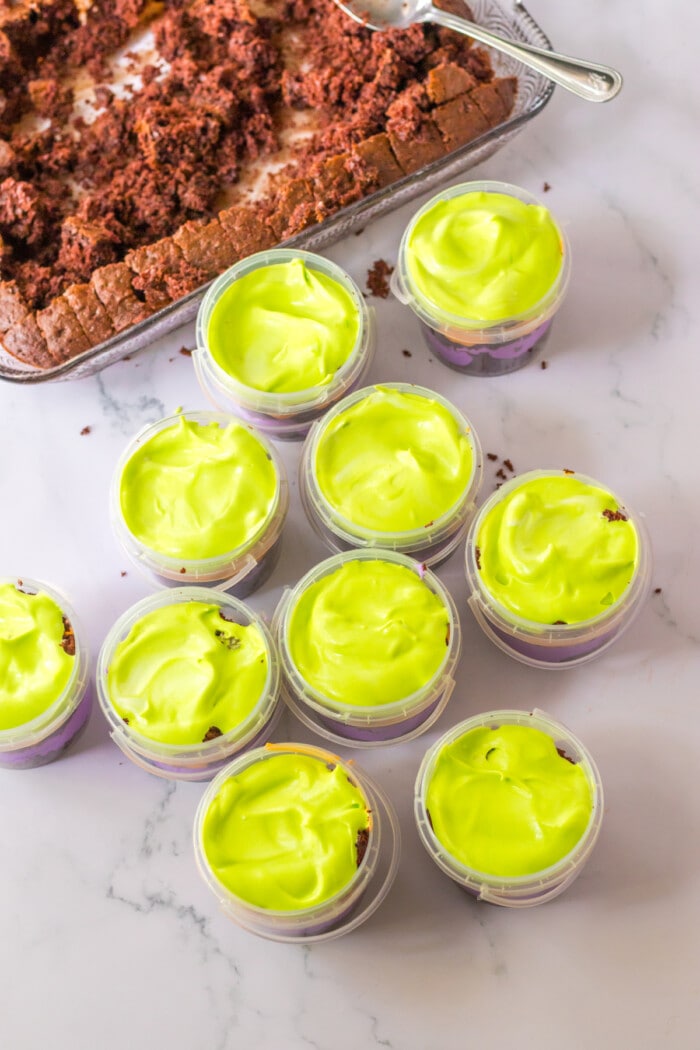
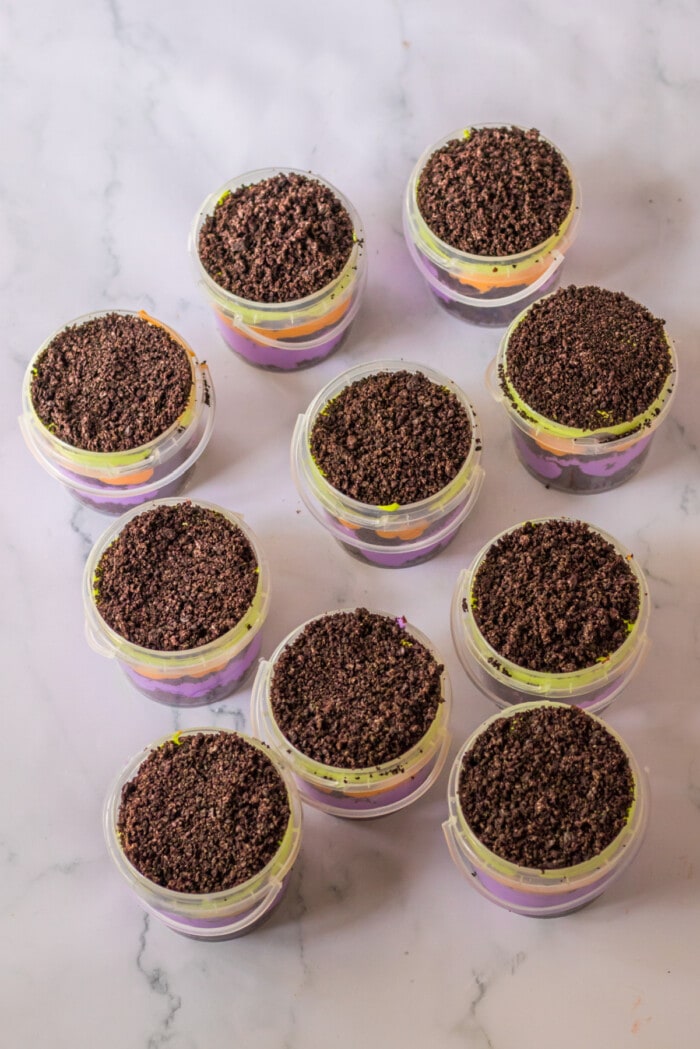
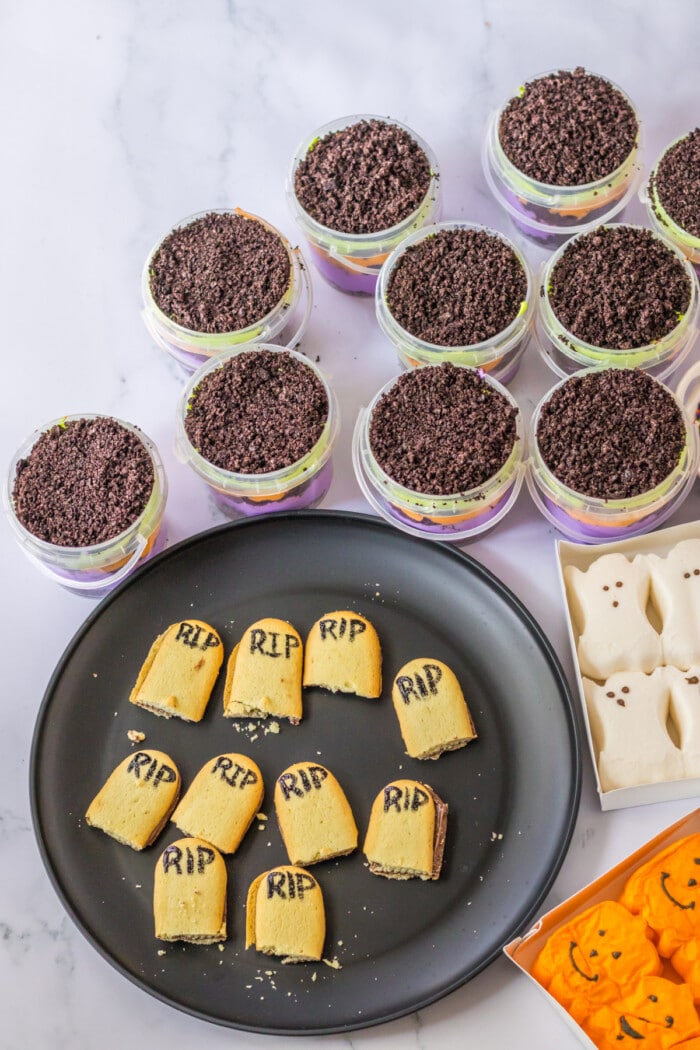
- Step 8. Cut off the bottom and paint “RIP” onto each Milano with food coloring and a small paintbrush. Top the bucket with cookie crumbs and a Milano cookie. Repeat steps 7 and 8 for each bucket.
- Step 9. Add decorations to each pudding cup.
- Step 10. Place into the refrigerator for 1 hour then serve!
Tips and Variations
- Pudding: You can use cheesecake or vanilla pudding instead of white chocolate. The key is to choose a light-colored pudding mixture that can take on the food coloring well. Cream Cheese Frosting in place of pudding will also work well.
- Oreo Cookie Crumbs: we like to crush cookies using the food processor, but you can also place the cookies in a large zip lock bag and crush them with a rolling pin.
- Decorations: Gummy worms, candy skulls, or any spooky candies and sprinkles are perfect for these pudding cups.
- Cake: You can use any variety of chocolate cake you prefer to change up the flavors or brownies will also work.
- Food Coloring: Swap one of the colors for red food coloring if you like!
How to Store Leftovers
If you have any leftover graveyard pudding cups, store them in the refrigerator. They will last up to 3 days. Include any time when you make them ahead as well. I do not recommend freezing this recipe.

More Halloween Recipes
Graveyard Pudding
Ingredients
- 1 15.25 oz devils food cake mix
- water, oil and eggs the box calls for
- 2 3.4 oz white chocolate pudding instant
- 4 cups cold milk
- neon green, orange, and purple food coloring
- 1 1/2 cups oreo cookies crushed
- Milano cookies
- Halloween candy and sprinkles
Instructions
- Preheat oven to 350 degrees F
- In a large bowl, combine cake mix, water, oil and eggs
- Pour the cake batter into a prepared 9×13 baking dish
- Bake for 30-35 minutes or until a toothpick inserted comes out clean.
- Slice into bite size squares. Set aside to cool.
- Combine the pudding with the milk and whisk.
- Fold in the whipped topping.
- Separate the filling to 3 bowls and color each bowl with one of the food colorings.
- Into your buckets place a little of the cake. Next a layer of one of the puddings.
- Repeat the layers so you have 3 layers of pudding, each a different color.
- Top each one evenly with the cookie crumbs.
- Cut the bottom of the Milano cookie off.
- Using food coloring and a little paint brush you can paint on the cookies R.I.P and such.
- Decorate the buckets with the gravestones, candy and sprinkles.
- Refrigerate for an hour. Serve!
Last Step:
Please leave a rating and comment letting us know how you liked this recipe! This helps our business to thrive and continue providing free, high-quality recipes for you.Equipment
Nutrition


Leave a Review!
We LOVE hearing from you! Submit your question or comment here.
Your email address will not be published.