
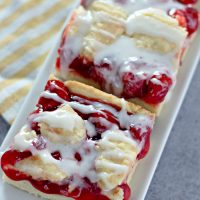
With a soft and chewy sugar cookie base, these Cherry Pie Bars are smothered in a delightfully gooey cherry filling and drizzled with a sweet glaze. The tartness of the cherry perfectly complements the light hints of almond and vanilla in the cookie, giving this sweet treat a surprisingly complex flavor profile.
Looking to serve these a la mode? Scoop some sweet and creamy No-Churn Vanilla Ice Cream on top!

Gooey Cherry Pie Cookie Bars With Icing Drizzle
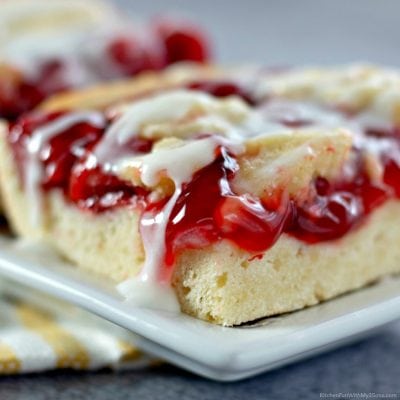
A slightly more structured take on the cherry pie, these cookie bars are so simple to make. And you don’t have to worry about par-baking the way you do with pie crust, since the cookies come together right under the pie filling. The drizzle of frosting brings the tartness and sweetness of this dessert into perfect balance.
These cookie bars give you all the gooey goodness of a classic cherry pie and none of the stress. Plus, they look impressive, which makes them a great dessert to bring to a bake sale or potluck. Their perfect blend of crowd-pleasing flavors is sure to make them a hit anywhere you take them.

What You’ll Need
Here’s the list of ingredients that go into these cherry bars. Look for the exact measurements in the printable recipe card below.
- All-Purpose Flour
- Salt
- Butter: Unsalted works best, since putting the salt out of balance can affect the baking process.
- Eggs
- Sugar
- Vanilla Extract
- Almond Extract: This is optional, but it really enhances the flavor of the sugar cookie base.
- Cherry Pie Filling: I use an extra cherry variety to really pack in the cherry flavor.
- Powdered Sugar
- Milk

How to Make Cherry Pie Bars
Making this dessert is quick and simple. In seven easy steps, you’ll have a pan full of impressive cherry pie bars.
Prep Your Materials: Preheat your oven to 350°F and grease an 8×8-inch baking dish with non-stick cooking spray before setting it aside.
Make the Dough: Whisk together the flour and salt in a medium-sized bowl and set it aside. Cream together the butter and sugar in a large bowl until they become light and fluffy, then add the eggs and flavor extracts and beat the mixture until it smooths out. Next, add the flour mixture and beat until it’s just combined.


Lay the Cookie Base: Scoop around 3/4 of the cookie dough into the greased dish. Spread the dough into an even layer from one edge of the pan to the other, covering the whole base.

Add the Pie Filling: Pour the cherry pie filling over the crust. Drop the remaining dough over the cherries one tablespoon at a time, making sure to spread the dough balls out.

Bake, Cool and Frost: Bake the cherry pie bars at 350ºF for 30-35 minutes until the dough has set. Mix the powdered sugar and the milk together in a small bowl. Drizzle this frosting over the cherry bars once they have cooled to room temperature.

Serve: Slice the cooled cherry pie bars into 9 even pieces and serve or store them.

Tips For Success
With only seven steps, there’s not much that can go wrong with these cookie bars. Follow these quick tips to make sure everything comes out exactly how you want it.
- Parchment Paper Lining: If you don’t want to grease the pan, you can get a similar effect by lining the cookie pan with parchment paper before adding the first layer of dough. Leave enough paper coming up over the sides of the pan so that you can use the edges as handles. Once you have the bars out of the dish, they should be easier to cut.
- Get the Dough Even: Another great way to use parchment paper to make things easier is to place it on top of the first layer of dough before pressing it down. Since the dough can be pretty sticky, this helps to get the dough even while skipping the mess.
- Don’t Ice Them While Hot: Although it may be tempting to eat these fresh out of the oven, the frosting won’t stick well until the bars are cool. Add it too soon and you might be left with a sticky, runny mess.

Variation Ideas
These pie bars are as good as it gets, but that doesn’t mean you can’t experiment with them! Try one of these ideas to put a twist on this recipe.
- Cherry Crumble Cookies: If you want something a little more decadent, try swapping out the extra batter on top of these pie bars with a streusel topping instead. Just mix together brown sugar and melted butter with flour and oats until it forms chunks, then sprinkle these chunks over the pie filling. Try to make little islands with pie filling showing through, just like with the cookie dough.
- Switch Up the Fruit Flavor: Not a big fan of cherry? Try making these bars with any fruit filling you want! This recipe works just as well with apple, blueberry, or even pumpkin!
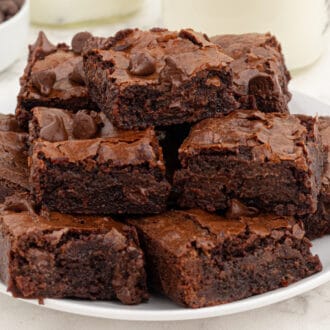
- Change Up the Base: If you want to take some inspiration from the famous black forest cake, try making a triple chocolate cookie as the base. You can also go with a classic chocolate chip cookie for a more subtle chocolate flavor.
- Homemade Pie Filling: One way to shake things up is to try making your cherry pie filling from scratch! This will give your bars even more tart cherry flavor, and also make them a little more firm and less gooey.
- Toasted Nuts: If you added almond extract to the batter, try tossing some toasted almonds on top of your bars to really bring out the flavor. You could also try other toasted nuts, like pecans or walnuts.
Serving Suggestions
Once they’ve cooled enough for the icing, you can slice and serve these cherry pie bars right from the pan. I like to use a spoon or fork to eat them so I can scoop up any filling that gets away from me, but you can eat them with your fingers if you don’t mind getting a little messy. A scoop of vanilla bean ice cream or a dollop of Homemade Whipped Cream really brings this dessert to the next level – but if you go a la mode, you’ll definitely want to grab a spoon!

Storage Instructions
Store leftover cherry bars in an airtight container in the refrigerator for up to 3 days. Make sure to wrap them well in plastic or keep them sealed in an airtight container. When you’re ready to serve them, let them warm back up to room temperature and enjoy!

Can I Freeze Cherry Pie Bars?
These cherry pie bars do great in the freezer! Freeze them in a single layer or stack them with parchment paper in between. Make sure to keep them well-wrapped in plastic wrap or shut tight in a freezer-safe container and freeze them for up to 3 months. When you’re ready to serve them, let them warm to room temperature.
Cherry Pie Bars
Ingredients
- 1 1/2 cups all-purpose flour
- 1/2 teaspoon salt
- 1/2 cups butter softened
- 1/2 cup sugar
- 2 eggs
- 1 teaspoon vanilla extract
- 1/8 teaspoon almond extract optional
- 21 ounce can of cherry pie filling
- 1/2 cup powdered sugar
- 1 tablespoon milk
Instructions
- Preheat oven to 350°F. Grease an 8×8 inch square baking pan with non-stick cooking spray.
- In a medium mixing bowl, whisk together the flour and salt; set aside.
- In a medium mixing bowl, cream together the butter and sugar with an electric mixer until light and fluffy. Add the eggs, vanilla extract, and almond extract and beat until well combined.
- Add the flour mixture and mix just until combined.
- Scoop 1 ½ cups of the dough mixture into the prepared pan and press down to form the bottom crust.Spread the pie filling over the crust. Dollop the remaining dough all over the top of the pie filling.
- Bake the cherry bars at 350°F for 30-35 minutes until set and beginning to turn golden brown around the edges.
- Cool the cherry bars in the pan until room temperature. Combine the powdered sugar and milk to make the glaze and drizzle over the cooled cherry bars. Cut into 9 squares to serve.
Last Step:
Please leave a rating and comment letting us know how you liked this recipe! This helps our business to thrive and continue providing free, high-quality recipes for you.Equipment
- Oven
Nutrition


Leave a Review!
We LOVE hearing from you! Submit your question or comment here.
Your email address will not be published.
1 thought on “Cherry Pie Bars”
I absolutely, positively love everything that you and your boys make!!!!!!!!!!!!!