
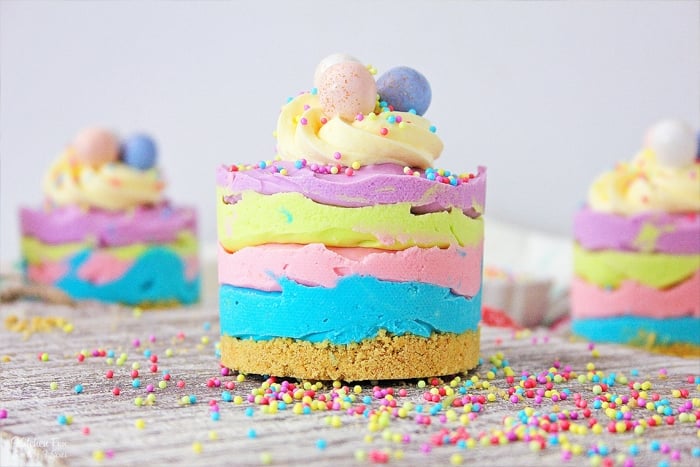
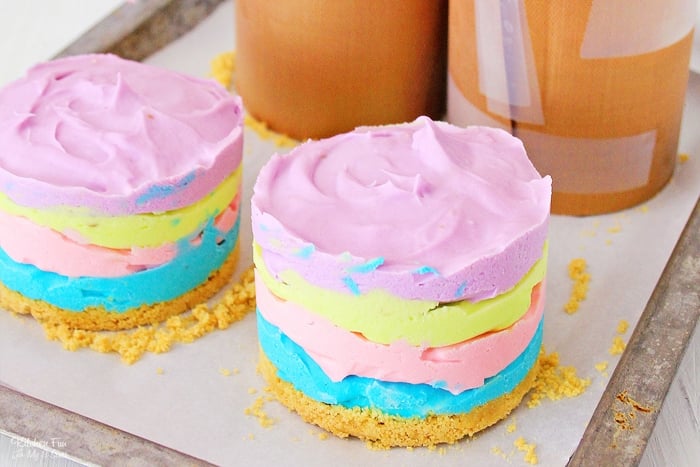
These no-bake Mini Easter Cheesecakes are a simple layer of a graham cracker crust, topped with colorful layers of cheesecake filling.
Mini Easter Cheesecakes
These are the tastiest and most adorable Easter treats. Not only do they look so beautiful and even a bit fancy, but they’re also actually simple to make. You could make these for any holiday by simply switching up the colors and sprinkles.
Key Ingredients You’ll Need
Graham Crackers: You will combine the crackers with butter and sugar to make the crust.
Sugar: You will need granulated sugar for the crust and powdered sugar for the layers of cheesecake.
Cream Cheese: This combined with pudding mix will make the layers very creamy and smooth.
Flavoring: I like to use vanilla extract and lemon juice to flavor it.
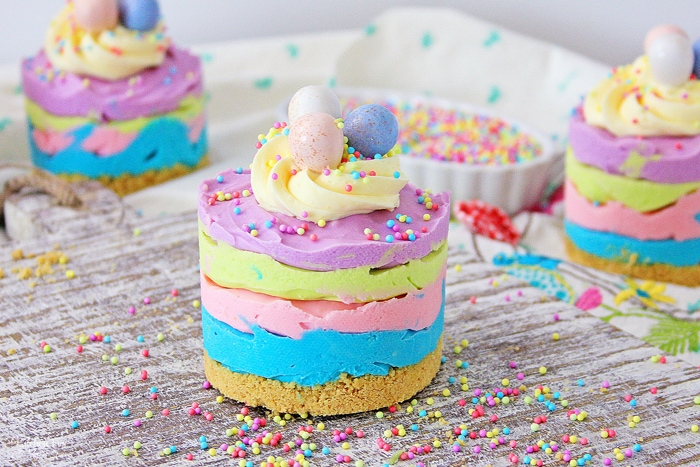
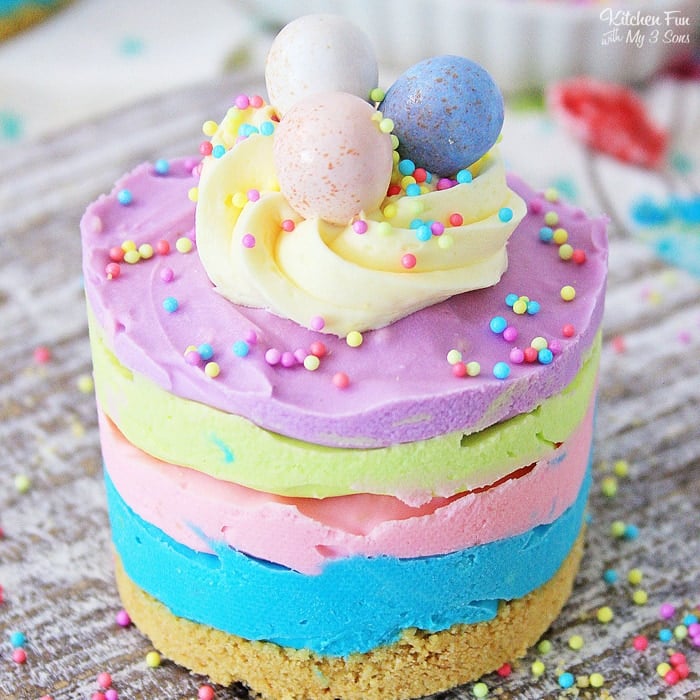
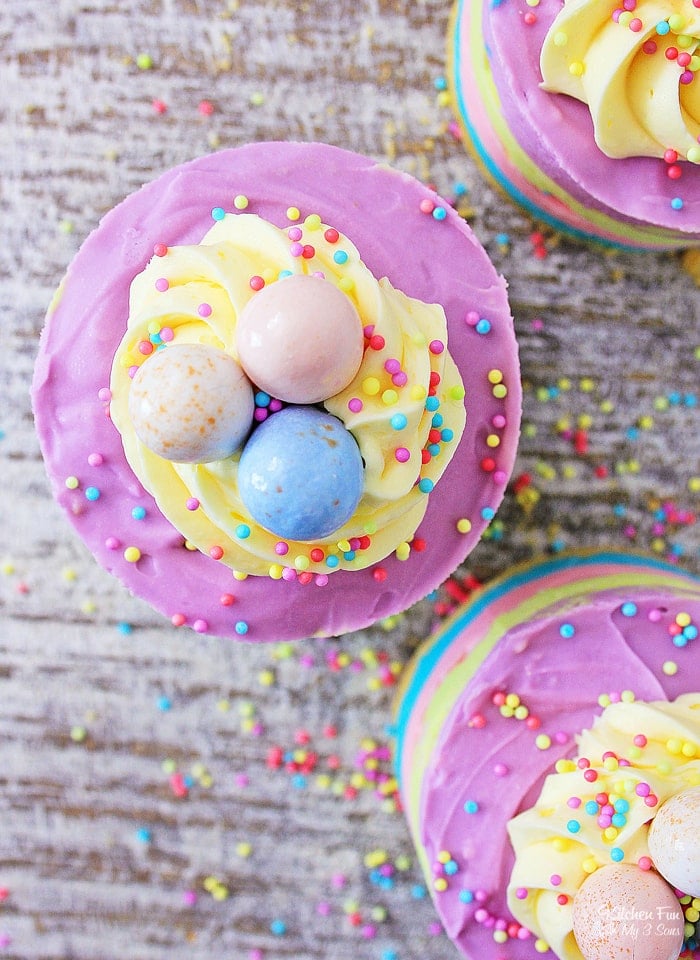
Frosting: This will be added on top to decorate along with sprinkles and mini eggs. Try our Cream Cheese Frosting recipe – it’s delicious!
How To Make Mini Easter Cheesecakes
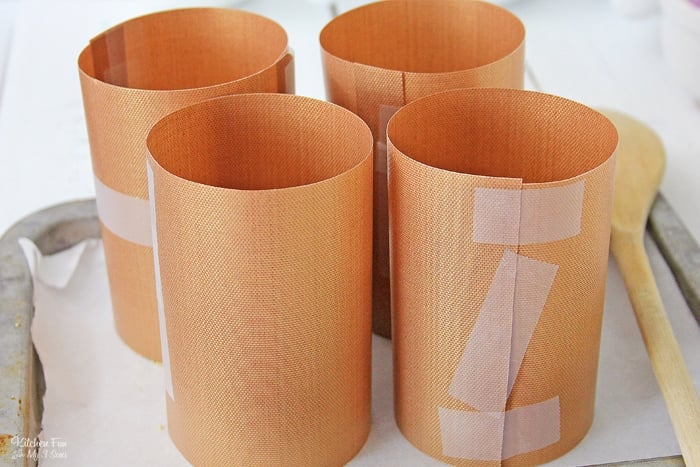
Step 1. Using the copper mats, cut and tape them together to make pastry sleeves. This is what will keep your cheesecake sturdy while making the layers. Combine the graham cracker crumbs and butter to make the crust. Divide into 6 portions to place in the bottom of each mold. Set in the freezer to chill while you make the filling.
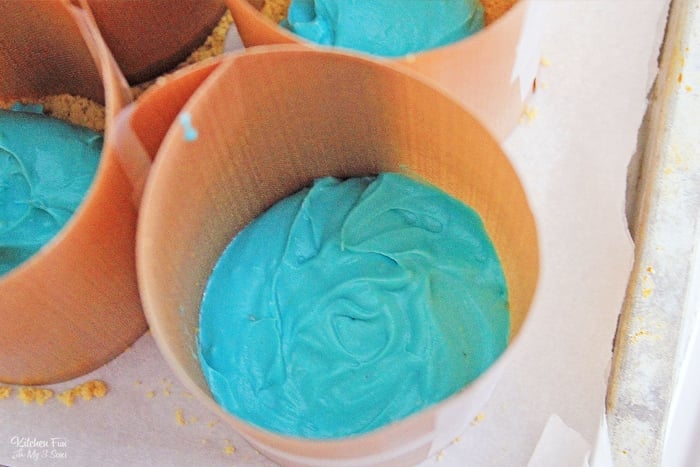
Step 2. In a bowl, combine the cheesecake ingredients. Divide into four separate bowls and color each one differently with aqua blue, pink, yellow, and lavender food coloring. Add one colored layer to the mold. Place in the freezer to chill for 30 minutes before adding another different colored layer. Once the final layer is set and you are ready to enjoy, take the copper molds off and top with some frosting. Place a few mini eggs and sprinkles on top.
How Long Can You Store Mini Cheesecakes?
You can keep these in the freezer for one to two months. Make sure to thaw them in the fridge before eating. Be sure to keep these refrigerated at all times, you don’t want to leave these out at room temperature.
Tips & Tricks
- You can decide to keep these mini desserts in a clear serving dish to reduce any mess. This will also make it a prettier display if you serve on a buffet of desserts.
- Pastry molds or stainless-steel plating rings can be used in place of the copper mats.
- Keep any leftovers stored in an airtight container for the best storage method.
- You can dye each layer to your liking, but I prefer using pastel colors for springtime.
More Easter Recipes:
- Coconut Macaroons
- Homemade Reese’s Peanut Butter Eggs
- Carrot Cake Cookies with Cream Cheese Frosting
- Easter M&M Cookies
- Easter Cadbury Cookies
- Bunny Butt Cupcakes

Mini Easter Cheesecakes
Ingredients
Crust Ingredients:
- 1 sleeve Graham crackers crushed in the blender
- 1/2 stick butter melted
- 1 heaping tablespoon sugar
Cheesecake Ingredients:
- 32 ounces cream cheese softened (I used 4 8-oz packages)
- 1 cup powdered sugar
- 1 tablespoon Vanilla
- 1 teaspoon lemon juice
- 1/2 3 ounce package Instant Cheesecake pudding mix
- 1/2 cup half & half plus 2 Tablespoons
- 1 can Cream Cheese Frosting for topping
- 1 package Cadbury mini eggs
- Easter sprinkles
Instructions
How to make pastry rings:
- Measure the Copper mats, and cut them in 3 inch high strips. Fold the strips to meet ends, until you have about a 3 inch, in diameter (across) circle.
- Cut the strip where needed, and leave enough extra to tape the ends of the strip together. Tape the ends of the strip with duct tape, and make sure it's taped securely along the edges. Place the copper circles on a piece of parchment paper, on a cookie sheet.
Crust Directions:
- Mix graham cracker crumbs, butter and sugar together. Place an equal amount in each copper circle. Tap the crumbs down with the end of a wooden spoon until they're even and compact. Place in the freezer.
Cheesecake Directions:
- Mx the softened cream cheese until smooth and creamy. Add the Vanilla and lemon juice and mix.
- In a separate bowl, add half of the 3 ounce package of Instant cheesecake flavored pudding and 1/2 a cup of half n half, and mix with a whisk until the pudding is smooth, and no longer grainy.
- Add the additional 2 Tablespoons as needed, to make the pudding smooth. When pudding is smooth and thick, add it to the mixing bowl and blend until completely smooth with the cream cheese. Add the powdered sugar a little at a time and blend well after each addition.
- Divide the cheesecake batter evenly between 4 small bowls. Dye each bowl of cheesecake batter a different color.
- Remove the crusts from the freezer and add an equal amount of one cheesecake color on top of the Graham cracker crumbs, and place back in the freezer for 30 minutes. Do this which each layer. Smooth the top layer, and place back in the freezer until you're ready to serve.
- Remove the tape and the copper circles from the cheesecakes, leaving the cheesecakes on the parchment lined cookie sheet. Add a swirl of Frosting on top of the cheesecakes and sprinkle with the Easter sprinkles. Place three of the mini eggs on the frosting. Serve and Enjoy!
Last Step:
Please leave a rating and comment letting us know how you liked this recipe! This helps our business to thrive and continue providing free, high-quality recipes for you.Video
Equipment
- 9 inch Spring-form pan
- Frosting Tip for piping
- Pastry bag to pipe frosting
- Sheets of Copper mats (or Pastry rings)
Notes
Nutrition


Leave a Review!
We LOVE hearing from you! Submit your question or comment here.
Your email address will not be published.