
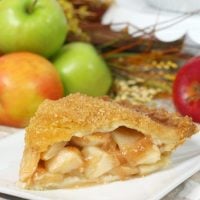
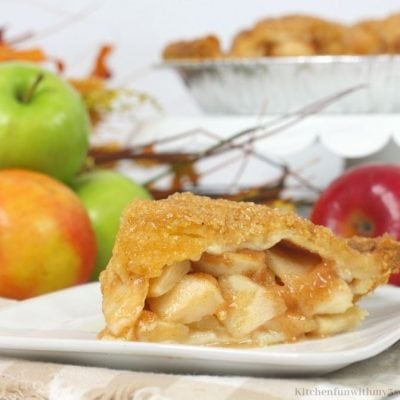
The smoky sweetness of bourbon comes together with tart apples and the classic warmth of cinnamon in this gooey Bourbon Apple Pie. A flaky top and crispy golden-brown edges on the crust help to balance out the smoothness of the filling, bringing both the taste and the texture into perfect balance.
Looking to serve this a la mode? Try dropping a scoop of Homemade Vanilla Ice Cream on top!

Quick & Easy Homemade Apple Pie With Bourbon
The bourbon in this fruity dessert gives it a smokiness that you just can’t get from a store-bought pie. It’s the perfect autumn dessert to make with a batch of fresh-picked apples, and the kick of bourbon and comforting cinnamon flavor will warm you right up on a crisp autumn night. But you don’t have to make it in the fall – as long as you have some apples and bourbon on hand, it’s the perfect time to make this pie!
With a gooey filling and a flaky crust, this pie hits all the right notes with both texture and taste. It’s a great choice to serve in a Thanksgiving spread, or to bring with you to an autumn barbecue celebrating the last warm days of the year. Everyone is sure to be impressed by this bourbon-flavored twist on an American classic. Even the kids can enjoy it, because the alcohol bakes right out!

What You’ll Need
This bourbon apple pie recipe uses tons of fresh and flavorful ingredients. To find the exact amounts for everything, scroll down to the recipe card.
- Apples: Peel them and dice them up.
- Flour: Use all-purpose flour for the best results.
- Ground Cinnamon
- Salt: This is an essential ingredient for the baking process, so don’t leave it out!
- Butter: Always use unsalted – too much salt can also be a problem in baking.
- Granulated Sugar
- Bourbon
- Pie Crust: You can make your own or buy a premade crust from the store.
- Eggs
- Water
- Sparkling Sugar: For topping.
What Kind of Apples Are Best for Pie?
The best apple varieties to use in a pie are firm and flavorful. Granny smith and honey crisp apples hold up really well in the oven, and they’ll give your pie a nice tartness to balance out the sweetness. Avoid soft apples or apples with bruises, since these tend to get mushy when they’re baked.

How to Make Bourbon Apple Pie
The steps to make this pie are super straightforward. I love using store-bought pie crust because it saves so much time.
- Prep Your Materials: Evenly spray a deep 9-inch pan with baking spray and set the oven to 450°F.
- Make the Filling: Combine the apples, sugar, flour, cinnamon, salt and bourbon in a medium mixing bowl. Toss everything until the apples are coated evenly with all the ingredients.
- Assemble the Pie: Undo one pie crust and lay it in the pie pan. Pour your apple mixture into the crust and place butter on top of the apple mix. Take the last pie crust and lay it over the top. Using your fingers or a fork, pinch the edges of the pie to seal it.
- Add the Egg Wash and Sugar Topping: Whisk together the egg and water in a small bowl, then use a brush to coat the top of the pie with the mixture. Take a little of the sparkling sugar and sprinkle it on top.
- Prepare the Pie for the Oven: Cut the top of the pie crust into 4 slits so steam can escape as the pie bakes. Set the pie on a cookie sheet.
- Bake: Bake your pie at 450°F for 15 minutes, then bring the temperature down to 350°F. Continue to bake for an additional 30 to 45 minutes, or until the top of the crust turns light brown.
- Cool and Serve: Take the pan out of the oven and let the pie cool for 15 minutes. Slice it into 8 even pieces, add any toppings and dig in!

Tips for Success
This pie is basically foolproof, but there are a few things to keep in mind when you make it. Follow these helpful tips so it comes out great every time.
- Don’t Forget the Slits: The steam that comes off the apple filling while it’s baking needs some way to get out, or else you run the risk of an exploding pie! Make sure to cut clear vents into the top layer of crust to avoid a mess.
- Cut Your Apples Evenly: When you dice the apples, make sure you cut them into roughly even pieces. If you have some that are a lot bigger than others, you may end up with a combination of mushy and slightly too firm apple pieces in the filling.
- Cover With Tin Foil: If you notice the edges of your pie crust browning too fast, you may want to take it out and try covering the top with a domed layer of tin foil. Make sure you wait until it’s brown to do this, or it could lead to a soggy crust.
Topping Ideas
This bourbon apple pie is full of flavor by itself, but feel free to get creative with toppings. It’s perfect with a big scoop of vanilla ice cream on top, or a nice heaping spoonful of Homemade Whipped Cream. You could also try adding cinnamon to the whipped cream for even bigger flavor. Another option is to skip the second pie crust and instead top it with a classic crumble, which will add a whole new layer of warm, buttery goodness.

How to Store Extras
Like most fruit pies, apple pie does best when it’s kept in the refrigerator. Just seal it up in an airtight container or cover it tightly with plastic wrap. You can store it there for up to 4 days. When you’re ready to eat it again, you can pop each slice in the microwave for 10-15 seconds to warm it back up before you dig in.
Does Apple Pie Freeze Well?
You can freeze apple pie both before and after baking it, but you’ll get the best results if you freeze it unbaked. Either way, it will last up to 6 months frozen – though, if you’re freezing the filling by itself, it can actually last up to 1 year.
For a raw fruit pie, it’s better to bake it from frozen by following the normal baking instructions. You may want to bake it at 450°F for 20 minutes instead of 15 before you turn the temperature down. If the pie you froze has already been cooked, you want to wait for it to thaw and then refresh it in the oven until it’s warmed through and the outside starts to crisp up again.
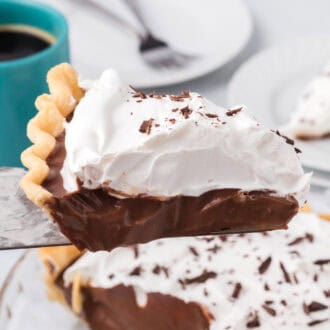
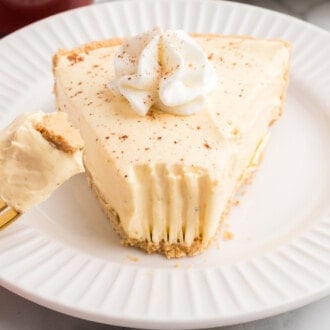
More Festive Fall Dessert Ideas
Bourbon Apple Pie
Ingredients
- 5 cups Apple peeled and chopped
- 3 tbsp sugar
- 3 tbsp flour
- 2 teaspoon ground cinnamon
- ¼ teaspoon kosher salt
- 2 tablespoons unsalted butter cubed
- 3 tablespoons bourbon
- 2 premade pie crust
- 1 large egg
- 1 tablespoon water
- ¼ cup sparkling sugar
Instructions
- Preheat oven to 450°F and spray a deep 9-inch pie dish with baking spray.
- In medium bowl, mix together the apples, sugar, flour, cinnamon, salt, and bourbon.
- Unroll one of the pie crusts and place into the pie pan.
- Pour the apple mixture into the pie shell.
- Place the butter over the apple mixture.
- Place the last pie crust on top of the apple mixture.
- Pinch the edges together using your fingers or a fork.
- Using a small bowl, whisk together the egg and water.
- Using a sauce brush, brush the top of the pie crust with the egg mixture.
- Sprinkle the sparkling sugar on top.
- Cut 4 slits into the top of the crust to make air vents.
- Place pie onto a cookie sheet.
- Bake in the oven for 15 minutes at 450°F and then bring the oven temp down to 350°F. Continue baking 30-45 minutes or until the top turns golden-brown.
- Remove from oven and allow to rest for 15 minutes before serving with desired toppings.
Last Step:
Please leave a rating and comment letting us know how you liked this recipe! This helps our business to thrive and continue providing free, high-quality recipes for you.Equipment
- Oven
Nutrition


Leave a Review!
We LOVE hearing from you! Submit your question or comment here.
Your email address will not be published.