
Halloween is just around the corner, and what better way to celebrate than with this easy Halloween Dessert. Colorful layers of pudding and cheesecake on top of a Oreo crust, this no-bake lush is sure to impress with very little effort!
Halloween Lush Dessert
Halloween Lush is the ultimate indulgence for those who love the combination of rich chocolate, creamy cheesecake, and a burst of citrusy orange flavor. But that’s not all – this dessert is a feast for the eyes too, with its vibrant Halloween colors and playful sprinkles that are sure to bring a smile to your face.
What I love about this Halloween dessert is it is something that breaks from the norm. Normally, anything Halloween has to be pumpkin flavored, and features ghosts, like Marshmallow Ghost Cupcakes, spiders, a mummy, ghouls and goblins, or tombstones. I have done all of those too. But occasionally, I want to make something that kids will like but doesn’t have to be just for kids at the Halloween party. This is a fun Halloween Lasagna that tastes great, everyone loves and is easy to make. Party guests will love it.
What You’ll Need
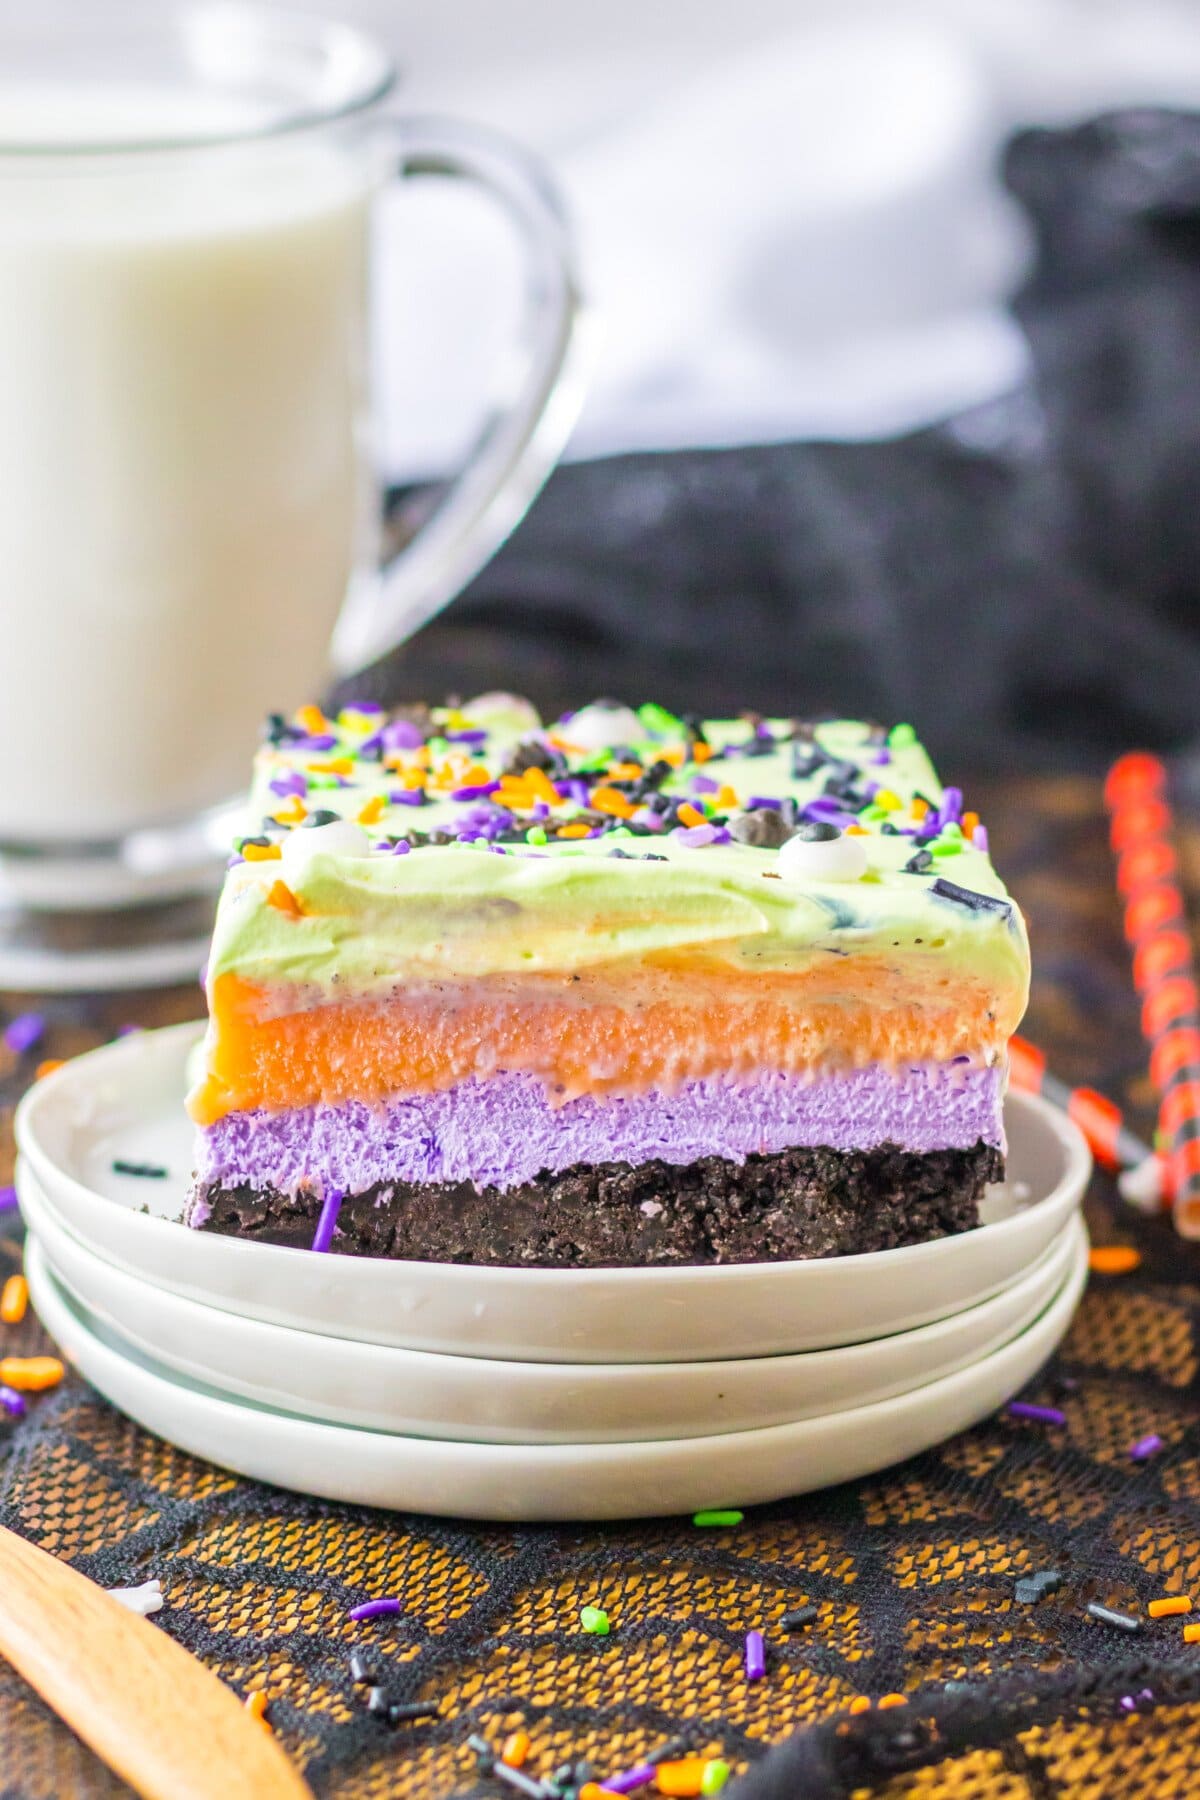
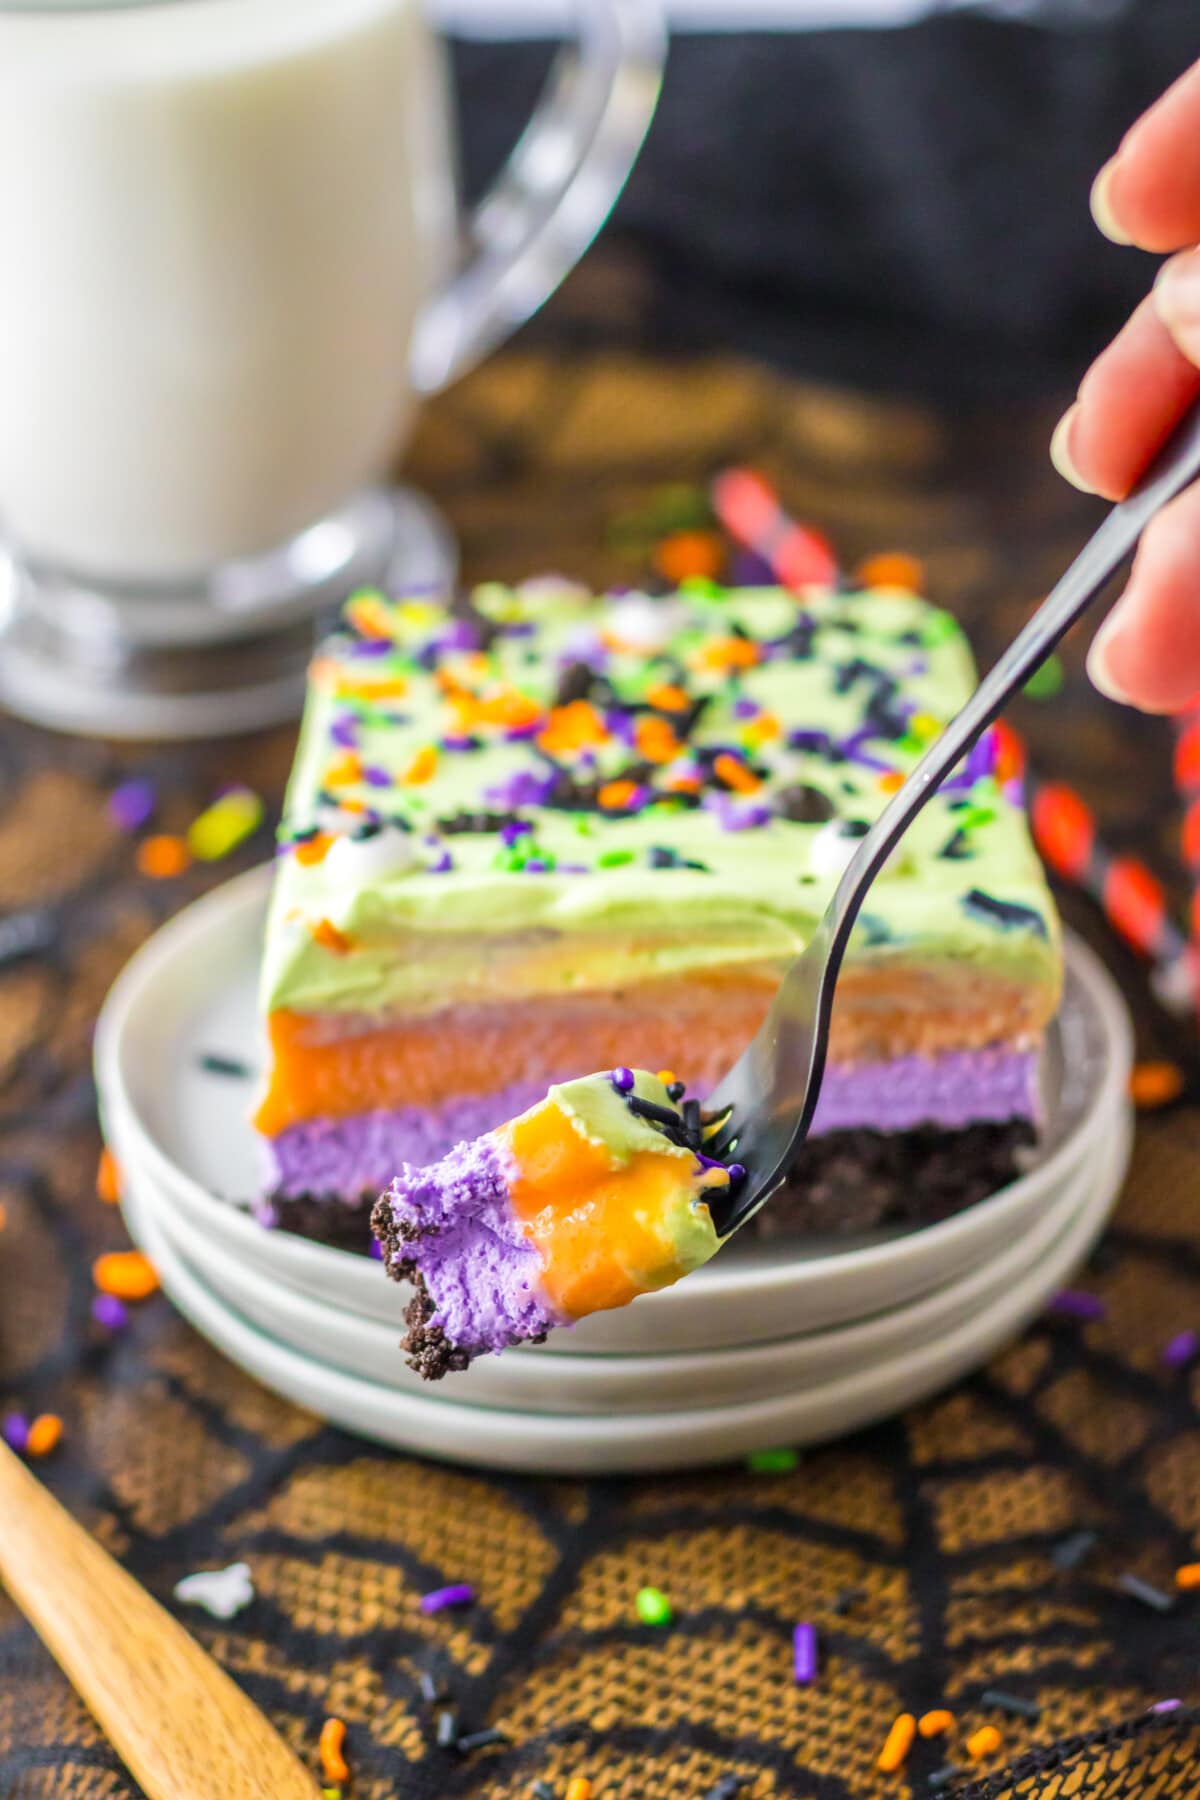
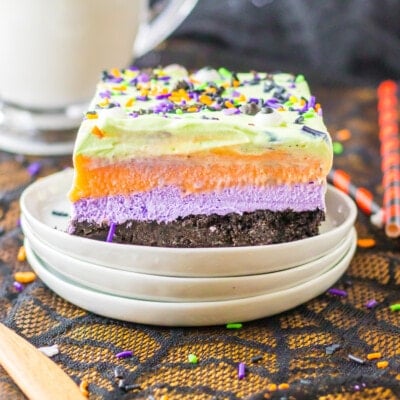
- Base Layer: This layer is made up of chocolate sandwich cookies and melted butter.
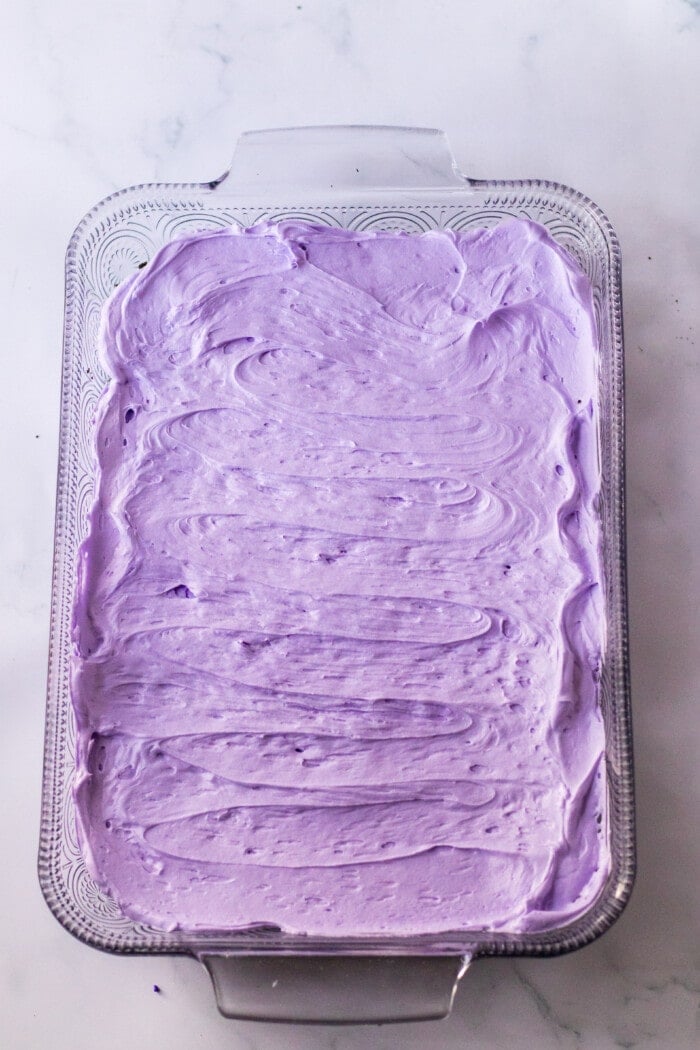
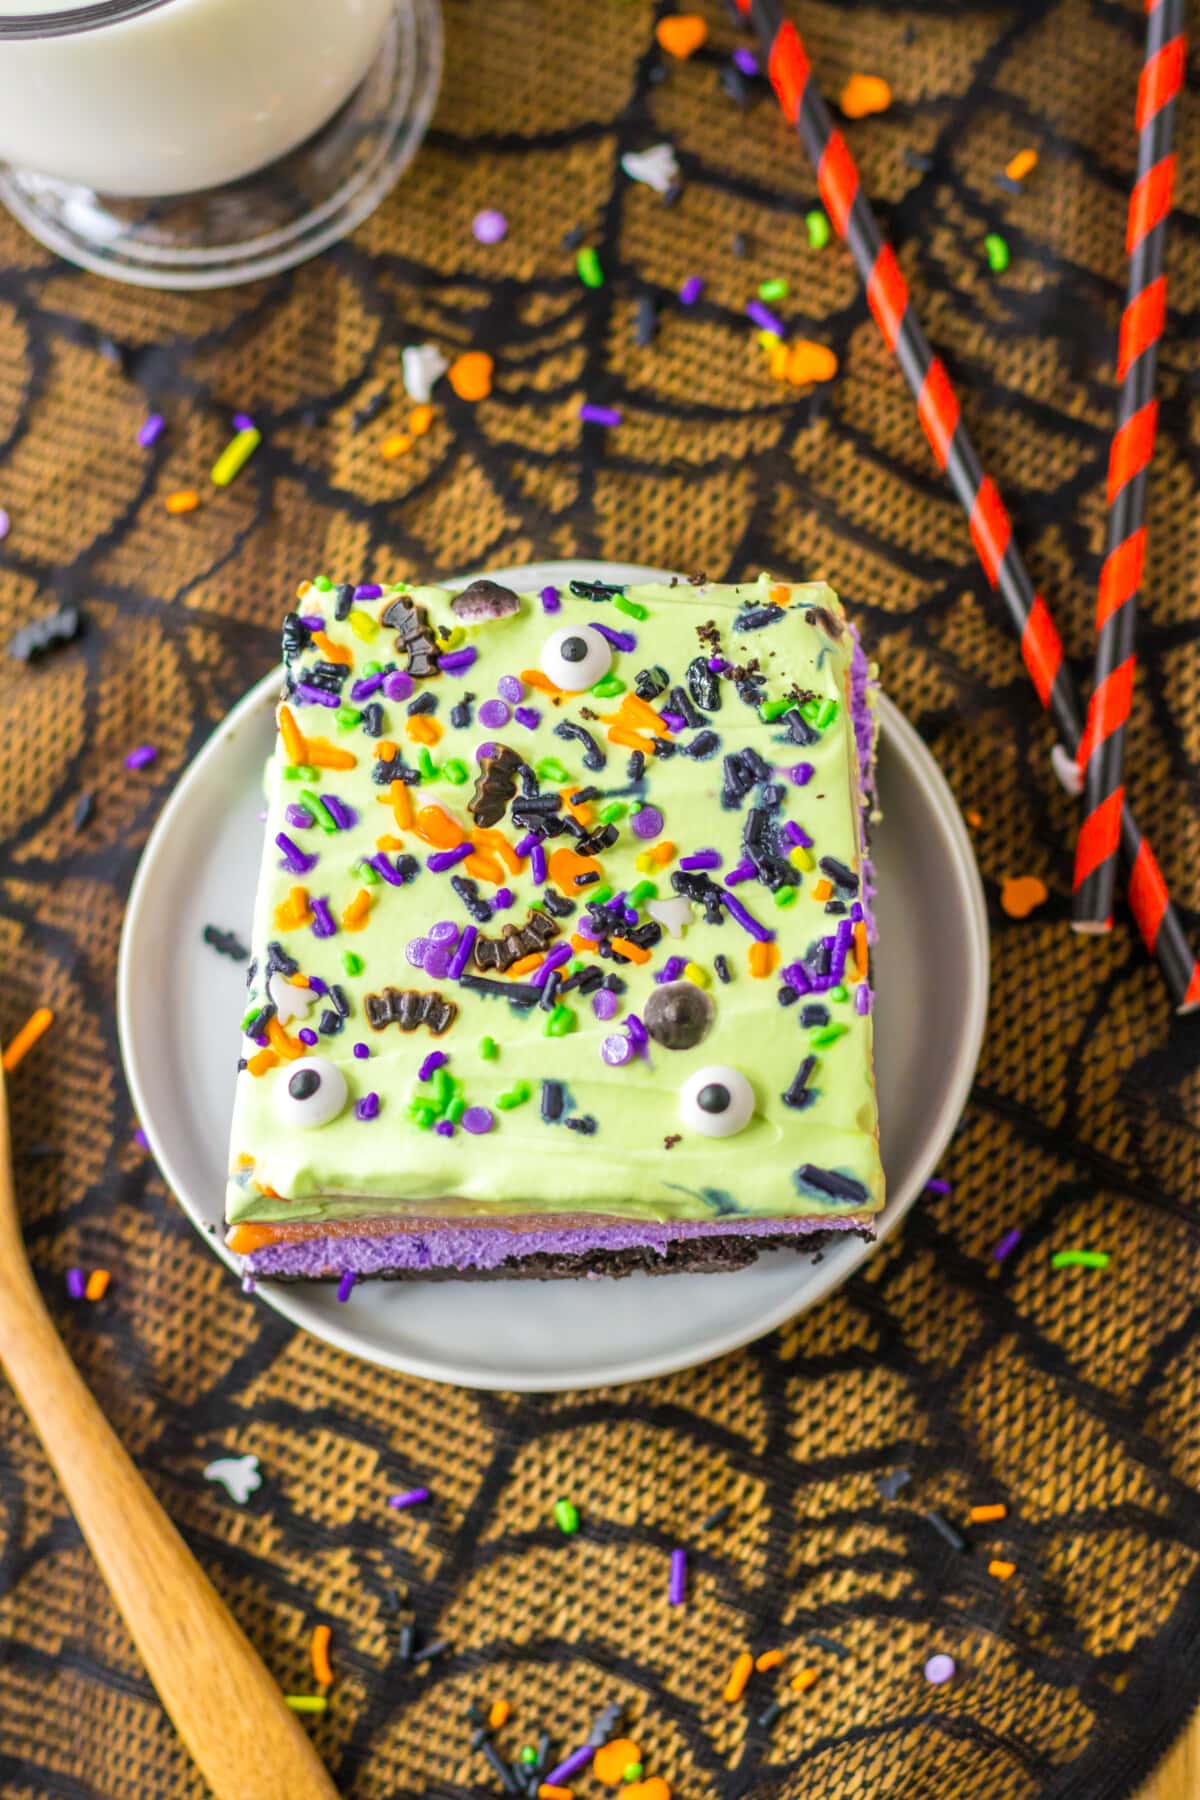
- Cheesecake layer: This layer is made up of cream cheese and powdered sugar. It is colored with purple food coloring.
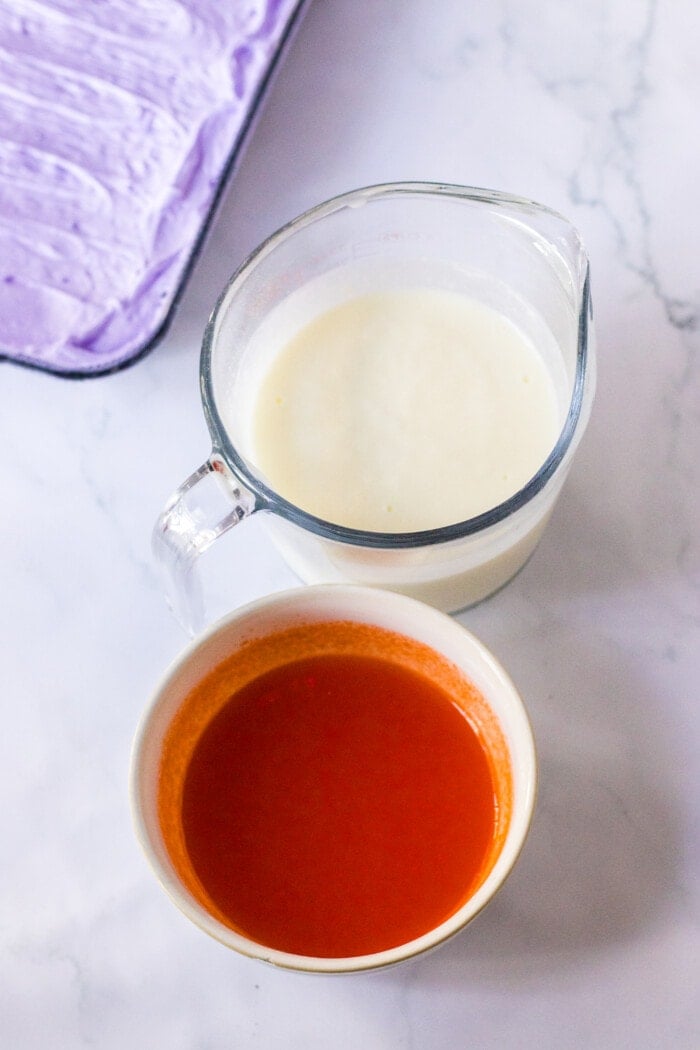
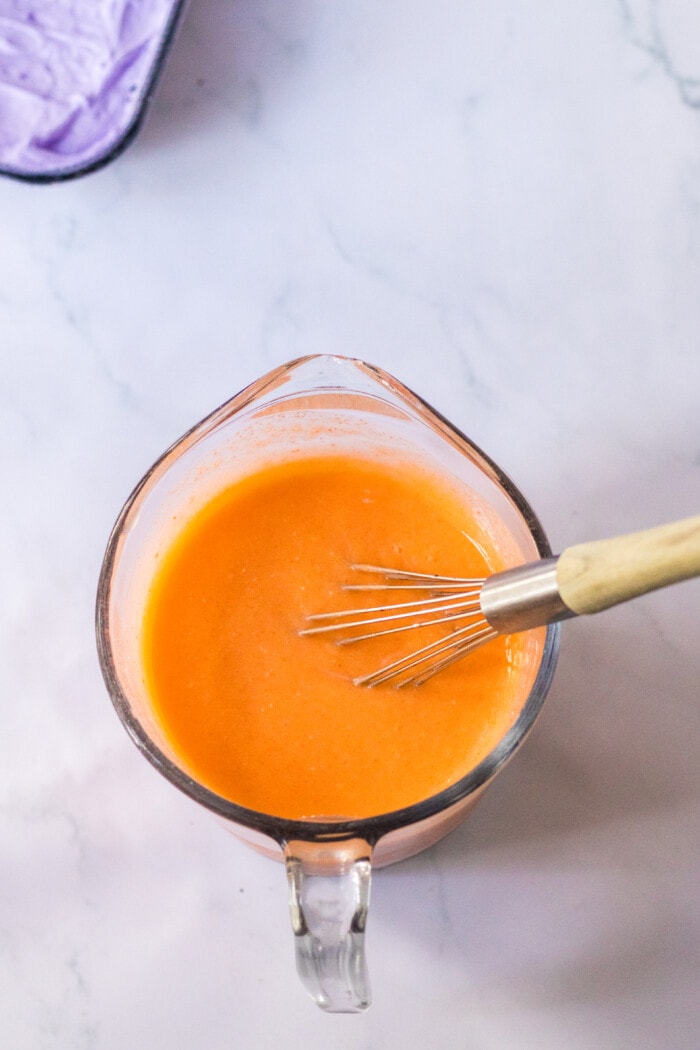
- Orange Layer: This layer is made up of orange gelatin, water, vanilla instant pudding & pie filling mix, and milk.
- Whipped Topping Layer: While this layer is made up of whipped topping, like Cool Whip, it can also be made using Homemade Whipped Cream Recipe. It is colored with green food coloring.
- Halloween sprinkles with candy eyeballs
How to Make Halloween Lush
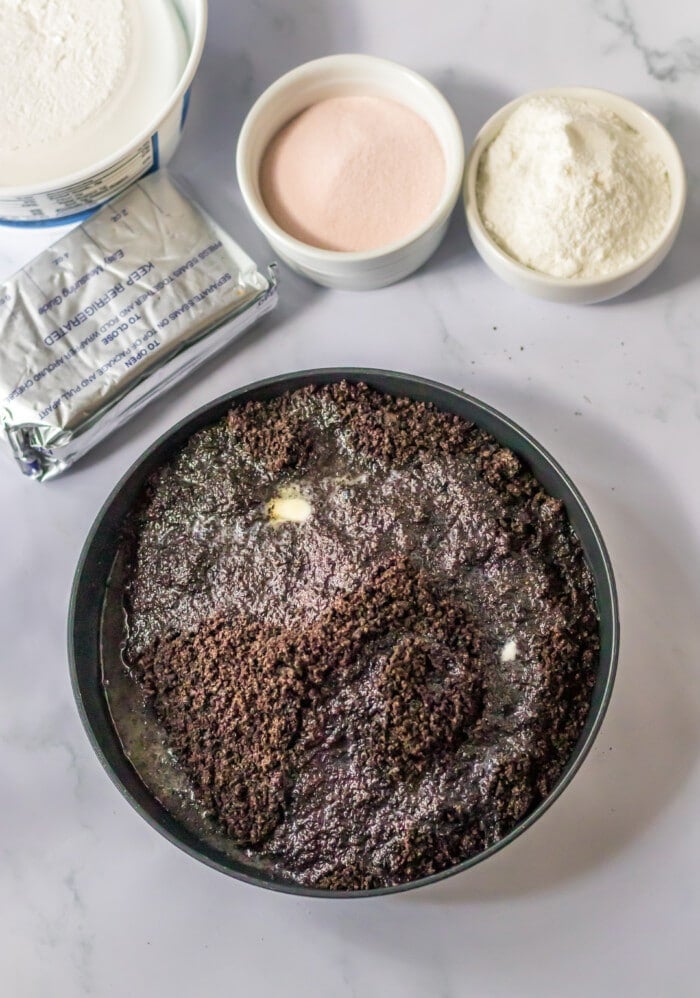
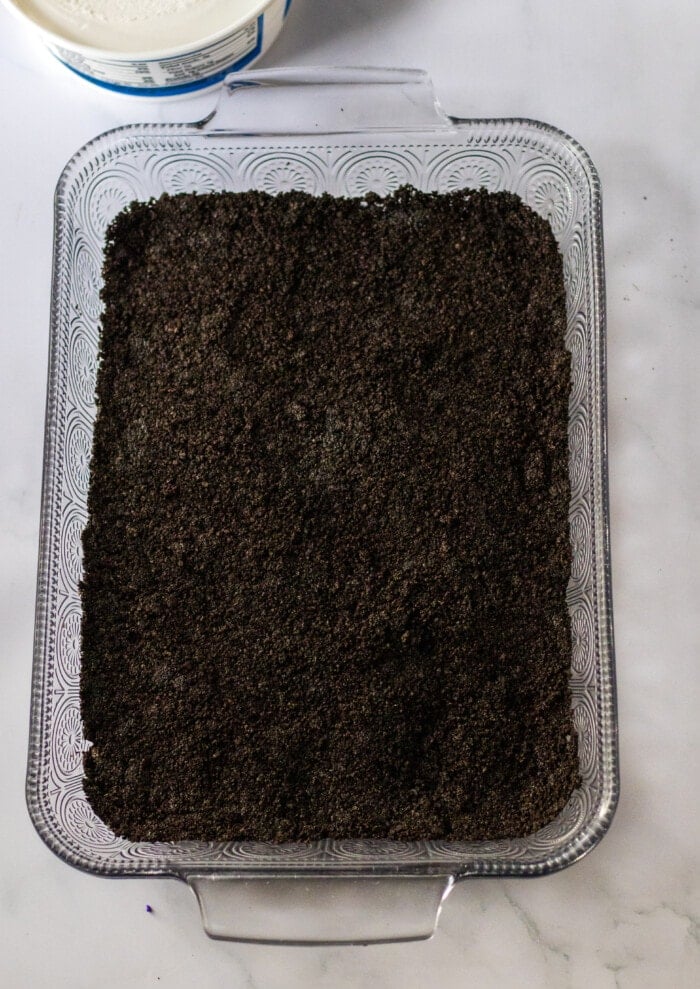
Prepare Your Base: Crush the cookies into crumbs using a food processor and combine with melted butter. Press the cookie crumb mixtures into the bottom of a 9×13 glass baking dish.
Cheesecake Layer: Using a mixer, combine the cream cheese and the powdered sugar together until smooth. Fold in 2 cups of whipped topping. Add a few drops of purple food coloring until you get the color that you want. Spread it over the cookie crust.

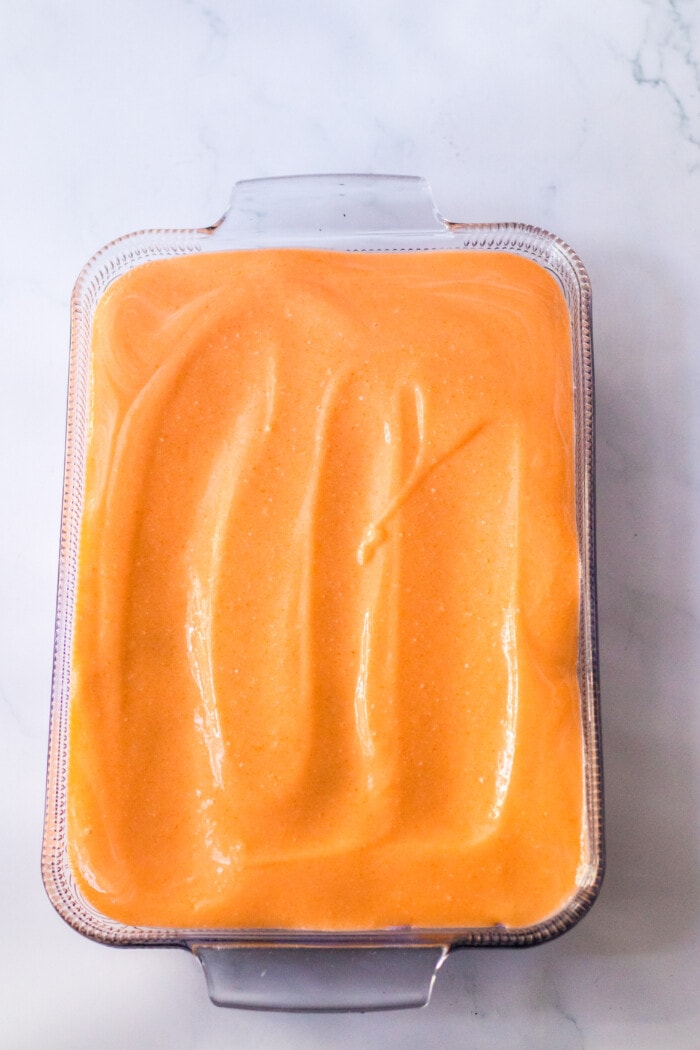
Creamy Orange Layer: To make the orange layer, start by adding boiling water to orange gelatin and whisk until dissolved. In another bowl, combine the pudding mix with milk and whisk until combined. Spread it over the purple layer.
Colorful Whipped Topping: Add a few drops of green to the rest of the whipped topping. Spread a layer of colorful whipped topping over the creamy orange layer. This adds a light and airy texture while bringing a festive pop of color.
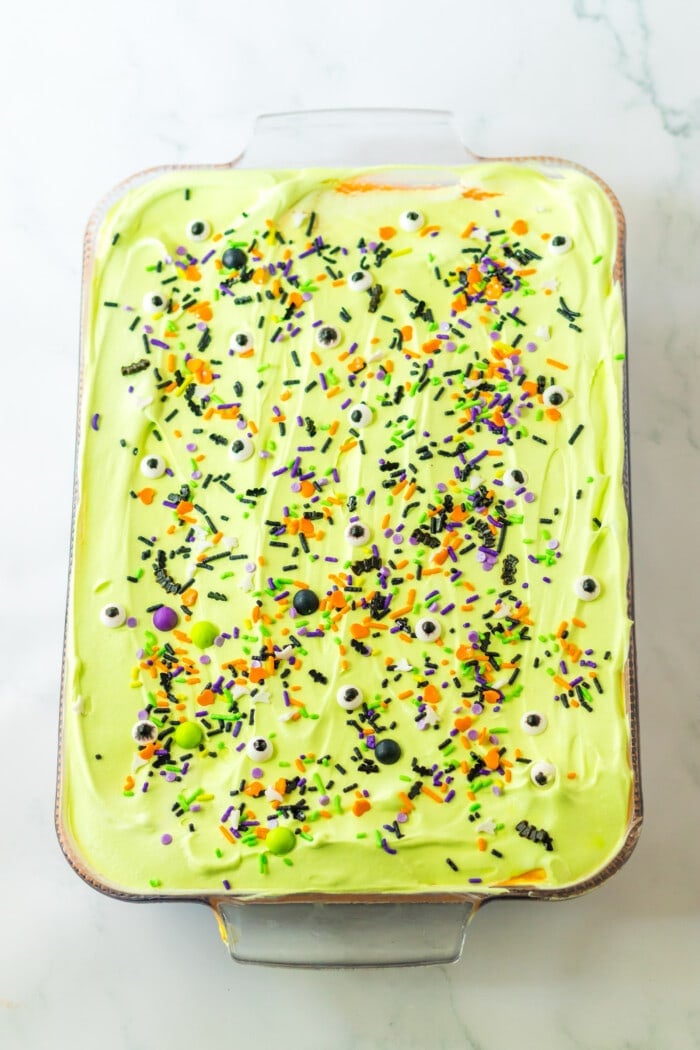
Spooky Sprinkles: Don’t forget the spooky sprinkles! Scatter them on top to give your Halloween Lush a playful and ghoulish appearance. Refrigerate for at least 4 hours.
Tips and Tricks for Making this Halloween Dessert
- Store leftovers in the refrigerator for up to 4 days.
- Crushed Cookies Consistency: When crushing the chocolate cookies for the base, aim for a fine and even consistency. You can use a food processor or place the cookies in a zip-top bag and crush them with a rolling pin for better control.
- Room Temperature Cream Cheese: Ensure your cream cheese is at room temperature before making the cheesecake layer. This makes it easier to mix and results in a smoother texture.
- Chill Between Layers:If you have issues spreading the layers, try to chill your dessert in the refrigerator for at least 30 minutes. This helps the layers set and makes it easier to spread the next one without mixing them together.
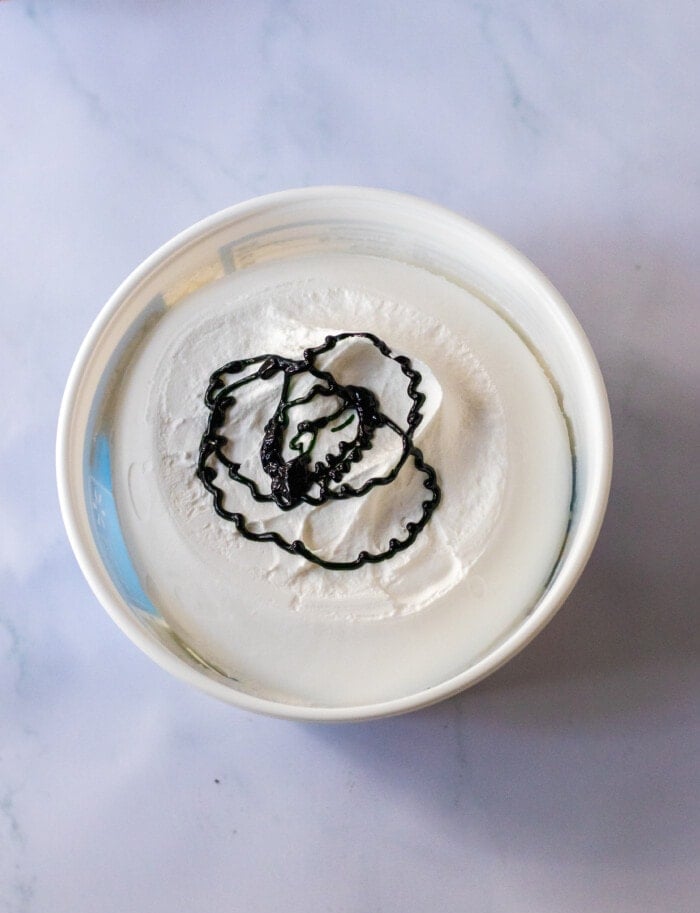
- Decorate Creatively: Have fun decorating your Halloween Lush. Use colorful Halloween-themed sprinkles, gummy worms, or candy eyes to give it a spooky and festive look.
- Serve Chilled: Halloween Lush is best served cold. Allow it to chill in the fridge for a few hours or overnight to let all the flavors meld together.
- Customize Flavors: Get creative with flavors. You can add extracts like vanilla or almond to the cheesecake layer for extra depth.
- Clean Knife for Neat Slices: When cutting your Halloween Lush into slices, dip a sharp knife in hot water and wipe it clean between cuts. This will help you achieve clean and neat slices. Another idea is to freeze it to make slicing a little cleaner but it is not necessary.
- Make Ahead: Halloween Lush can be made a day in advance. This allows the flavors to meld even more, making it even tastier.
- Portion Control: This dessert is rich, so consider serving it in smaller portions. It’s quite satisfying, and smaller servings ensure everyone gets a taste without feeling overwhelmed.
More Halloween Dessert Recipes
- Halloween Bark
- Oreo Layered Halloween Brownies Recipe
- Halloween Cookie Cake
- Candy Corn Sugar Cookies
- Sugar Halloween Cookies
- Caramel Apple Dump Cake
- Pumpkin Pie Rice Krispie Treats
No Bake Halloween Dessert
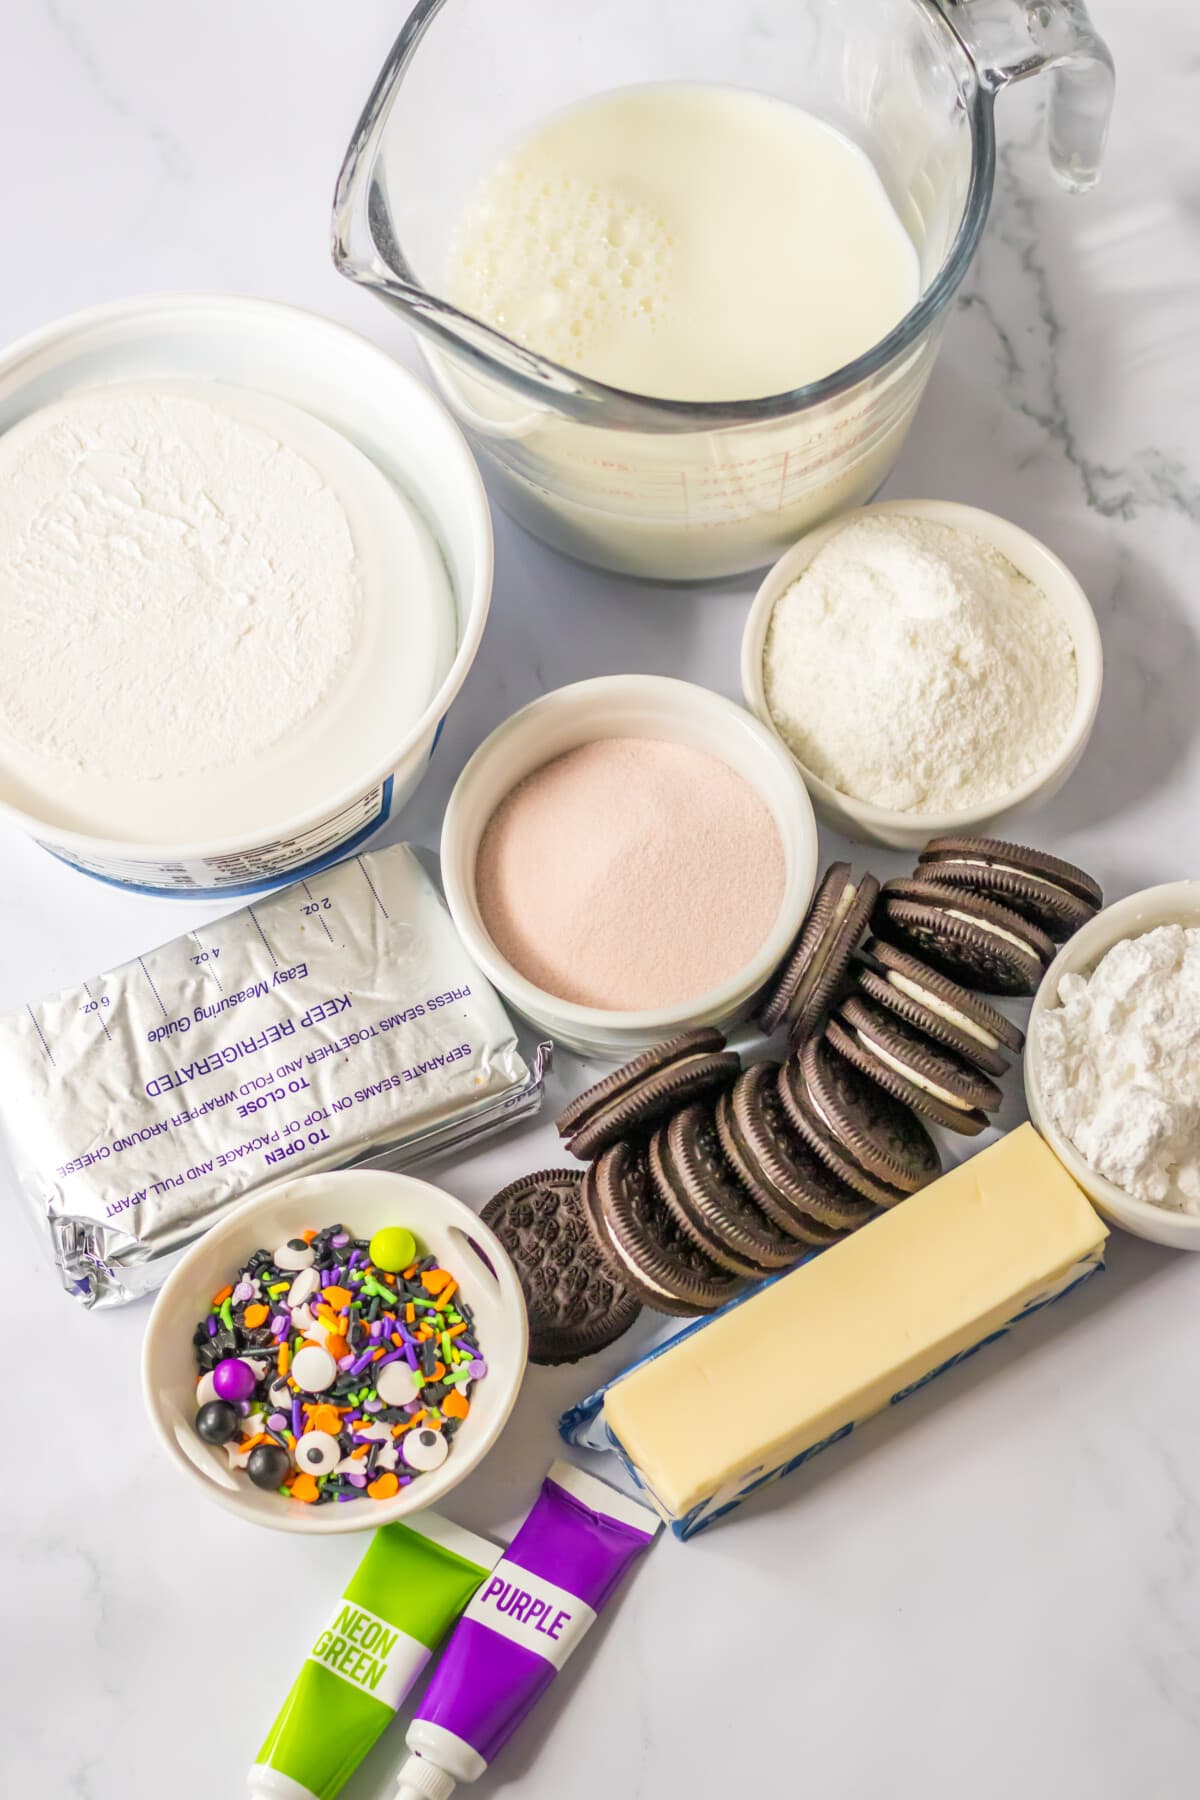
Ingredients
- 36 chocolate sandwich cookies
- 6 tablespoons butter melted
- 2 boxes orange gelatin 3 ounce each
- ⅓ cup boiling water
- 2 boxes vanilla instant pudding & pie filling mix 3.4 ounce each
- 2 ½ cups cold milk
- 8 ounce cream cheese softened
- 1 cup powdered sugar
- 16 ounce whipped topping
- Green and purple food coloring
- Halloween sprinkles
Instructions
- In your food processor crush all the cookies into crumbs.
- Place the cookies into a large bowl and add the melted butter.
- Stir until well blended.
- Press the cookie crumbs into the bottom of a 9×13 glass baking dish.
- Next prepare the fillings.
- In small bowl, place the orange gelatin, and add the boiling water.
- Whisk together until combined and most of the gelatin is dissolved.
- In medium bowl, whisk together the dry pudding mixes and milk until combined.
- Whisk the orange gelatin into the vanilla pudding until completely combined.
- In large bowl using an electric mixer combine the cream cheese and powdered sugar until smooth.
- Fold in 2 cups of the whipped topping.
- Stir in a few drops of the purple food coloring, until you get your desired purple shade.
- Spread over cookie crust.
- Spread the orange jello/pudding layer over the cream cheese layer.
- Mix the rest of the whipped topping with a few drops of the green food coloring until you get the green color you desire.
- Spread the green whipped topping over the gelatin layer.
- Sprinkle with halloween sprinkles
- Refrigerate at least 4 hours.
- Serve!
Last Step:
Please leave a rating and comment letting us know how you liked this recipe! This helps our business to thrive and continue providing free, high-quality recipes for you.Nutrition


Leave a Review!
We LOVE hearing from you! Submit your question or comment here.
Your email address will not be published.