

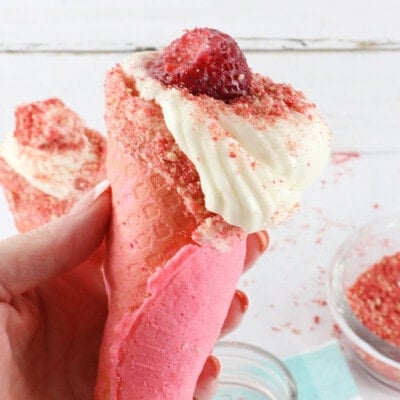
Strawberry Crunch Cheesecake Cones are simply irresistible and the perfect Summer treat. A waffle cone filled to the brim with creamy, no-bake cheesecake and topped with a strawberry crunch.

Strawberry Crunch Cheesecake Cones
These Strawberry Crunch Cheesecake Cones are absolutely amazing! I mean, we’re talking about a dessert that combines the creaminess of cheesecake with the crunch of strawberry flavor crumble all packed into a fun waffle cone. It’s like a party in your mouth! The contrast of textures and flavors is just out of this world. And the best part? They’re so easy to make! The kids will love to help make them. Whether you’re planning a get-together with friends or just want to treat yourself to something special, these cones are the way to go.
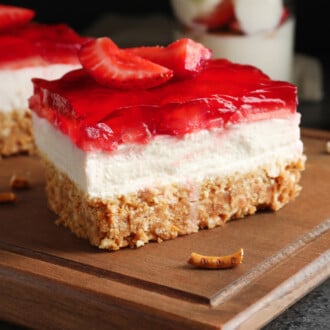
We have other fun Strawberry Crunch Desserts you’ll want to check out including our Strawberry Crunch Cupcakes, Strawberry Crunch Cake and Strawberry Shortcake Cheesecake Cake.
What You’ll Need
- For the Cheesecake: This is a simple no bake cheesecake recipe using cream cheese, heavy cream, and sugar.
- Homemade Waffle Cones: Skip the store bought cones. This recipe uses all purpose flour, salt, sugar, butter and milk. Neon Hot Pink Food Coloring gives a fun look. If you don’t have the time to make homemade, you can certainly purchase pre-made waffle cones.
- Strawberry Crunch: The cookie crunch is made up of Golden Oreos and Strawberry Jello Mix. Held in place with white chocolate.
How to Make Strawberry Crunch Cheesecake Cones
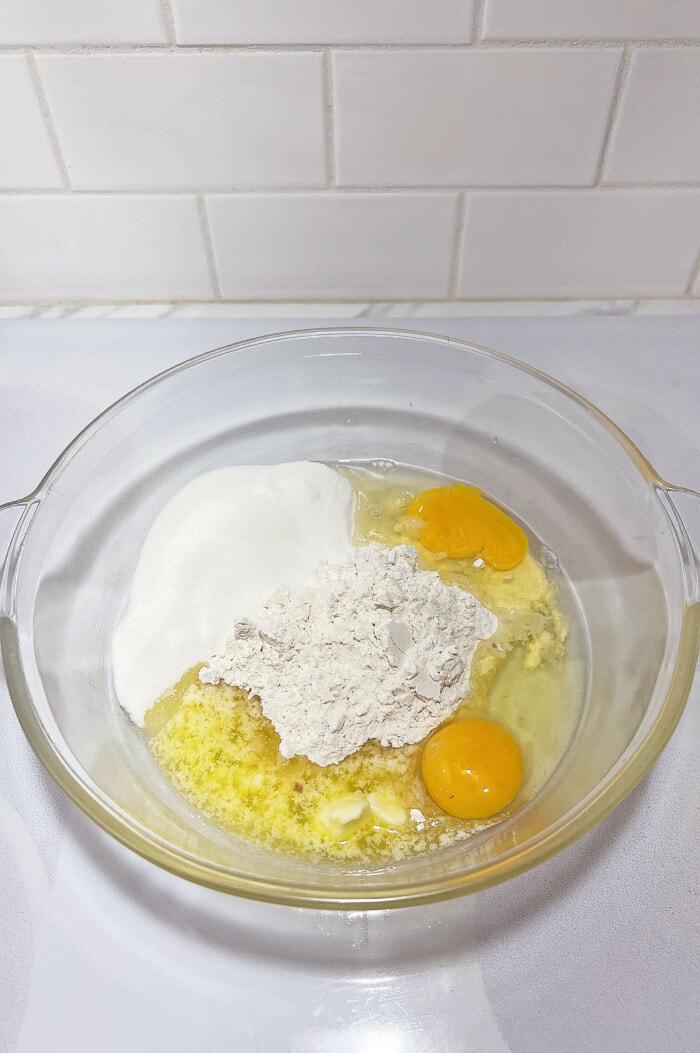
Make the waffle cones: Heat the waffle maker while combining the the dry ingredients in a large bowl. Whisk the eggs and sugar together and then add it to the dry ingredients. Add the food coloring. Scoop the batter into the waffle maker, cook and then form the waffle around the waffle cone stand.
Create the strawberry crunch: Using a food processor blend together the Oreo cookies and strawberry Jello to make crumble Place in a bowl.
Dip the cones: Once the cones have cooled, dip the cones in the melted white chocolate and then dip in the strawberry crunch pieces and lay them on parchment paper.


Make the Cream Cheese Filling: Using a hand mixer, beat the heavy whipping cream, granulated sugar and vanilla in a medium-sized bowl. When the cream is thick and starts to form stiff peaks. Add room temperature cream cheese, confectioner’s sugar and a pinch of salt. Place the tip in the pastry bag and then fill the pastry bag with the no bake cheesecake filling. Fill the cone and sprinkle the top with more Strawberry Crunch.

Tips and Tricks
- If you find yourself without a food processor, no worries! You can still crush the Golden Oreos and strawberry Jello by using a simple zipper bag and a trusty rolling pin. Just add the cookies and strawberries to the bag, seal it tightly, and crush away until you get the desired texture.
- For a precise application of white chocolate on the cones, try using a silicone brush. This handy tool allows you to paint on the chocolate and gives you complete control over how much you want to add. It’s a game-changer!
- While the white chocolate is still wet, roll the cones in the Strawberry Crunch Topping. This step is important because the wet chocolate acts as a glue, helping the topping to stick to the cones effortlessly. Plus, it adds an extra layer of deliciousness!
- Don’t want to make homemade waffle cones? You can use store bought ice cream cones.
- To ensure a smooth and creamy consistency for the no-bake filling, make sure your cream cheese is softened beforehand. If it’s still cold, it might be difficult to achieve that perfect creamy texture. Softened cream cheese is the key!
- Give the no-bake filling some time to set up properly by chilling it for at least 2 hours before adding it to the cones. This chilling time allows the filling to firm up and hold its shape, resulting in a delectable and well-structured treat.
- For an easy and mess-free filling process, fill a piping bag (or a zipper bag) with the chilled cheesecake filling. Then, simply pipe the filling into the cones. This method ensures that every nook and cranny of the cone gets filled with the amazing cheesecake filling. It’s a total win!
- Want an added step of deliciousness? Add some white chocolate drizzle over the cones. Another idea is to add fresh strawberries to the cheesecake filling and maybe some Cool Whip on top.
How to Store
Store the Strawberry Shortcake Ice Cream Bar Cheesecake Cones in the fridge. Place them in an airtight container to keep them fresh.

More Strawberry Desserts
Strawberry Crunch Cheesecake Cones
Ingredients
FILLING:
- 8 ounces Cream Cheese softened
- 2 cups Heavy Cream Whipped
- ½ cup Sugar
- 1 ½ cups Powdered Sugar
- 1 teaspoon Vanilla
- Pinch Salt
WAFFLE CONES:
STRAWBERRY CRUNCH
- 15 Golden Oreos crushed
- 1 package Strawberry Jello
TO DIP:
- ½ cup White Chocolate
Instructions
FOR THE WAFFLE CONES:
- Plug in the Waffle Cone maker, and light will come on when ready. Mix together, Flour, and Salt in a small bowl, and set aside. Whisk together the Eggs, and Sugar for one minute. Add the Flour mixture, Butter and Milk, and stir well to combine. Add the Hot Pink Food Coloring Gel, and stir well to blend. (If the Batter isn’t a bright pink, add a few more drops at a time, and stir, until you get the desired shade of Hot Pink).
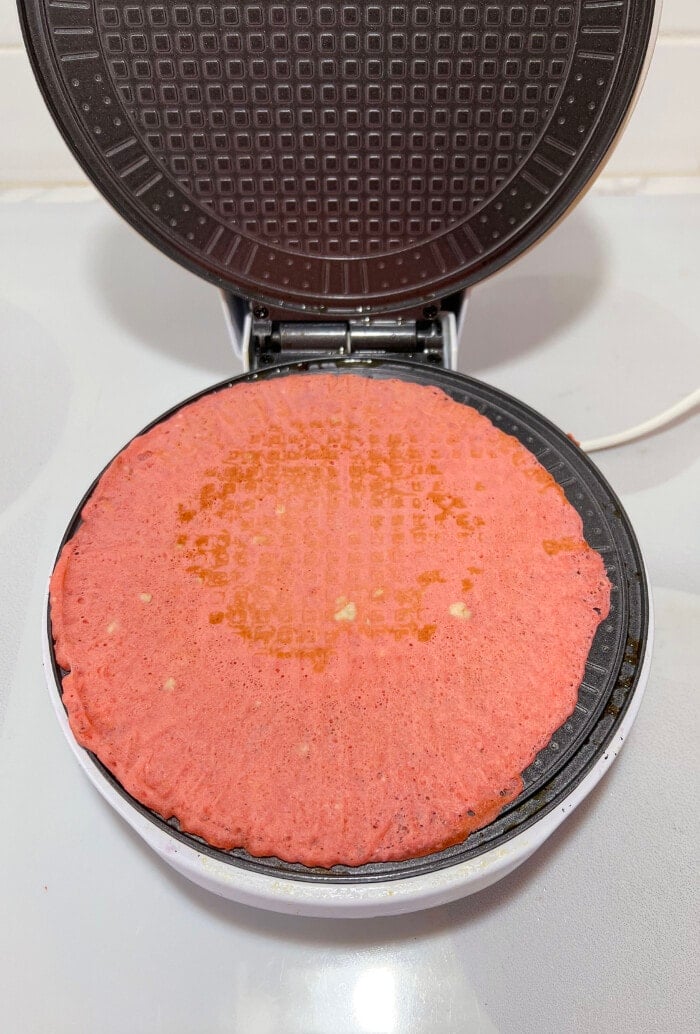
- Scoop 1/4 cup of the batter and pour it on the center of the Waffle Cone maker. Close the Waffle maker, and set a timer for 2 minutes. Use a Silicone Spatula to remove Waffle Cone, and IMMEDIATELY shape the warm Waffle Cone in a Waffle Cone Stand – see link for Cone Stand – You simply overlap the edges of the round cone, and shape it into a Waffle Cone shape, and place it in the stand to cool, and harden.
FOR THE STRAWBERRY CRUNCH:
- In a Food Processor, or Blender, place the Oreo Cookies, and the Strawberry Jello, and pulse the Cookies into crumbs, mixing with the Jello, to make the Strawberry Crunch. Place the Strawberry Crunch in a bowl.
- When Cones are cool, melt the White chocolate in the Microwave, in a small shallow dish. Dip the tops of the Cones in the melted White Chocolate, and then dip in the Strawberry Crunch, and lay on Parchment paper to set/dry. When Crunch is set around the Cones, fill with the filling.
FOR THE FILLING:
- In the Mixing Bowl of a Stand Mixer, add the Heavy Cream, 1/2 cup of Sugar, and Vanilla, and mix with the Whisk attachment until the Cream is thick, and stiff peaks have formed, about 2 to 3 minutes on high speed. When the Cream is whipped, add the Cream Cheese, Powdered Sugar, and pinch of Salt, and mix until blended, and thick.
- Place the Tip in a Pastry Bag, and fill the bag with the Filling. When all the Waffle Cones have been made, cooled and hardened, pipe the filling into the Waffle Cones, filling the cone. Place a Strawberry in the center of the filling, and sprinkle the top with the Strawberry crunch. Serve, and Enjoy!
Last Step:
Please leave a rating and comment letting us know how you liked this recipe! This helps our business to thrive and continue providing free, high-quality recipes for you.Equipment
- Food Processor or Blender
Nutrition


Leave a Review!
We LOVE hearing from you! Submit your question or comment here.
Your email address will not be published.