

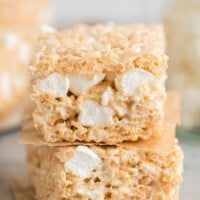
Made with just 4 ingredients, these Homemade Rice Krispie Treats have all the elements of the classic treat, from the chewy, gooey texture to the marshmallows hidden throughout. Just 20 minutes of prep!

Easy Homemade Rice Krispie Treats
It’s no secret that we love Rice Krispie treats in this house. In fact, I’ve shared all sorts of Rice Krispie treat recipes before, from Oreo Rice Krispie Treats to Salted Caramel Rice Krispie Treats and even Valentine Rice Krispie Treats.
But I realized…I’ve never shared the original recipe!
Today’s recipe is the one that started it all – classic homemade Rice Krispie treats. No crazy colors, shapes, or flavors here, just the signature gooey, sticky marshmallow treat with even more marshmallows throughout.
All you need is 4 ingredients and 20 minutes, making this the perfect anytime snack (though it’s definitely a hit if packed for school lunch).
Watch The Recipe Video:
Why You’ll Love This Recipe
Once you make these at home, you’ll never grab a box at the store again!
- Quick to prepare. You’ll only need about 20 minutes to prepare this recipe! Easy, peasy!
- Only 4 ingredients. Yes, really. All you need is butter, Rice Krispie cereal, marshmallows, and vanilla.
- Kid-approved. Perhaps the most important item on the list…these Rice Krispie squares are 100% kid-approved! (Even though the adults secretly love them too!)

What You’ll Need
One reason these Rice Krispie squares are a wonderful treat to make? You need just 4 ingredients! See the recipe card below for measurements.
- Butter – Salted butter is ideal for this recipe, for the added flavor. If you only have unsalted butter, add in 1/2 tsp or sea salt.
- Mini marshmallows – These are melted into the cereal for the sticky texture while others are reserved to be folded in, so you have whole marshmallows in each Rice Krispie square as well.
- Vanilla extract – Adds flavor to the rice krispie treats.
- Rice Krispies cereal – I used the name brand but a store brand version works just fine.

How to Make Rice Krispie Treats
Making homemade Rice Krispie squares is quick and easy, with just a few steps.


- Prepare the pan. Line your pan with foil then spray it with non-stick cooking spray.
- Melt the marshmallows. Melt the butter over medium-low heat, then add 6 cups of the mini marshmallows. Stir constantly until fully melted.


- Add the cereal. Remove the melted marshmallows from heat then stir in the cereal. Once the cereal is coated in the marshmallow mixture, stir in the remaining mini marshmallows.
- Transfer to the pan. Press the mixture evenly into the prepared pan.
- Cool then enjoy. Allow to cool completely at room temperature then cut into squares. Enjoy!

Recipe Tips & Variations
If you’re making homemade Rice Krispie treats for the first time, these tips may be helpful!
- Be careful not the burn the marshmallows. It’s important to stir the marshmallow mixture constantly. If you give it a chance to stick to the pan, it will likely burn.
- How do I keep the mixture from sticking the spoon? This mixture is always going to be a bit sticky but I’ve found using a non-stick spatula is the best option. Otherwise, spraying a wooden spoon with cooking spray is helpful.
- Add some color. Feel free to add a few drops of your favorite food coloring to give your Rice Krispies a burst of color, as I did in my 4th of July Rice Krispie treats. You could also fold in rainbow mini marshmallows, instead of plain white ones.
- Add a topping. Another fun twist is to add some sprinkles or perhaps a chocolate drizzle over the top.
- Cool before slicing. Make sure to allow plenty of time for the Rice Krispie treats to set, before you slice into them.

How Long Do Homemade Rice Krispie Squares Last?
- Countertop. Store in an airtight container on the counter, your homemade Rice Krispies treats will last for about 3 days.
- Fridge. They can also be stored in the fridge for an extra few days, just allow them to come to room temperature before trying to bite into them!
More Easy Rice Krispie Recipes:
- Peanut Butter Balls with Rice Krispies
- Minion Rice Krispie Treats
- Rice Krispie Turkey Legs
- Christmas Rice Krispie Cheesecake

Rice Krispies
Ingredients
- 6 tablespoons salted butter
- 16 ounces bag mini marshmallows divided
- 1 teaspoon pure vanilla extract
- 6 cups rice krispies cereal
Instructions
- Line a 9×9‐inch pan with aluminum foil. Spray foil with non‐stick spray. Set aside.
- In a large pot, over medium‐low heat, melt the butter. Once butter is melted add 6 cups mini marshmallows stirring constantly until marshmallows are fully melted.
- Remove from heat and stir in cereal. Stir until just barely coated in marshmallow mixture. Now stir in the remaining 2 cups of mini marshmallows.
- Pour mixture into pan and press evenly into the pan.
- Allow to cool completely before cutting into squares. Serve and enjoy!
Last Step:
Please leave a rating and comment letting us know how you liked this recipe! This helps our business to thrive and continue providing free, high-quality recipes for you.Nutrition


Leave a Review!
We LOVE hearing from you! Submit your question or comment here.
Your email address will not be published.
2 comments on “Rice Krispie Treats”
It was awesome!
Thanks Izel!