

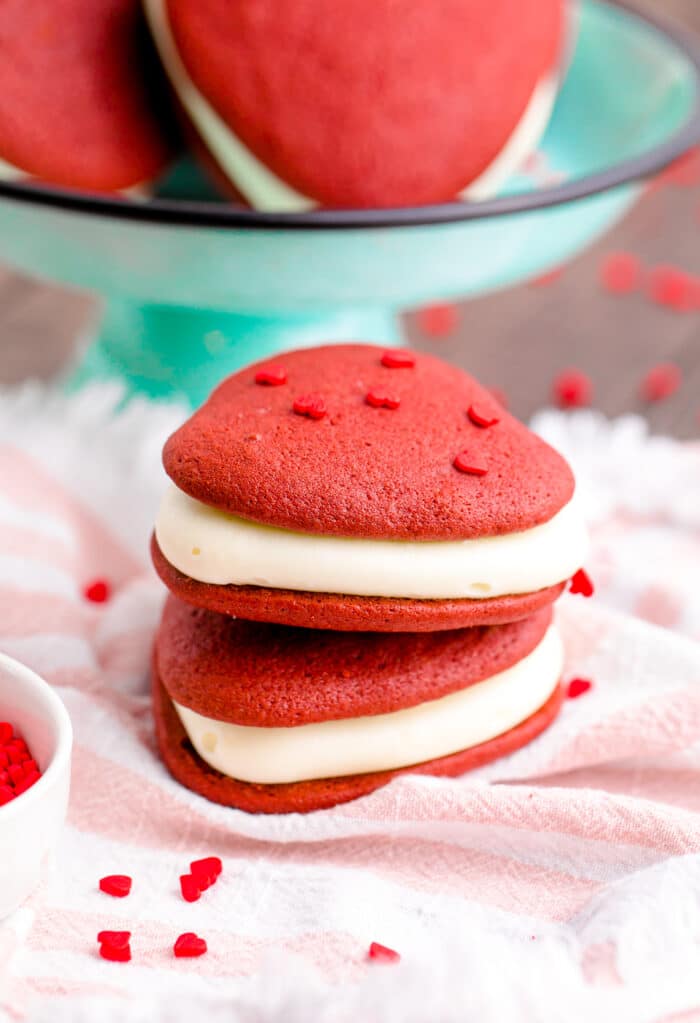
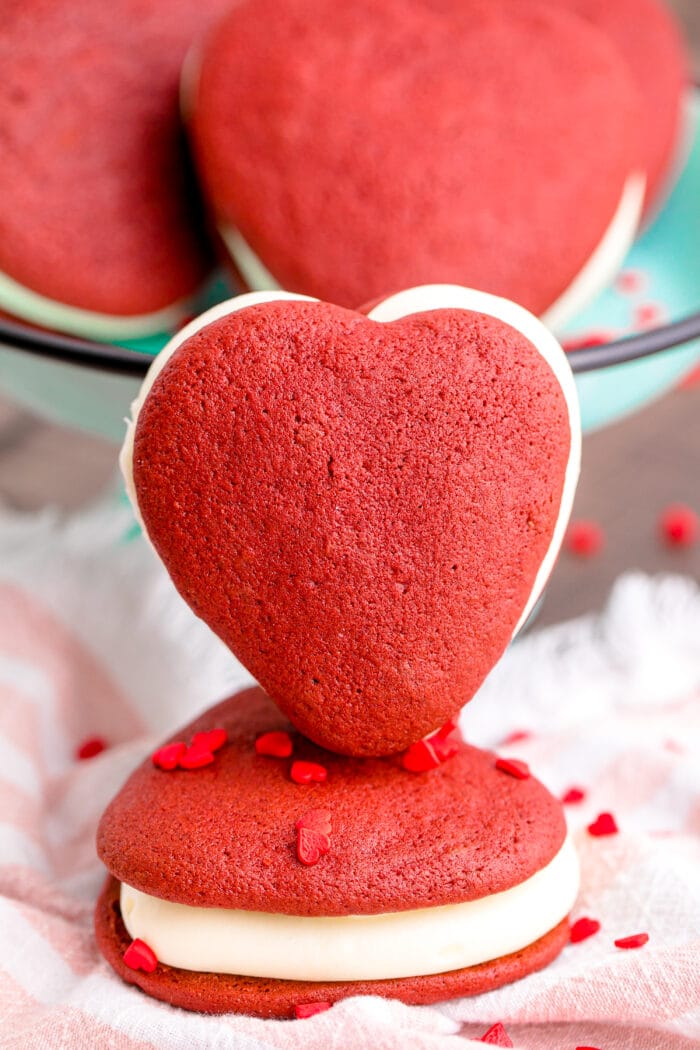
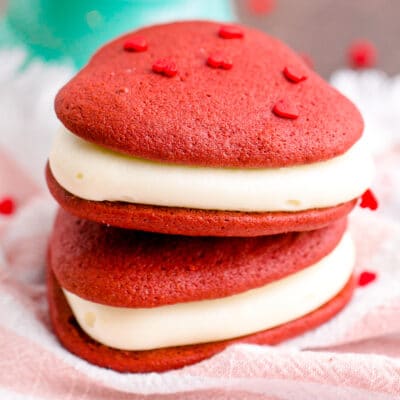
We’ve taken the classic red velvet cake and turned it into a Whoopie Pie! These Red Velvet Whoopie Pies are soft, fluffy, and full of rich chocolate flavor. With their bright red color and delicious taste, they’re perfect for any occasion!

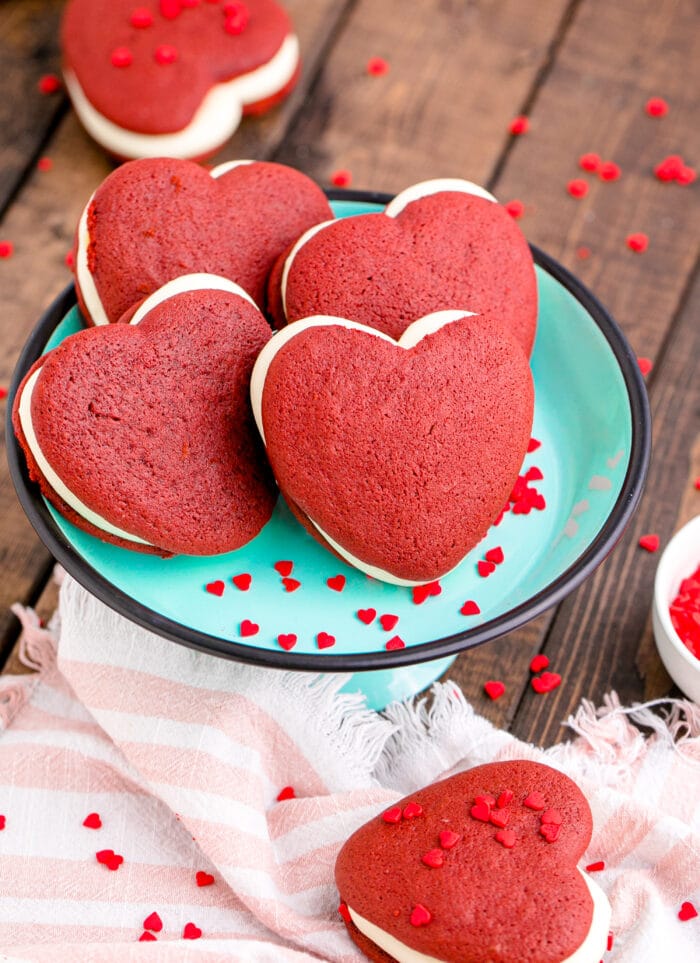
Valentine’s Day Red Velvet Whoopie Pies
Whoopie pies are the best! They’re soft, sweet, and delicious. These Red Velvet whoopie pies will make you feel like a kid again. You can have them for breakfast or dessert, but either way they’ll be gone in no time flat. They’re perfect for any occasion! Our whoopie pies are made with real buttercream filling that is sure to satisfy your sweet tooth. These mouth-watering treats will make your taste buds go wild as soon as they hit your tongue. Once you try them, you won’t want anything else ever again!
What You Need
- Flour
- Unsweetened cocoa powder– You want to use a good Dutch chocolate when making red velvet dessert
- Baking soda
- Salt- Salt helps to bring out the flavor in desserts. While many people think that it seems weird to add salt to desserts, this is an ingredient you don’t want to miss.
- Salted butter– If you have unsalted butter, you will want to add 1/4 teaspoon more salt to the recipe.
- White and Brown Sugar– Using a combination of sugars adds sweetness as well as richness.
- Eggs
- Buttermilk- Don’t have buttermilk on hand? You can make your own by adding vinegar to milk. Add a tablespoon of vinegar to a measuring cup. Then fill the rest of the 1 cup with milk. Let the milk sour slightly and this gives the same taste, texture and benefits of buttermilk.
- White vinegar
- Vanilla
- Red gel food coloring – You should always use gel food coloring for a brighter color.
- Homemade Cream Cheese Frosting Recipe
How to Make Red Velvet Whoopie Pies
Make a Stencil. Start by adding hearts to the parchment paper. This works as your stencil on where to place the whoopie pie hearts.
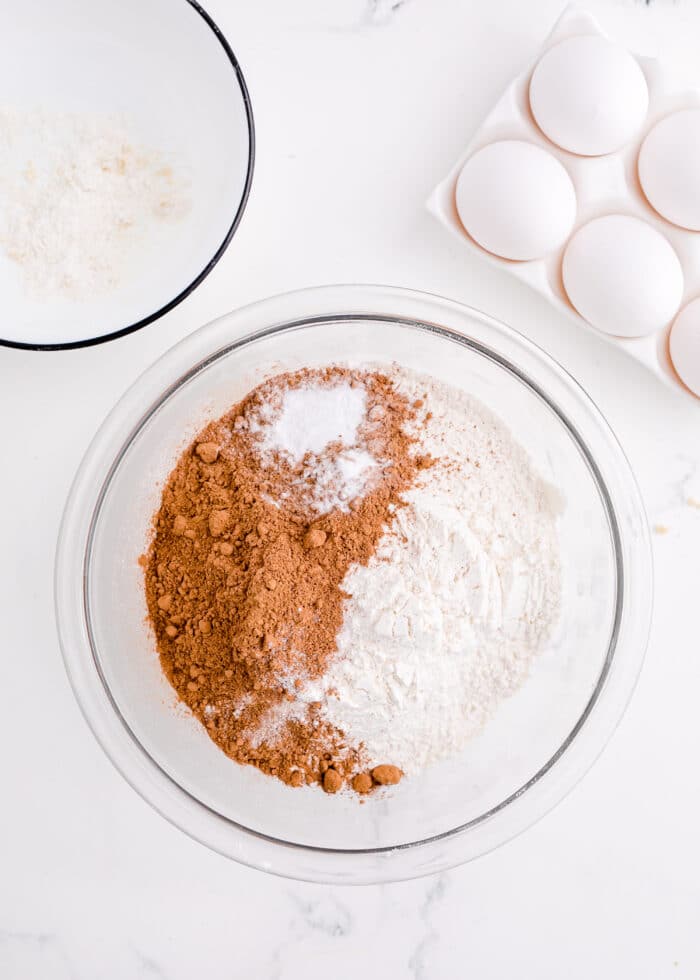
Make the Batter. Combine the dry ingredients together. Beat together the wet ingredients and then combine the 2 together to make the cake batter.
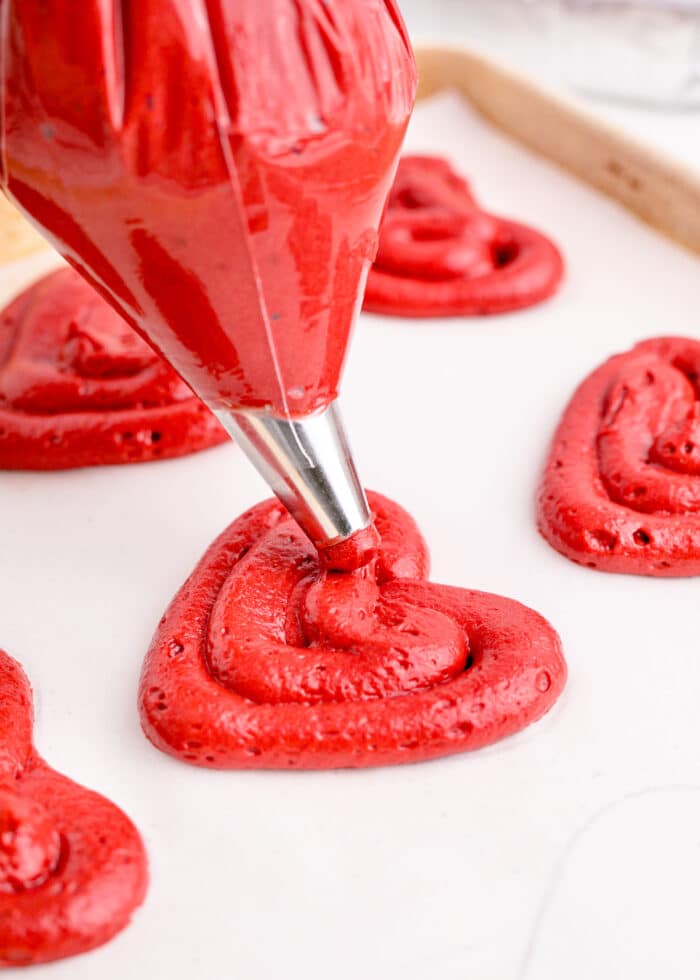
Pipe the Hearts. Add the batter into a piping bag and pie it over the hearts on the parchment paper. Bake the cookies.
Make the Cream Cheese Frosting. Follow the recipe and make a batch of my cream cheese frosting or use store bought.
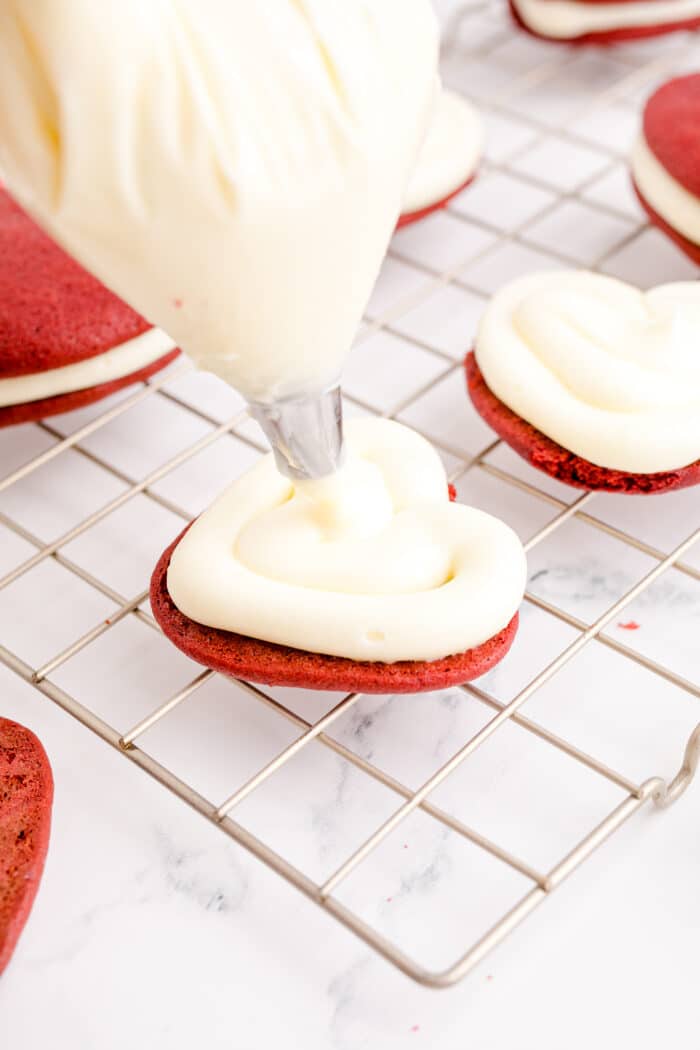
Add the filling. Add about 2 tablespoons of frosting to the cookies and then place a cookie on top. Be sure not to press too hard or else the filing will press out.
How to Store
Keep the Valentine’s Day Red Velvet Whoopie Pies in the refrigerator, in an airtight container for up to a week. The whoopie pies can also be frozen for up 3 months. It is best to wrap them individually when freezing them.
Recipe FAQs
Need to save time? You can also use a red velvet cake mix or use store bought cream cheese frosting.
If you don’t have both white and brown sugar, you can use just one. Just add the amounts together and use all white sugar or brown sugar.
Don’t have gel food coloring? You can use liquid food coloring. The gel coloring gives a more intense color.
If you prefer buttercream frosting instead of cream cheese frosting, you can swap it. Typically red velvet is served with cream cheese filling but both taste great.
What Gives Red Velvet the Red Color
Originally, red velvet got its red color from the cocoa powder. The cocoa powder has antioxidants that are sensitive to the acid in the buttermilk and vinegar. It would cause a dark red color. It never gave the bright red color that is associated with with red velvet now. These days, people add food coloring to the batter to give that bright red color. If you want a more traditional look, you can add 2 tablespoons of red food coloring and that will give a hint of red color to the red velvet whoopie pies.
Can I Make These Red Velvet Whoopie Pies Without Food Coloring
Absolutely. The red food coloring only gives the dessert a red color. It adds nothing to the flavor or the texture of the whoopie pie. That means, if you are trying to avoid food dyes, you can easily skip the coloring.
There are ways to naturally color the red velvet cake red. If you want some natural ways to color the red velvet cake without the red food coloring, you can use
- Pomegranate juice
- Beet juice or beet powder
- Steep dried hibiscus flowers in hot water and then strain the water.
- Cranberries can be boiled with just enough water to cover them. Once the water is dyed, strain the cranberries out.
More Whoopie Pie Recipes
- Peppermint Whoopie Pies
- Apple Cider Whoopie Pies
- Pumpkin Gingerbread Whoopie Pies
- Pineapple Whoopie Pies with Pineapple Cheesecake Filling
- Pumpkin Whoopie Pies – Filled with Cream Cheese Frosting
Red Velvet Whoopie Pie
Ingredients
Whoopie Pies:
- 2 ½ cups flour
- ¼ cup unsweetened cocoa powder
- 1 teaspoon baking soda
- ½ teaspoon salt
- ½ cup salted butter softened
- ⅔ cup white sugar
- ⅔ cup brown sugar
- 2 eggs
- 2 cups buttermilk
- 1 teaspoon white vinegar
- 2 teaspoons vanilla
- 4 Tablespoons red gel food coloring or more depending how red you want your pies to be
Filling:
Instructions
- Preheat the oven to 350 degrees. Line 2 baking sheets with parchment paper.
- Stencil heart shapes all over the parchment paper (leaving about an inch of space between each). I find it easiest to trace a small heart-shaped cookie cutter, but you may make a template for yourself. We want all of the hearts to be the same size. Then flip the parchment paper over so that you can still see the hearts but will not be placing batter directly on the pencil markings.
- Whisk together the flour, cocoa, baking soda, and salt in a medium mixing bowl.
- In a separate, large bowl, use a stand mixer or hand held electric mixer to cream the butter. Beat it on high power until it is creamy. Then beat in the white sugar and brown sugar. Beat this for at least 3 minutes on medium high speed until it is fluffy. Then beat in the eggs until smooth. Next, add the buttermilk and mix only as needed.
- Now, add the dry ingredients (the flour mixture) to the wet ingredients (the buttermilk, egg mixture).
- Mix this together on low speed until just mixed. Then add the vinegar and vanilla, again mixing until just mixed. You do not want to over mix the batter. The batter will be like cake batter and should pipe and spread easily.
- Place the batter into a piping bag with a Wilton 1A round tip. If you don’t have one, you could cut the corner out of a large zip-lock bag and this will work as well.
- Pipe the batter into heart shapes leaving about two inches of space between them. The cookies will spread while baking. I find it easiest to pipe an outline of the heart and then fill it in then smooth out the batter a bit with a spatula.
- Bake the cookies for 10-12 minutes until completely set up. Allow them to cool slightly on the pan, then move them to a wire rack to cool completely.
- While the cookies are cooling, make the filling.
- Beat the cream cheese and softened butter together until light and fluffy. This will take about 2 minutes on high speed with an electric mixer. Then add the powdered sugar 1 cup at a time and beat for another minute or two after each addition. It should be creamy.
- Allow the cookies to cool completely before filling them. Match up pairs of cookies that are similar in shape and size.
- Spread (or pipe with a Wilton 1A tip) about 2 Tablespoons of filling onto the flat side of one cookie and gently top it with a matching cookie. (Don’t squeeze too hard or the filling will squish out.)
- These must be kept in the fridge because of the cream cheese filling.
Last Step:
Please leave a rating and comment letting us know how you liked this recipe! This helps our business to thrive and continue providing free, high-quality recipes for you.Nutrition


Leave a Review!
We LOVE hearing from you! Submit your question or comment here.
Your email address will not be published.